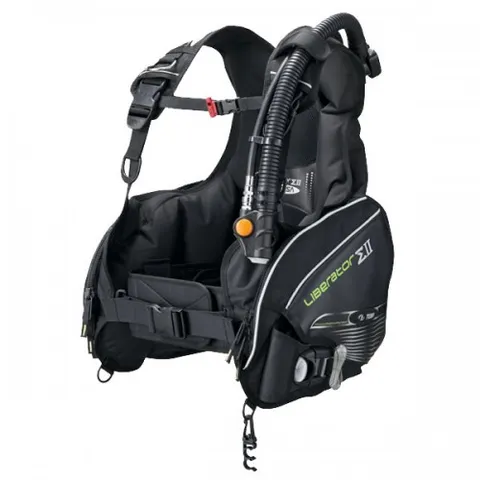


TUSA has long been one of the most popular BCD brands among Taiwanese divers, mainly because its designs are tailored to Asian body proportions and include thoughtful women-specific models. The build quality is durable, so many BCDs in active use have already logged a great many dives. Knowing how to properly maintain these BCDs extends their service life and prevents malfunctions.
Regular thorough rinsing: After each dive, inflate the BCD slightly by mouth, then hold down the dump button and pour fresh water into the bladder through the exhaust port. Shake it to rinse, repeat twice to remove any residual seawater, then submerge the inflate/deflate valve in fresh water and press each button. Soak and rinse the exterior of the BCD in fresh water as well, then leave it to dry in the shade — never in direct sunlight. The intense UV rays in sunlight cause plastics to age and deteriorate.
The bladder itself is not harmed by seawater, but residual seawater will corrode the metal components in the valves. Salt crystals can also cause pneumatic lines or moving parts to seize up and stop functioning.
The worst scenario is finishing the dive season and leaving the BCD stored away for half a year or more, only to find it completely seized and broken when you take it out again. It is therefore best to do a thorough cleaning before long-term storage.
Annual Equipment Maintenance Checklist:
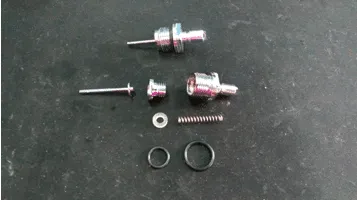
- Inflate/deflate valve: This is the component most prone to failure. Metal corrosion and silt in the water can both compromise the airtight seal, causing continuous inflation (leaking air). The O-rings used for the seal can deform or harden over time, so the valve should be disassembled and cleaned. Replace O-rings as needed.
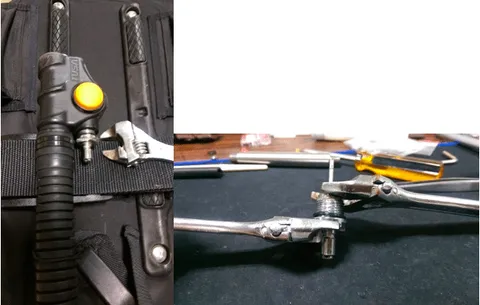
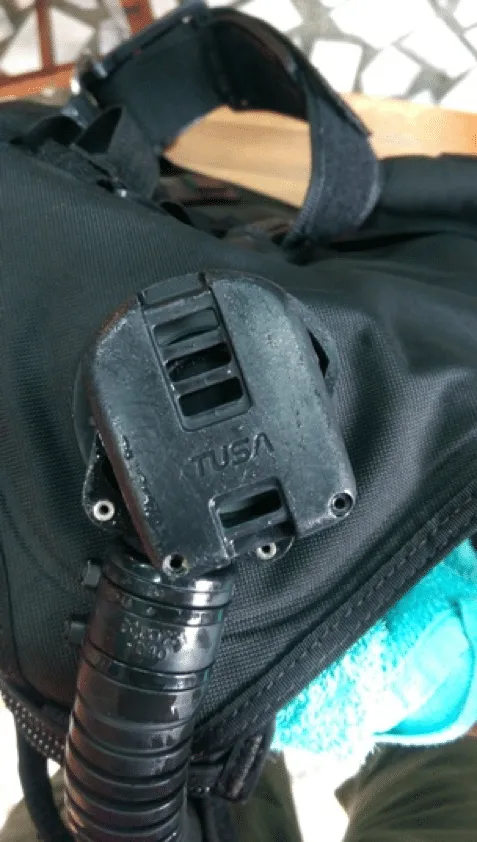
- Exhaust seat: The exhaust seat located on the left shoulder of TUSA BCDs releases air when the corrugated hose is pulled, which helps speed up descent. All TUSA BCDs have a one-way membrane inside the exhaust valve to effectively reduce seawater ingress.
- First remove the two screws, then rotate the top cover counter-clockwise.
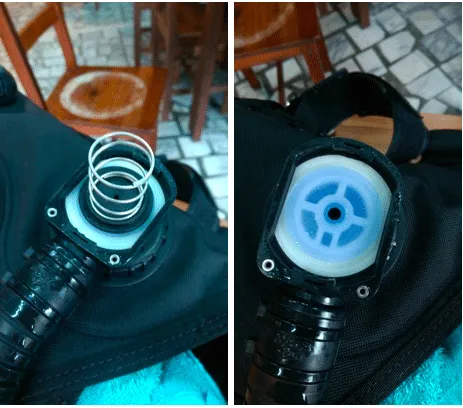
- Remove the spring and send it through an ultrasonic cleaner to remove rust. Remove the black push rod, then clean the surrounding area and the one-way membrane.
- Right shoulder quick-release dump valve: This valve is only found on mid-range and higher-grade BCDs — basic training equipment does not include it. The valve cover has a special design that makes it difficult to open; use a non-slip mat to increase friction. The spring can be removed by winding the cord around it and unscrewing.
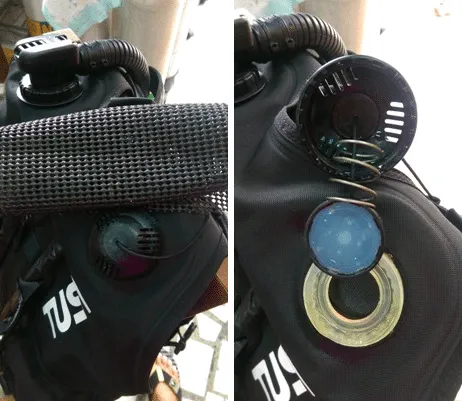
The grooves around the top cover grip the raised points on the base when locked — you must hear three distinct "clicks" to confirm it is fully secured.
If the pull cord shows signs of wear, lift the rubber gasket, untie or cut the knot, and tie a new knot at the worn section to secure it in place.
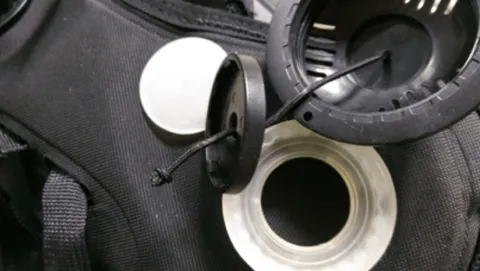
- Rear dump valve: The valve cover also has a special design that makes it difficult to open; use a non-slip mat to increase friction. This valve seat likewise uses a one-way membrane — clean the surrounding area thoroughly. The spring can be removed by winding the cord around it and unscrewing.
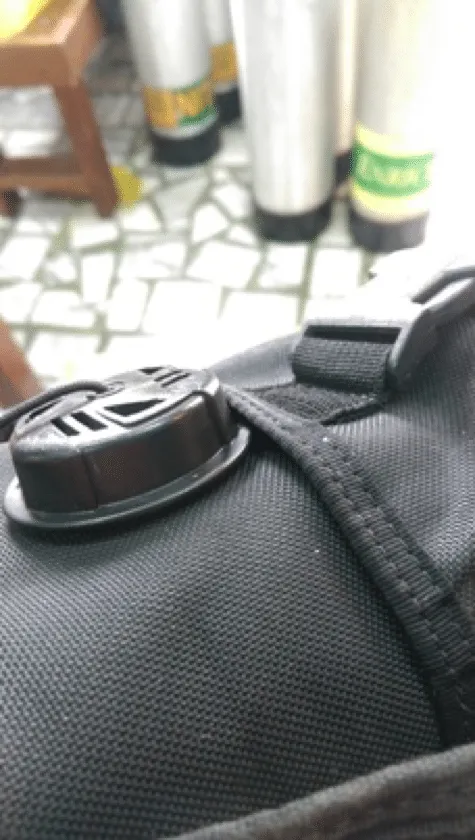
When reassembling, be careful not to let the valve cover pinch the rear weight pocket, or it will not lock properly. Again, listen for three "clicks."
Once you have completed all of the above steps, fully inflate the BCD and leave it to sit while you check for any air leaks. If everything is fine, you can store your BCD away for the off-season with peace of mind, knowing that corrosion during storage won't leave you with a broken BCD when the new dive season rolls around.
Finally, a reminder: disassembling and reassembling equipment requires a certain level of experience. If you are not yet comfortable doing this yourself, it is strongly recommended to seek help from a professional dive shop or dive instructor — so that you can dive with complete confidence in the future!