The Editor says: As someone who primarily scuba dives, I've personally witnessed bottom weights from freediving buoy setups damaging habitats underwater — and I've even had a few near-miss moments where a bottom weight came plummeting down and nearly hit me on the head. Sharing this article isn't meant to stir up conflict between scuba divers and freedivers. Rather, we hope to promote safer and more responsible water activity practices. The ocean is a magical place, and the last thing we want is for careless habits to spark disputes — or worse, lead to permanent diving bans in certain areas. That kind of "no-diving culture" would be the worst outcome for everyone: scuba divers, freedivers, yacht operators, SUP riders, and all other water users alike. This article is reproduced in full from 魚式生活, with additional commentary from the Editor on water activity practices.
Over the past year when overseas travel wasn't possible, more and more people took up freediving. During the summer diving season, popular training spots like Chaoching Park and Longdong are packed — the surface is filled with freedivers, while the bottom is crowded with scuba divers. As everyone shares the ocean together, some improper bottom weight setups are damaging the ecosystem and causing friction between scuba divers and freedivers (e.g., bottom weights being cut or removed). Posts venting about this seem to pop up every week or two, and it's honestly disheartening. The Northeast Coast, for instance, has notoriously poor visibility, making it genuinely difficult to find suitable anchor points on the reef below. So I'd like to share the correct way to set up a bottom weight — one that protects the ecosystem and keeps everyone's diving environment safe.
Editor's note: The following photos were all taken at real locations along the Northeast Coast. To reiterate — we are not here to call anyone out or pit scuba divers against freedivers. We simply want more people to recognize the importance of this issue.
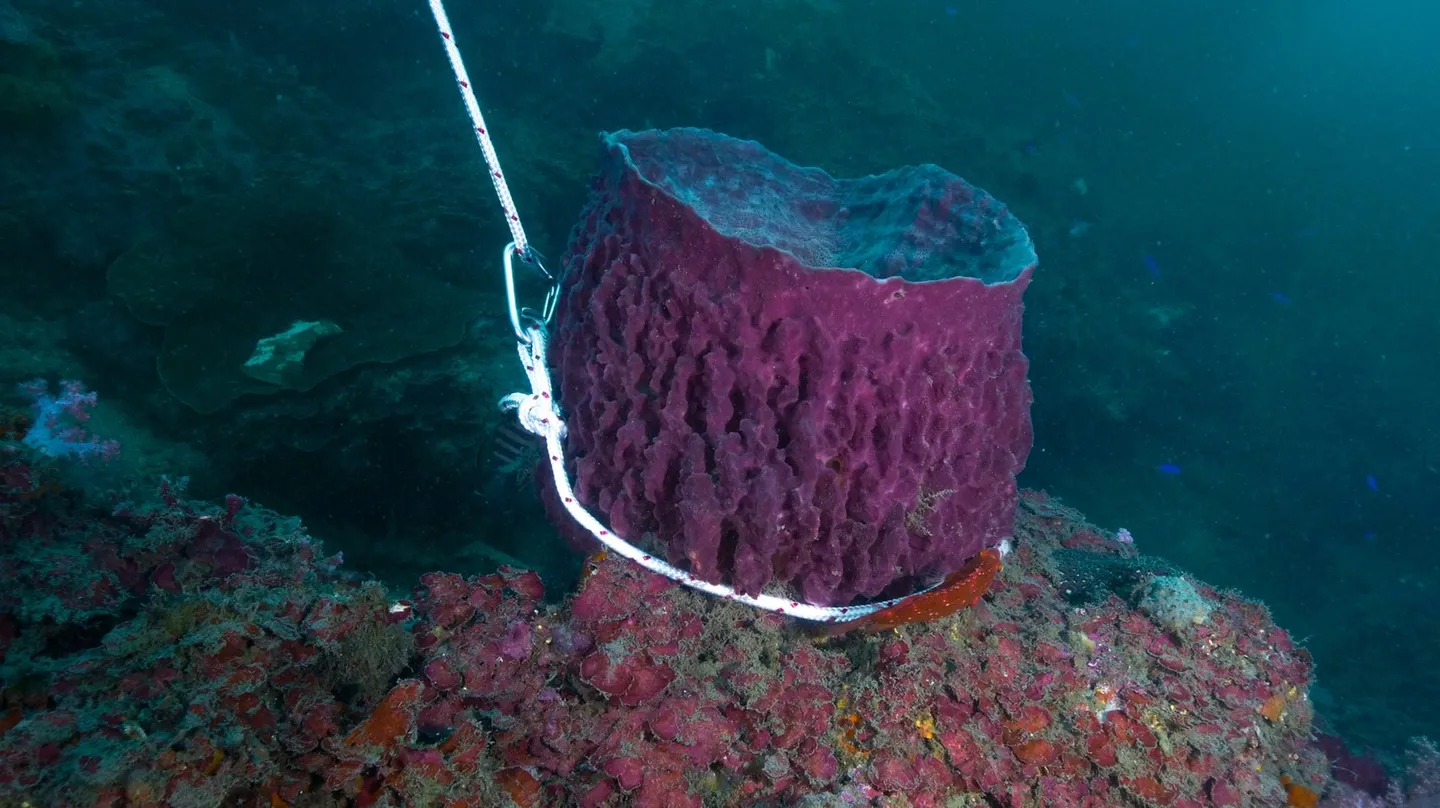
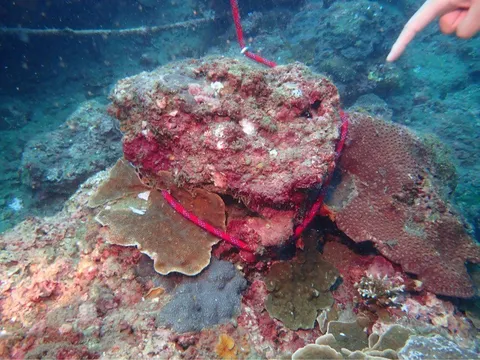
Left: rope tied to a barrel sponge. Source: Spark. Right: rope tied to a reef with coral growing on it. Source: provided by a dive buddy in the group.
The Editor says: If those of us who call ourselves ocean people fail to respect nature, entire dive sites may end up permanently off-limits for water activities. Some people might say, "I'll just go somewhere else." But if that mindset doesn't change, all that happens is a different patch of ocean gets damaged instead.
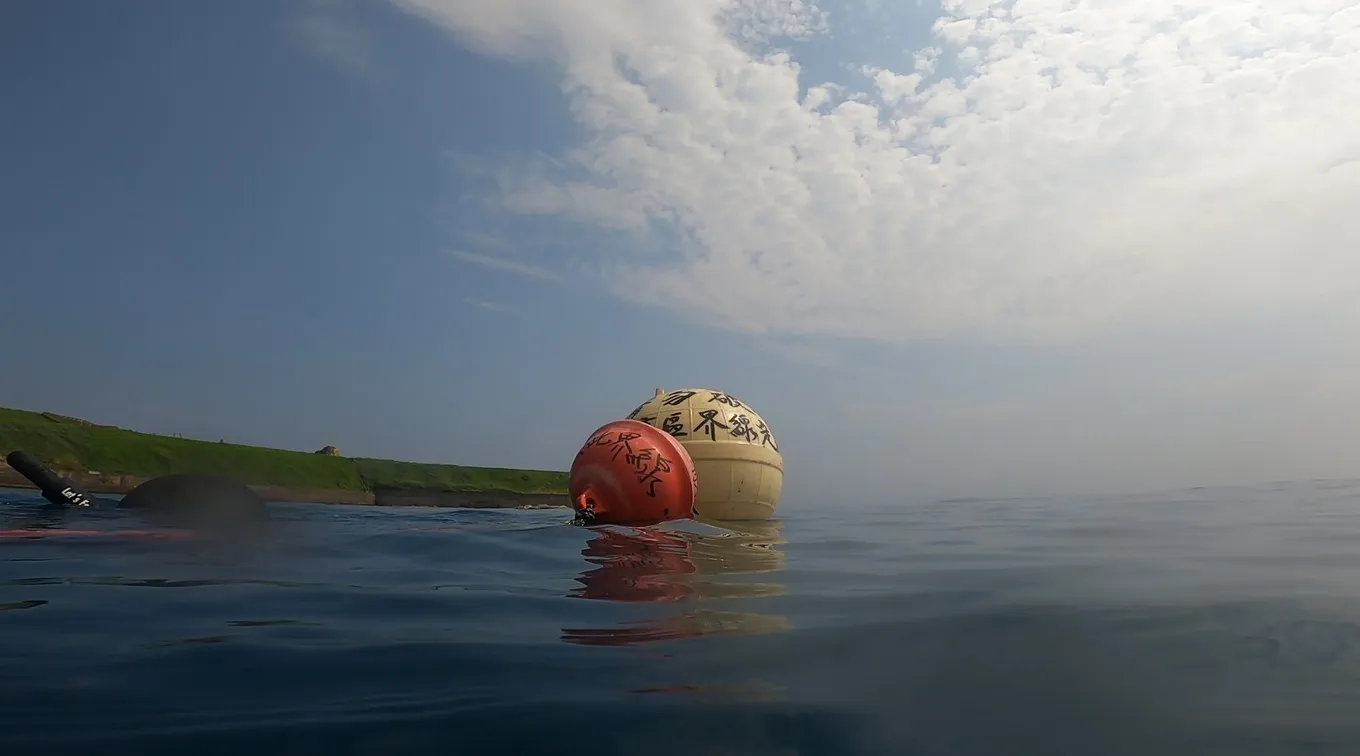
A fixed mooring buoy — not all fixed buoys can be freely attached to.
There are many fixed mooring buoys along the Northeast Coast. Some are used as markers for ecological research; others mark navigation channels; and some are set up by instructors specifically for scuba diving. Most beginner freedivers tend to use these fixed buoys, attaching a connecting line and then setting a bottom weight for practice. The Editor adds: some fixed buoys are designated exclusively for vessel use, and attaching a freediving setup to them can create real safety hazards and disputes. Some research buoys are equipped with sensitive data sensors, and tampering with them can compromise months of research. Please make sure to consult local instructors or experienced divers about the relevant rules before entering the water.
A fixed mooring buoy
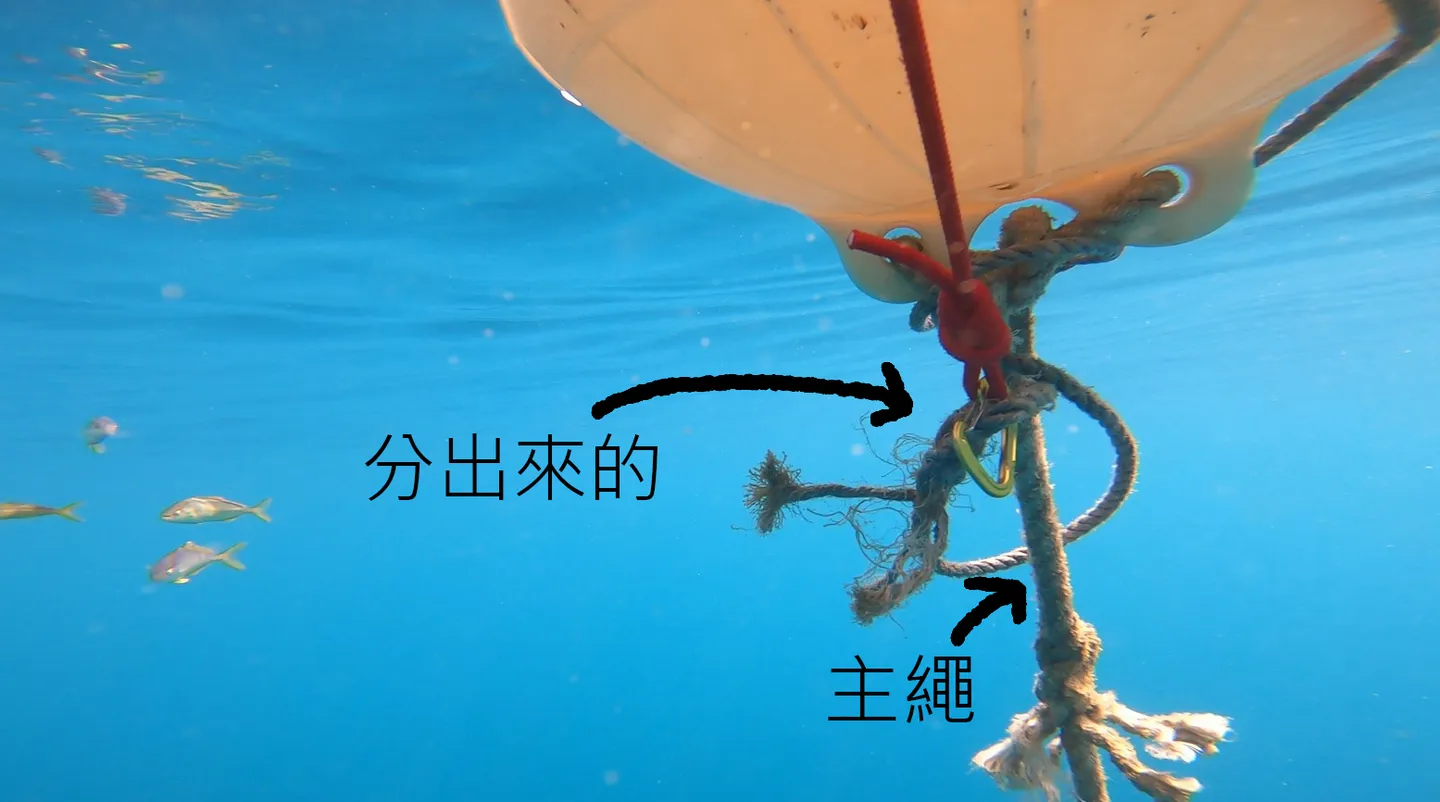
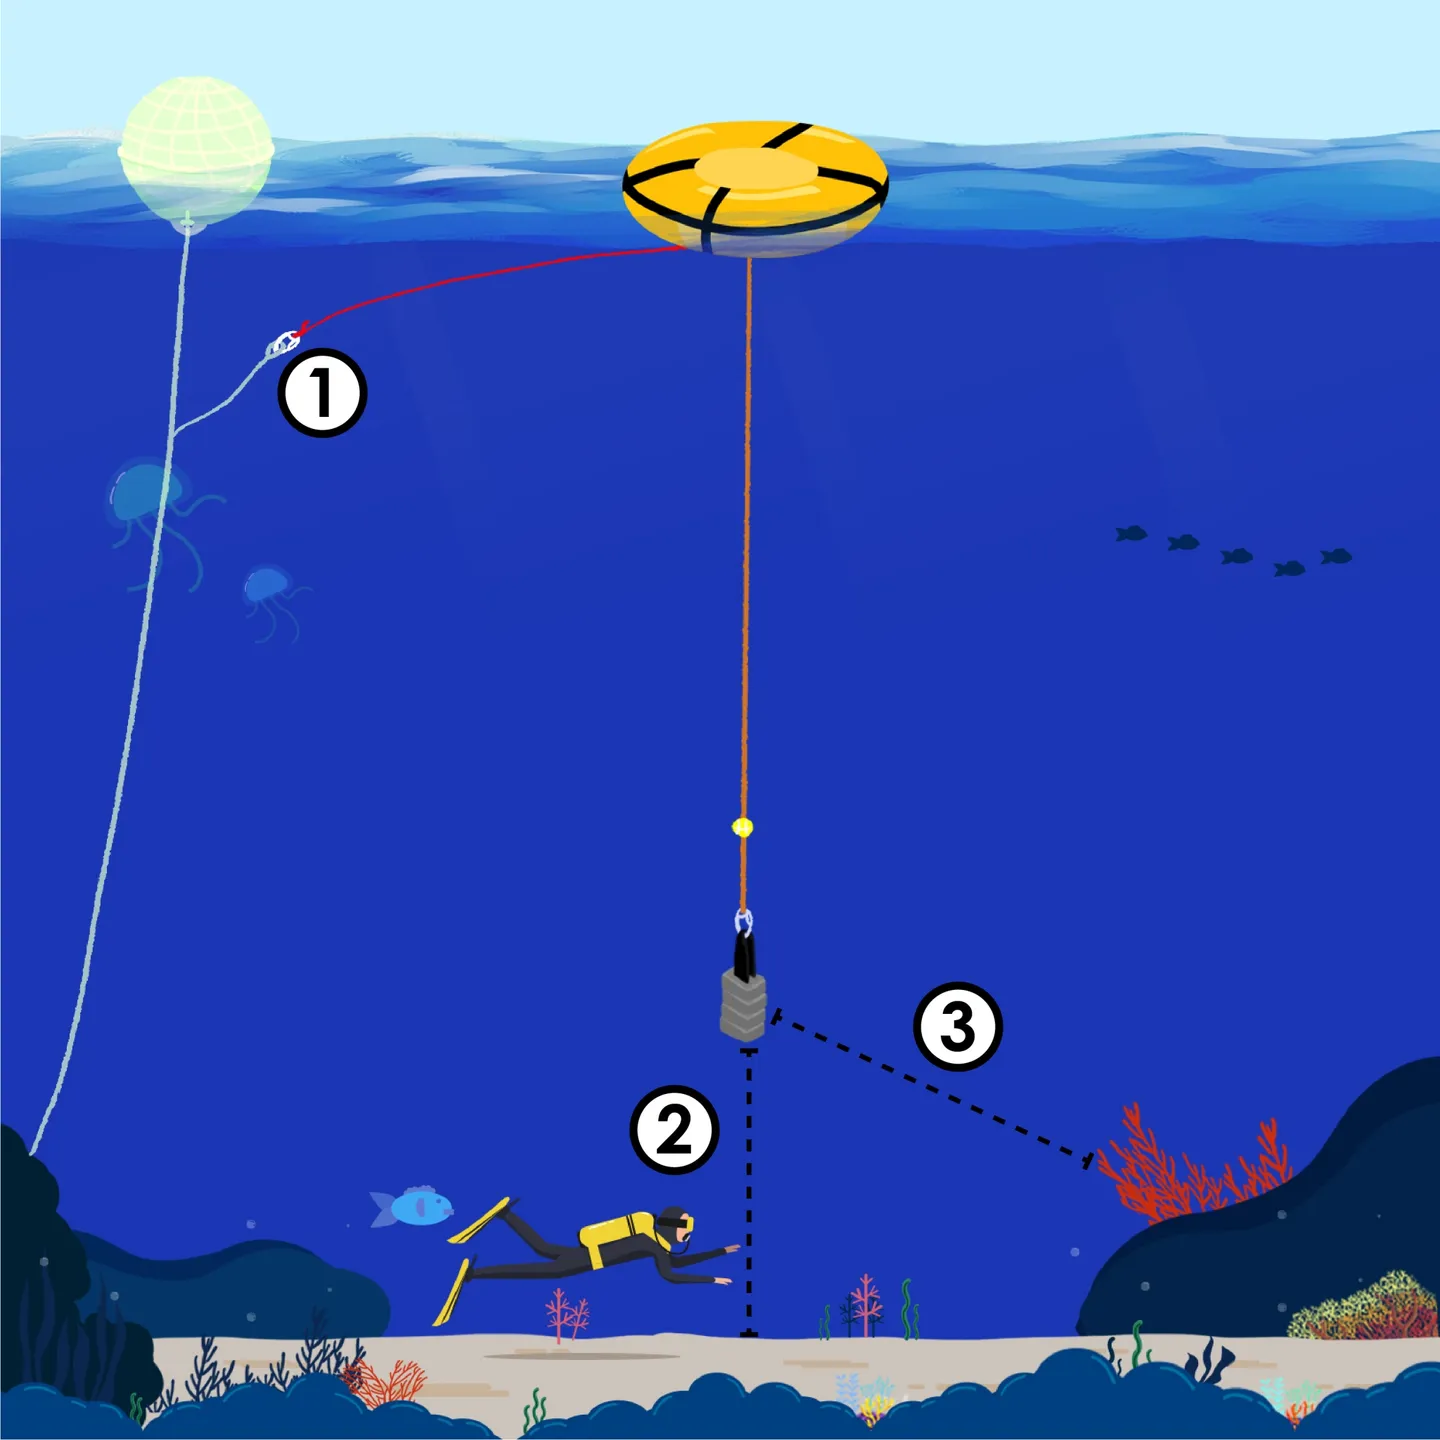
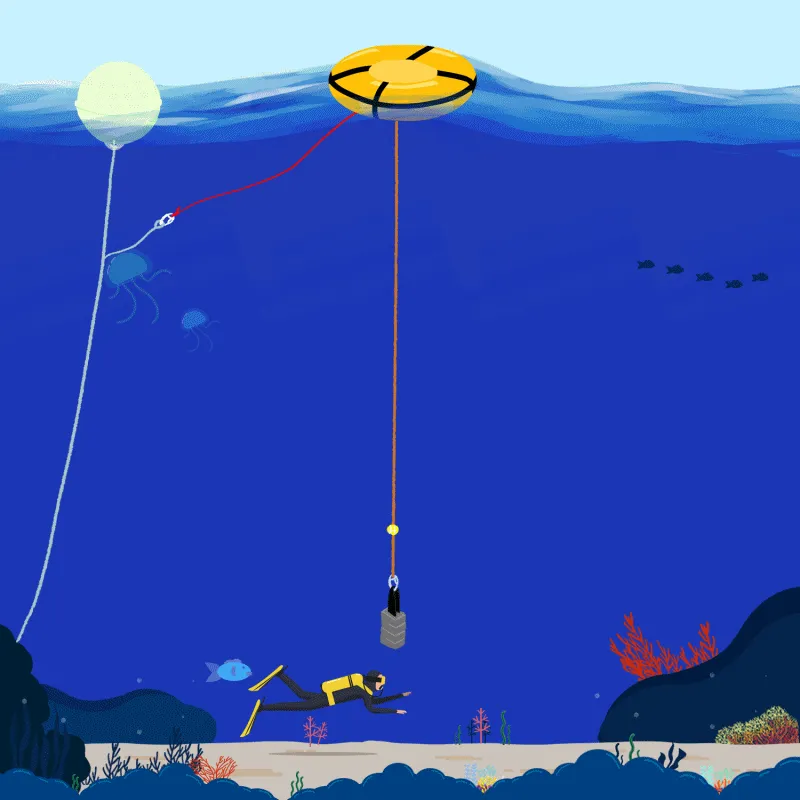
One important thing to note: near the surface, there is usually an additional line branching off from the main line, used for anchoring and similar purposes. Your connecting line should be clipped to this secondary line — not the main line — otherwise, when a current picks up, the force can rip the entire buoy out from its anchor. (Setting up a fixed buoy is a serious undertaking — please treat every fixed buoy with care.) In the photo shown here, there is no branching line, so I avoided the main line and fastened my setup to an extra knot nearby. The Editor adds: There was once a research buoy along the Northeast Coast that had more than 10 freediving setups attached to it simultaneously. When a current surged, the entire research apparatus was displaced, wiping out six months of data. The freedivers themselves were swept into a navigation channel — it was an extremely dangerous situation.
Since visibility at the Northeast Coast makes underwater photography difficult, the following animated diagrams are used for clearer illustration.
Quick summary:
① ② ③ All positions must be at least 5 m away from the reef bottom and surrounding environment.
Upon reaching a fixed mooring buoy, please follow these steps:
**Situation A —
Other freediving buoys are already attached in front of you**
- Politely ask: "Would it be alright to attach my buoy behind yours?"
(A single fixed mooring buoy should only ever have one line of freediving buoys hanging from it — never a radial arrangement! Currents will tangle everything together!!) - Ask the person in front how deep the bottom is and how much line they've let out.
- Clip your connecting line to the buoy in front of you.
- Watch for a large number of bubbles rising from below — if you see them, there are scuba divers underneath. Please wait a moment before dropping your bottom weight.
- Based on the information from the diver in front, follow their line length but subtract 2–3 m as your starting bottom weight depth setting. (The 2–3 m buffer accounts for potential terrain differences, or the possibility that the diver in front set their weight too close to the bottom — we don't want to repeat that mistake 😄)
- After dropping the bottom weight, descend along the guide line to the weight's position and assess the surrounding terrain.
- Adjust the bottom weight so that it is at least 5 m away from the bottom and from surrounding reef in all directions.
- Once training begins, verify on every dive that the bottom weight remains at least 5 m from the surroundings, and adjust as needed.
**Situation B —
No other freediving buoys are currently attached**
- Clip your connecting line to the fixed mooring buoy.
- Descend along the fixed buoy to assess the depth and terrain below.
- Watch for a large number of bubbles rising from below — if you see them, there are scuba divers underneath. Please wait a moment before dropping your bottom weight.
- Use the depth minus 5–7 m as your guide line length setting for the bottom weight.
- After dropping the bottom weight, descend along the guide line to the weight's position and assess the surrounding terrain.
- Adjust the bottom weight again so that it is at least 5 m away from the bottom and surrounding reef in all directions.
- Once training begins, verify on every dive that the bottom weight remains at least 5 m from the surroundings, and adjust as needed.
There are many reasons why the bottom weight needs to be kept at least 5 m from the bottom and surrounding reef. Here are the scenarios that can go wrong:
- A sudden current can cause the bottom weight to swing and drift erratically. Without sufficient clearance, it will strike the surrounding reef, coral, or scuba divers.
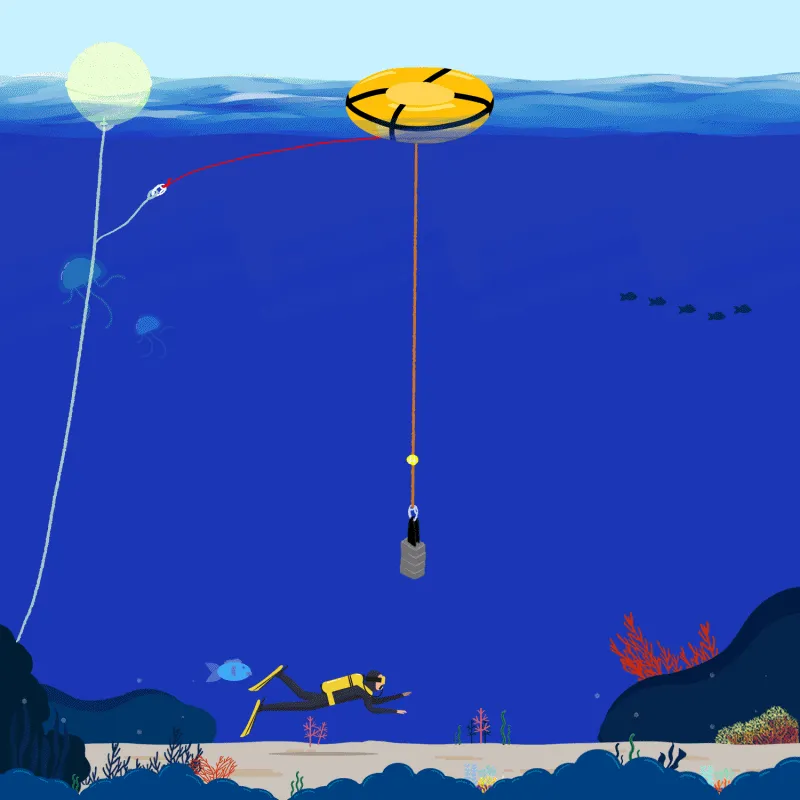
Correct setup
Incorrect setup
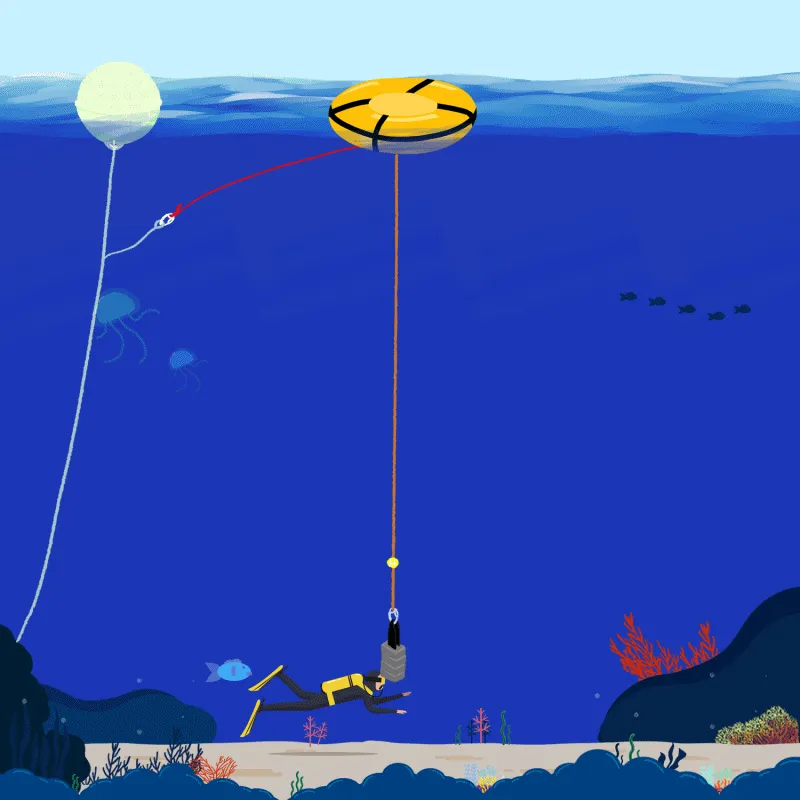
- Sudden swells can cause the bottom weight to heave up and down. Without adequate clearance from the bottom, it will slam hard into the coral below — or into a scuba diver.
Correct setup
Incorrect setup
Editor's note: Without a fixed buoy system in place, freedivers may be unable to monitor what's happening beneath their buoy in time due to currents or poor visibility. But a qualified instructor or responsible freediver should have the fundamental competency to know the local environment and hydrological conditions. From the surface, you can use visual landmarks on land to roughly estimate the depth at your location, allowing you to adjust your position accordingly. If you were to see the following scene underwater, wouldn't it break your heart? The video below is shared with permission from 京太郎.
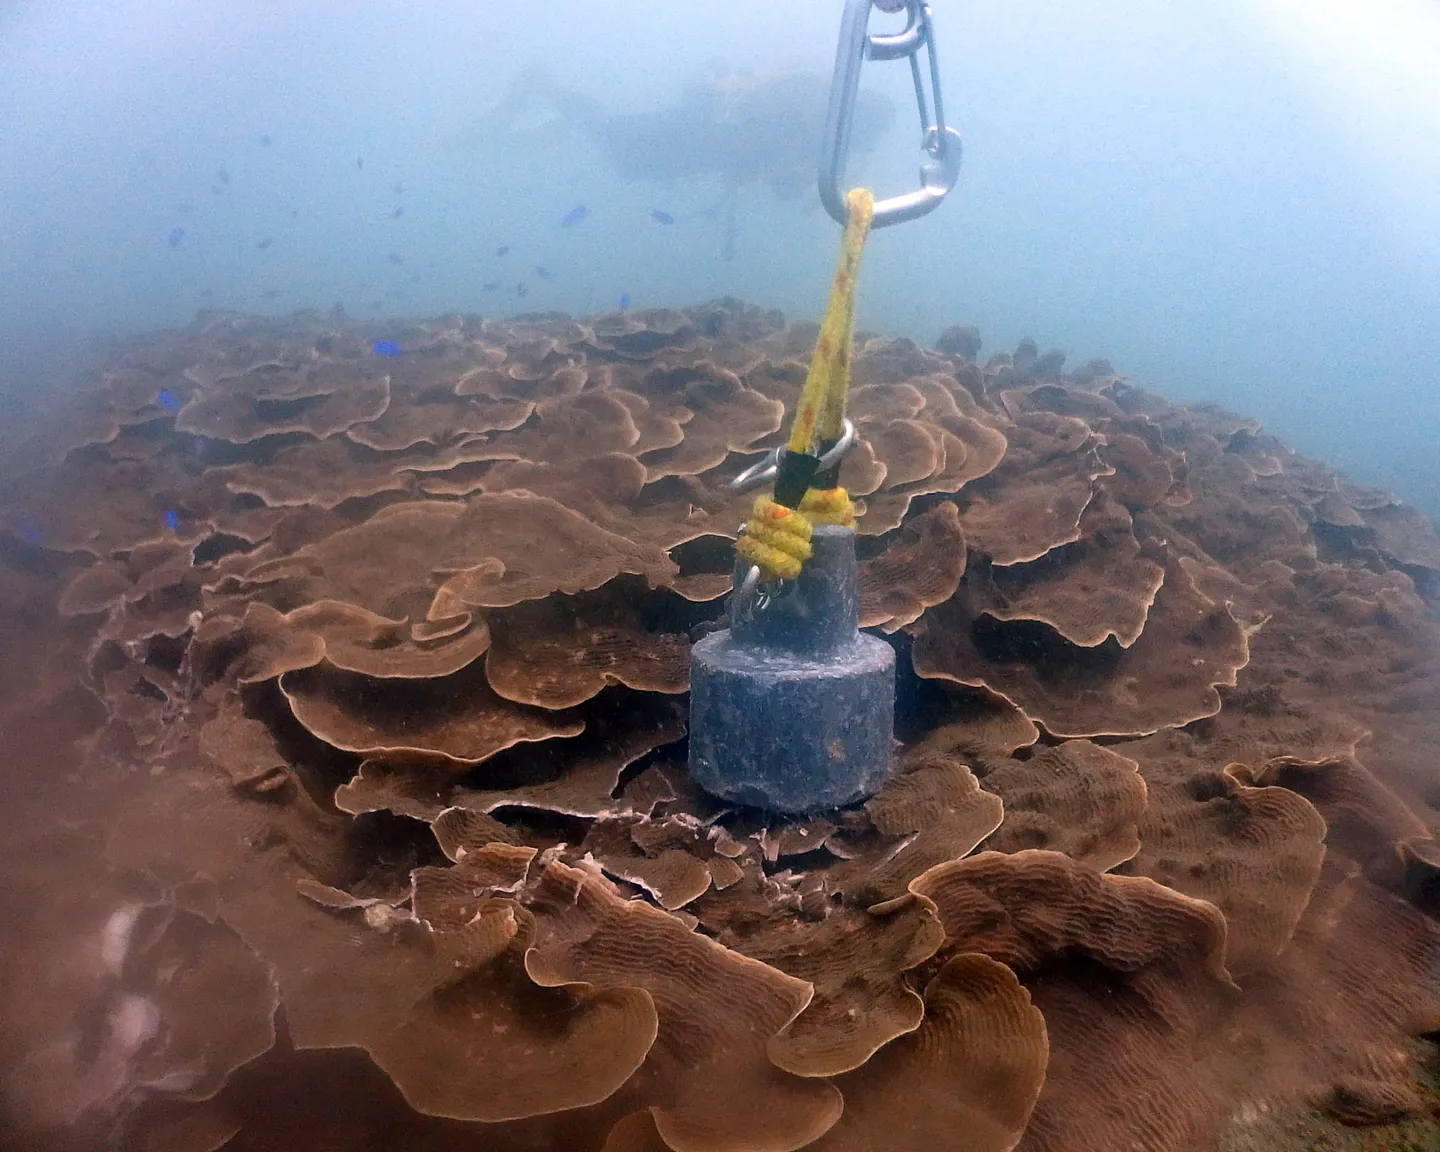
Real-world damage to coral caused by a bottom weight. Source: 京太郎
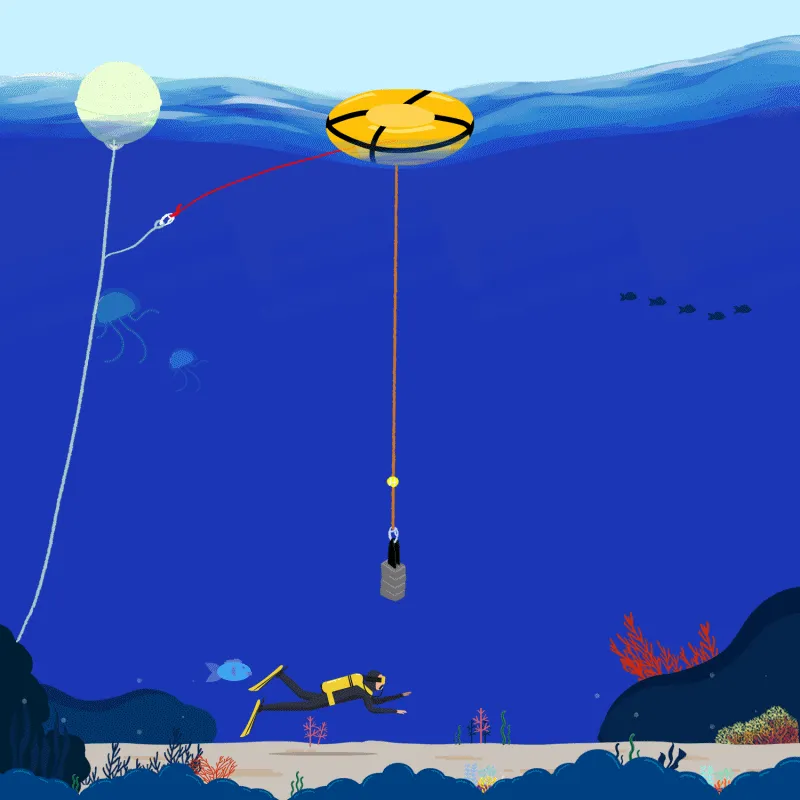
- Low tide: tidal variation during spring tides can exceed 1 m, meaning the water depth between high and low tide can decrease by more than 1 m — which can cause the bottom weight to lose its clearance from the surrounding environment.
- A freediver hitting their head: during freefall, divers may close their eyes to maximize focus, and when reaching the bottom weight, they can accidentally hit their head on a nearby reef. (This actually happened to me — a sudden shift in current direction sent me into the reef. I turned and saw the weight wedged against the rocks. The first thing I did when I surfaced was shorten the line. Fortunately, I wasn't too deep and wasn't moving too fast — otherwise it could have been a serious impact.)
The following are common mistakes made by beginner freedivers. Key reminders:
- Only let out as much line as the depth you can descend to consistently.
- On every single dive, re-check that the bottom weight is at least 5 m from all surrounding terrain.
- A single fixed mooring buoy should only ever have one line of freediving buoys attached to it.
Let's all be freedivers who protect the environment and respect one another — deal?
Wishing everyone safe dives!
One more reminder from the Editor:
- Scuba divers — please maintain proper neutral buoyancy control. Instructors leading groups should closely monitor students, and if students don't have the skills, do not take them into ecologically sensitive areas such as spots with dense rose coral or gorgonians / sea fans.
- Scuba instructors training beginners — please conduct training in sandy-bottom areas. If students are kneeling on the seabed to practice skills, the habitat is being damaged without anyone realizing it.
- Scuba divers — avoid wearing gloves, and build the habit of not touching the environment.
- Both scuba divers and freedivers — please be mindful of your fin kicks. Scuba divers should avoid the bicycle-kick style (head-up, feet-down orientation). Freedivers using long fins (freediving) should be careful not to kick shallow reef coral.
- Freedivers — please dive with an experienced local instructor or mentor who is familiar with the local hydrological conditions and environment. Setting up your buoy correctly not only reduces environmental damage but also lowers your own risk.
- Freedivers — please learn the local navigation channels and restricted zones. The Editor has heard fishing boat captains complain more than once: "When our large fishing vessels are passing close by, we genuinely cannot see your tiny surface buoys or your heads in the water!"
Finally, we want to remind everyone that as you get closer to the ocean, you must carry the right mindset — one that lets you respect the sea both in your heart and in your actions. And when you respect the ocean, you are also respecting yourself.
Further reading: