


The Editor says: If you've already read [Hai Xia Dive Inn Workshop] How to Shoot Black-Background Macro Shots with the Olympus TG Series, you're probably eager to take your macro photography even further with an even cleaner background. Masters of the craft often say that photography is the art of subtraction — learning how to highlight your subject and create tension within a limited frame is exactly what every photographer needs to work on. A big thank you to Nick from Hai Xia Dive Inn for sharing another incredibly practical guide with us!
There's a voice inside all of us asking: why do the masters always shoot such clean, impactful images, while my nudibranch shots are surrounded by a mess of weeds and clutter?!
Is it all done in post-processing? Actually, it really isn't. Many of these results can genuinely be achieved in-camera, before you even open an editing app. That said, I do believe appropriate post-processing has its place. Keep in mind that the masters have worked hard to shoot hundreds of thousands of frames — if we've only taken a few hundred, we're hardly in a position to complain.
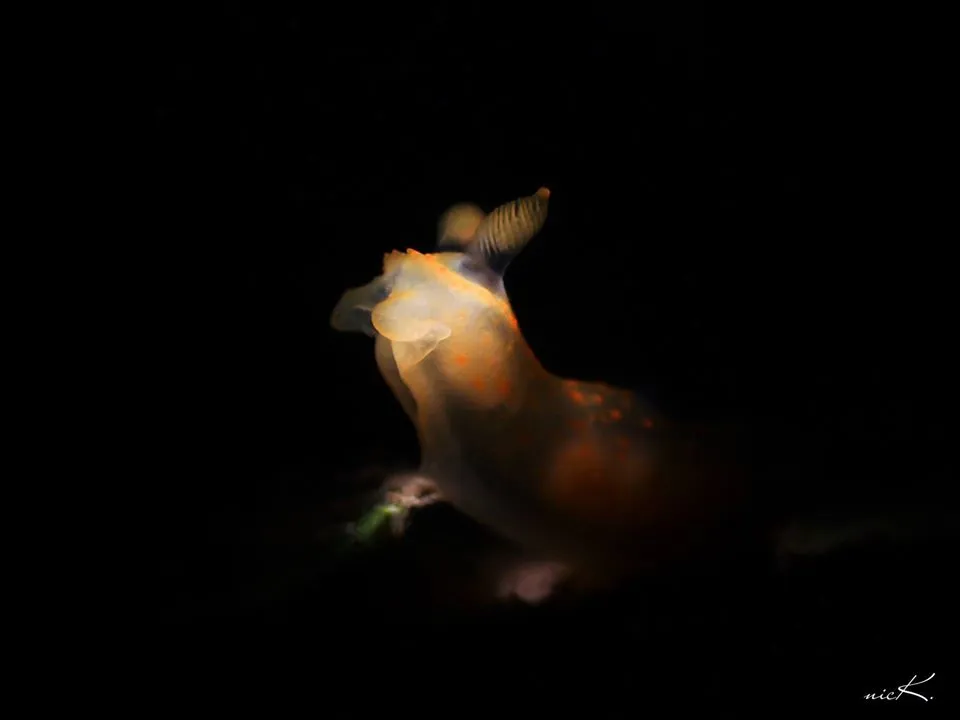
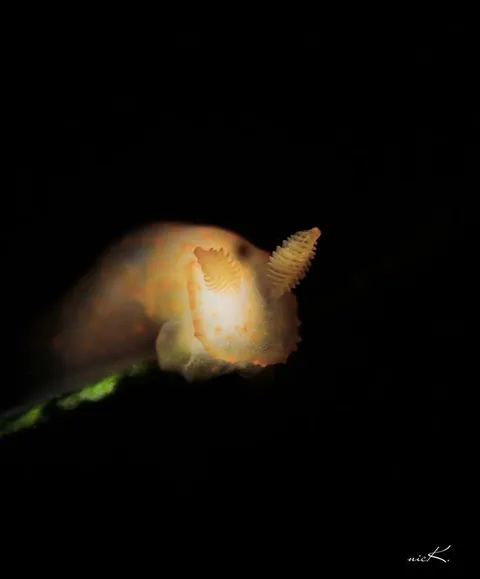
Light avoidance example 1, TG3 + minigear ms03
Hai Xia Dive Inn Workshop
My recommendation is to first read [Hai Xia Dive Inn Workshop] How to Shoot Black-Background Macro Shots with the Olympus TG Series. Once you've mastered using a Flash Light snoot to achieve black backgrounds, then come back and learn about light avoidance.
Light avoidance means: changing the projection angle of your light source (dive light or strobe) to avoid illuminating parts of the scene you don't want lit.
Light can be projected from an infinite number of angles. In plain terms, you only illuminate what you want to illuminate. Whatever doesn't catch the light stays black (the seafloor, for example).
This is an advanced technique. Light avoidance is a deep subject — it encompasses the fundamental principles of underwater lighting as well as a wide range of advanced setups. You could spend a lifetime studying it and still not learn everything. But that's exactly what makes it fascinating, isn't it? I'll explain it in a straightforward, easy-to-understand way, giving you a practical introduction to light avoidance so you can quickly pick up a few key techniques. Trust me — with just the TG series compact camera and a focused-beam Flash Light, you can absolutely pull this off.
All the photos below were taken by me on actual dives. For the purposes of instruction, only backscatter has been removed in post; the light intensity has essentially been left unchanged. Feel free to share them as much as you like, no permission needed!
TG3 + minigear ms03
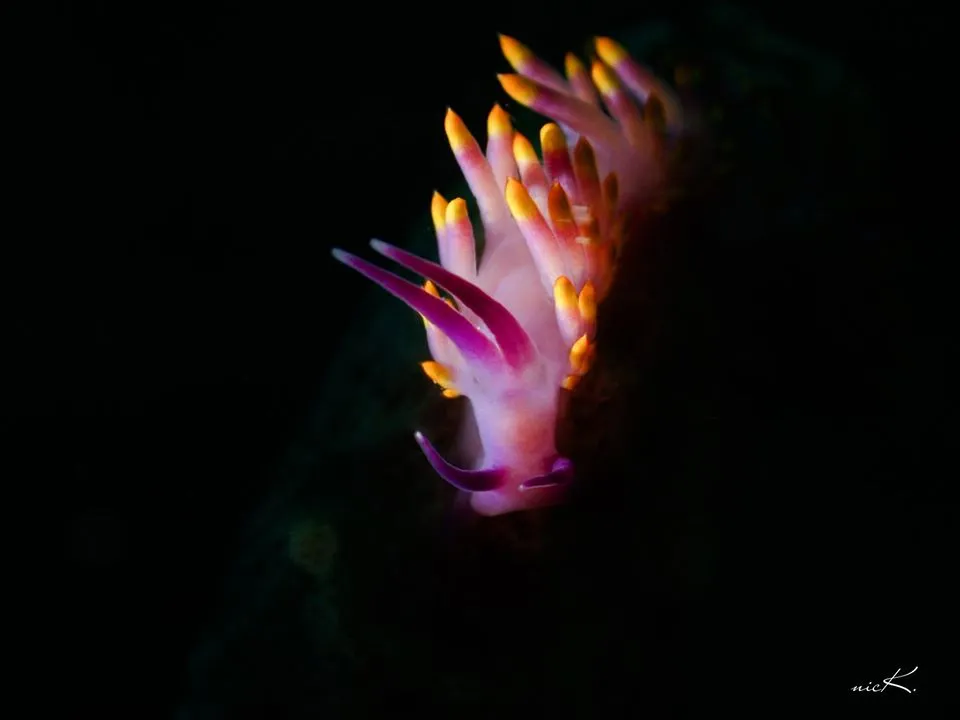
[Key Point #1] Horizontal light position = side lighting. Hold your focused-beam Flash Light at nearly a horizontal angle. You can tilt the head slightly up or down as you like — the key is keeping it horizontal so the light doesn't hit the cluttered seafloor. And honestly, that's the only key point in this entire article!
[Key Point #2] Share this article for us!
[Key Point #3] Key Point #2 is more important than Key Point #1!
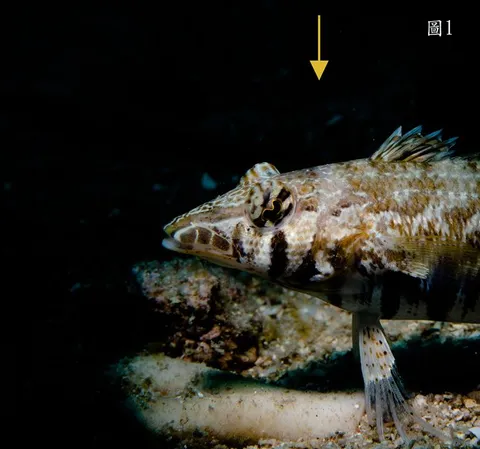
Top-down lighting — tends to illuminate the seafloor, and the subject's belly often misses the light entirely. Can you tell where the fish's belly is?
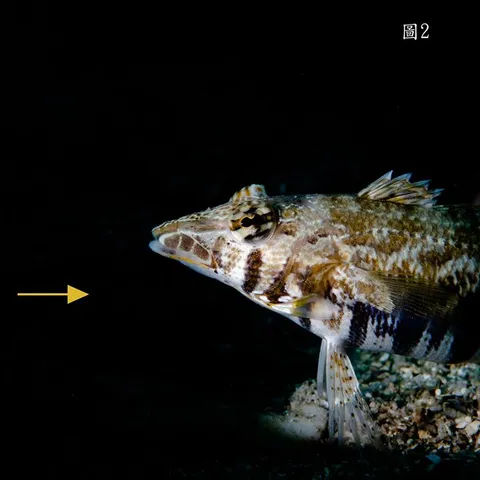
Horizontal light, coming from left to right — the cluttered seafloor is much less visible, and the belly catches light too. With a little more fine-tuning, you can frame only the fish with no seafloor at all.
Never underestimate your left hand — it's more capable than you can imagine!
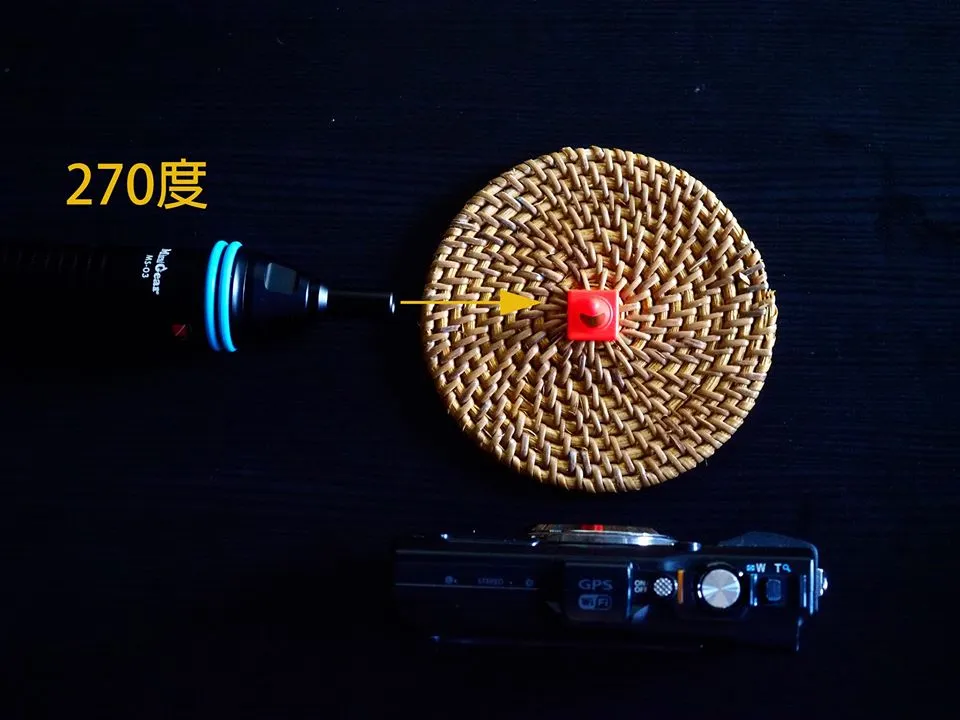
The standard light avoidance technique: hold the camera in your right hand and shoot, while your left hand holds the SNOOT light and continuously fine-tunes the angle. You can practice this on land — it's great fun! To make it easier to explain, I'll use compass directions. Let's look at how the angles are distributed.
You need to understand the angles first, or the rest of this won't make any sense. Think of it as a top-down (bird's-eye) view. Memorise the four angle values highlighted in blue below — the nudibranch is in the center.

Top-down view
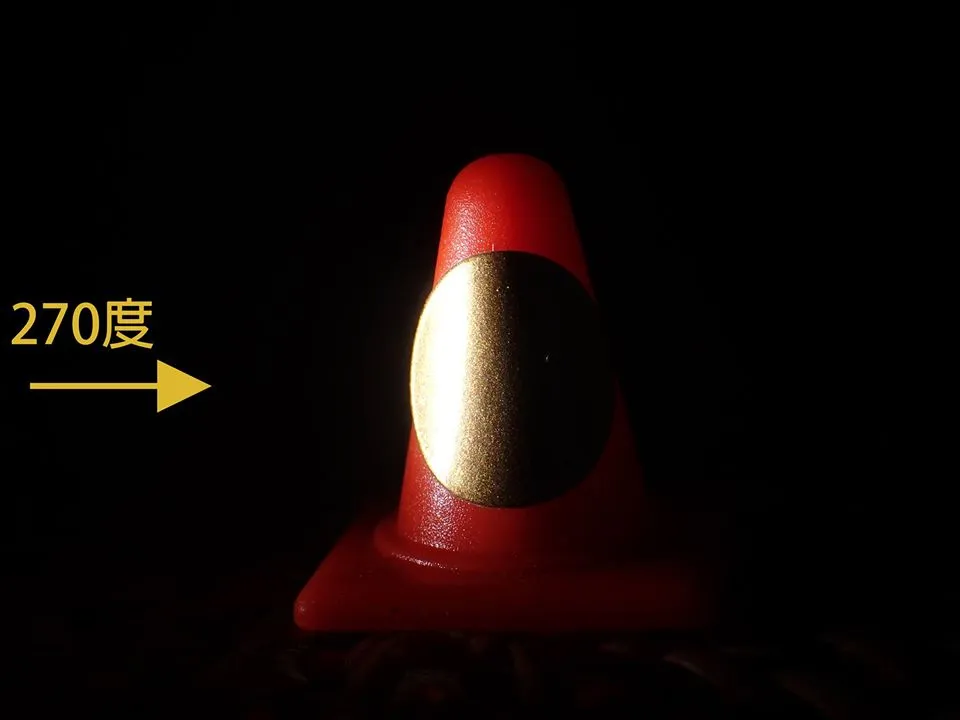
270° light position — my most-used angle; almost no seafloor visible, though the right side of the subject can be a little dark
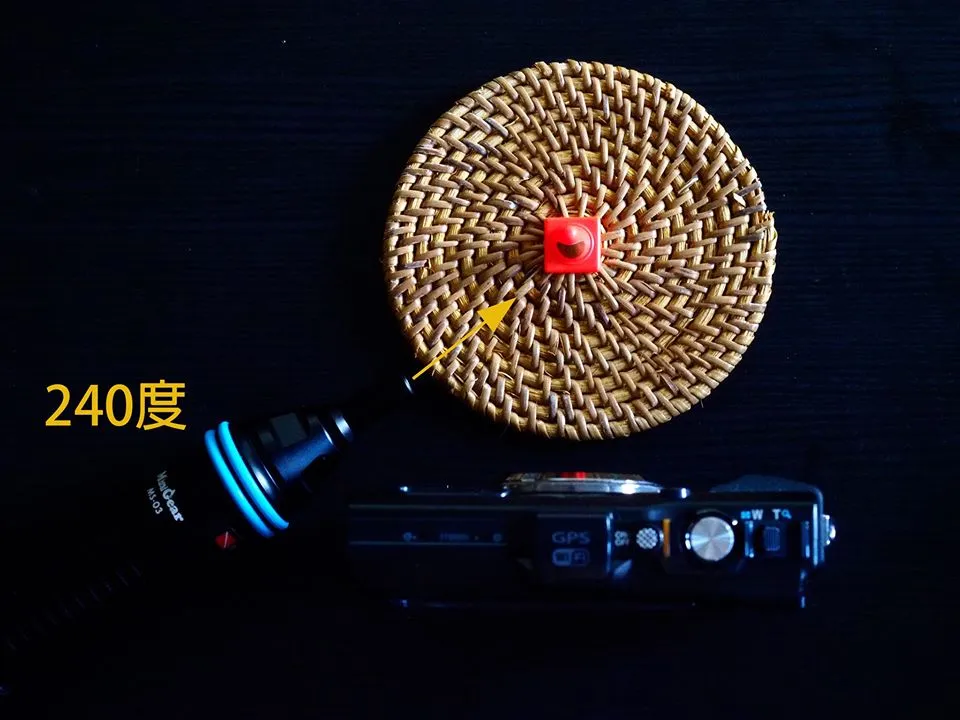
Top-down view
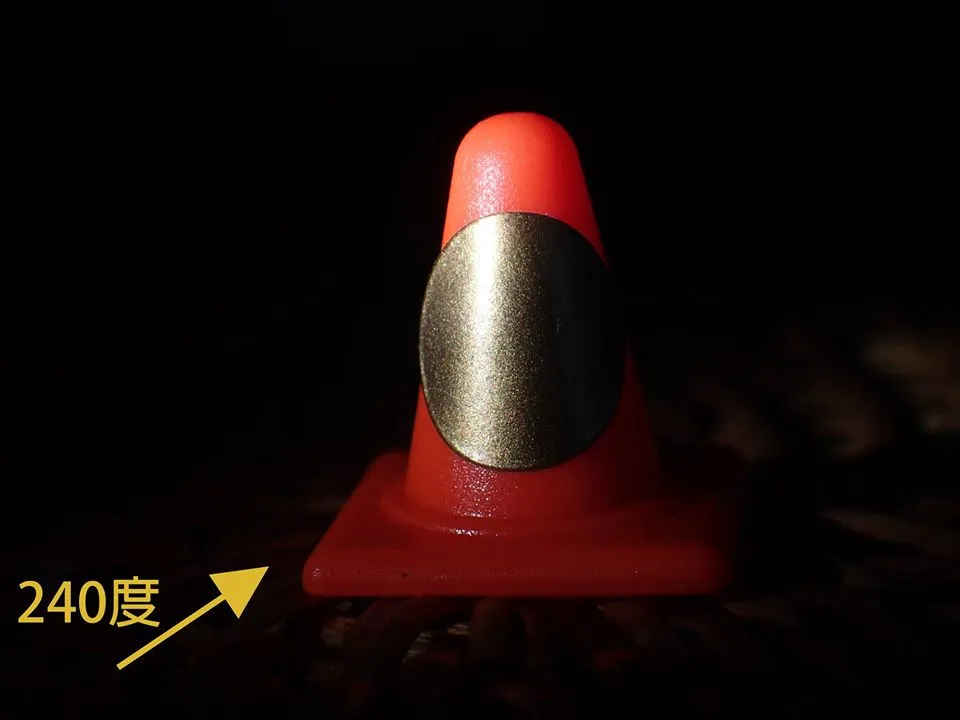
240° light position — my most recommended angle; catches frontal light on the subject while keeping the seafloor out of the frame
Top-down view
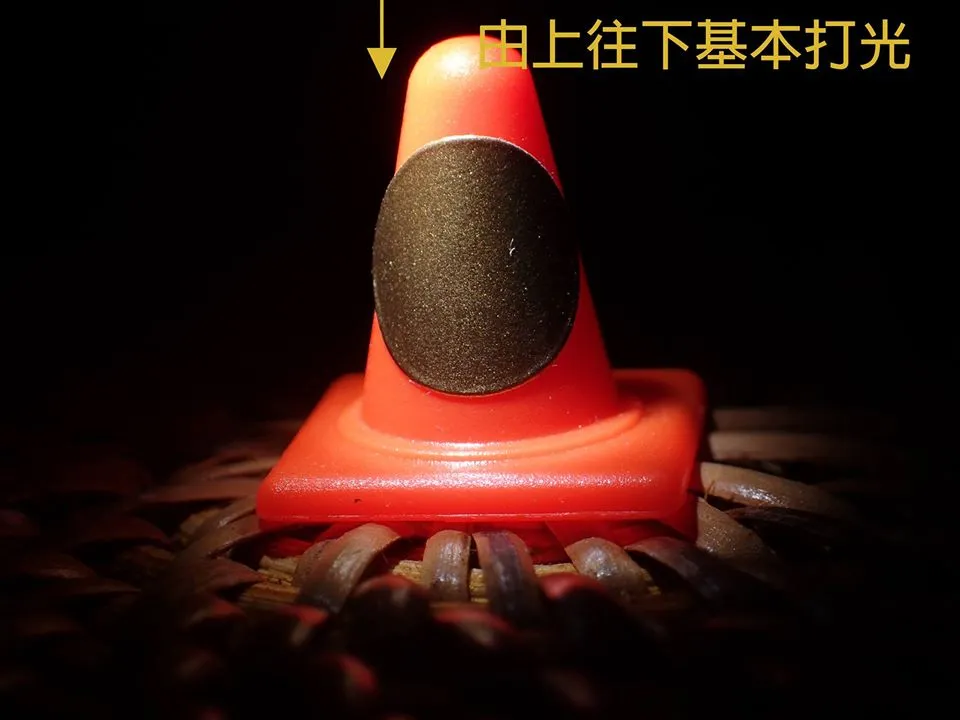
Top lighting is the most basic light position — coming from above — and can produce beautiful results, though the cluttered seafloor tends to appear in the frame
Top lighting
In summary, in terms of results, my recommended light position order is: 240° → 270° → Top lighting.
The 240° position can illuminate the front of the subject — even the neck and mouth of a nudibranch — while keeping the messy seafloor out of the frame (or conversely, preserving a beautiful seafloor if you want it). That's why I consider it the best position for macro photography.
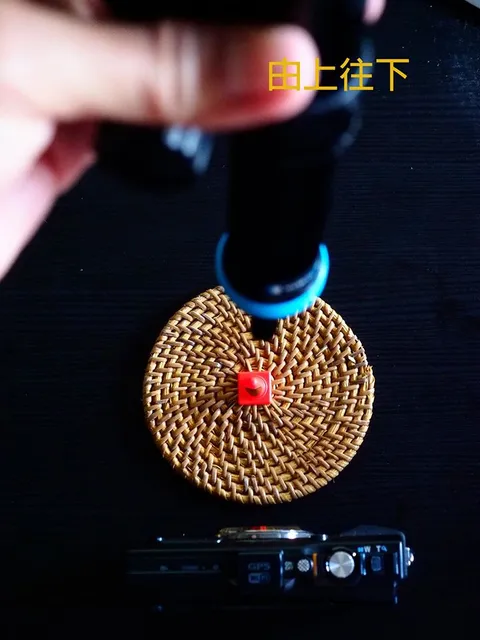
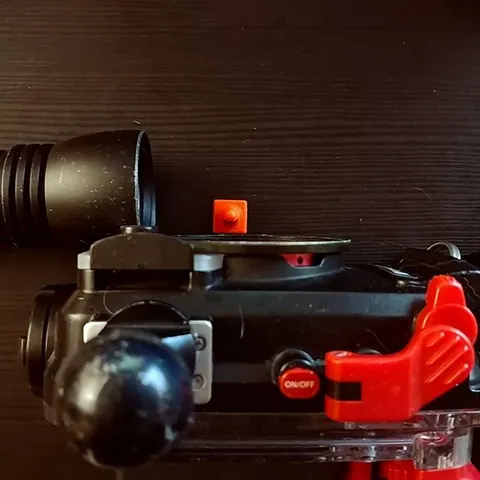
If you've understood everything so far, let's go a little deeper. Let's talk about horizontal lighting and the first practical challenge you'll encounter underwater. With the TG series, the focusing distance (working distance) is very short — typically just 1 cm or less during shooting. Take a look at the photo and you'll see what I mean.
Using a standard focused-beam Flash Light — there's simply no room to maneuver, so you're limited to the 270° position

Same working distance, but the slim, elongated light head buys you a little more room — you can get close to the 240° position.
The point I'm making is that both 270° and 240° are powerful tools for macro shooting — use them well. Practice on land as much as you can. Look carefully at the two photos below, observing how the light falls on the subject and how bright or dark the seafloor appears. See if you can tell the difference — the answers are written under each photo.
Top lighting

240° light position
With the same light, simply changing the angle produces a completely different lighting pattern on the subject — and the brightness of the seafloor can vary dramatically. Finally, let's look at the light positions used in some real-world shots!
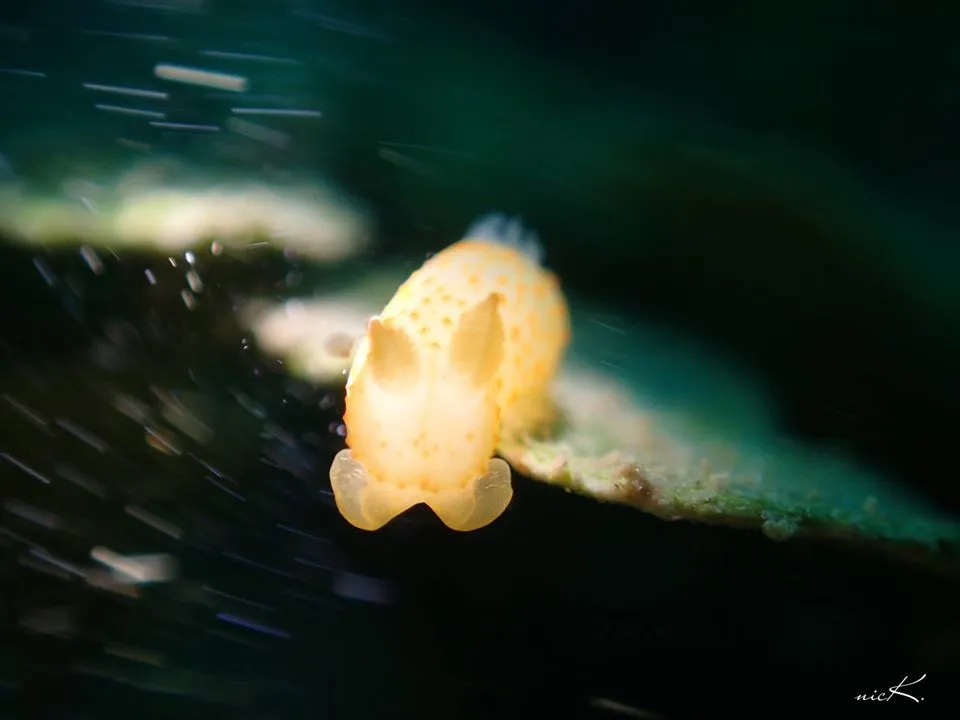
Top lighting
240° light position
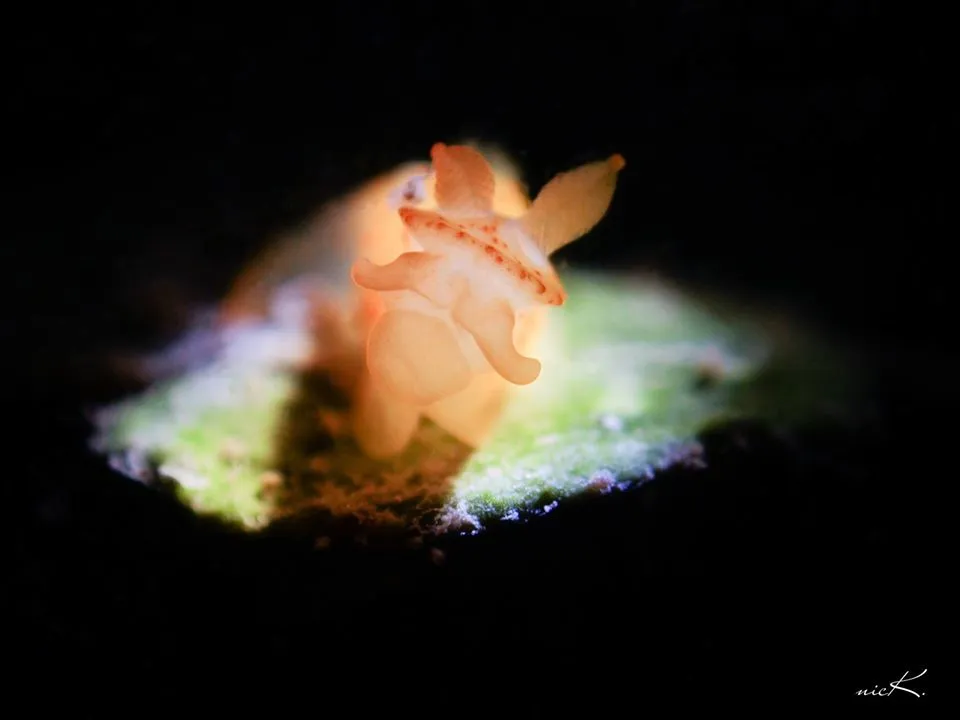
Top lighting
270° light position
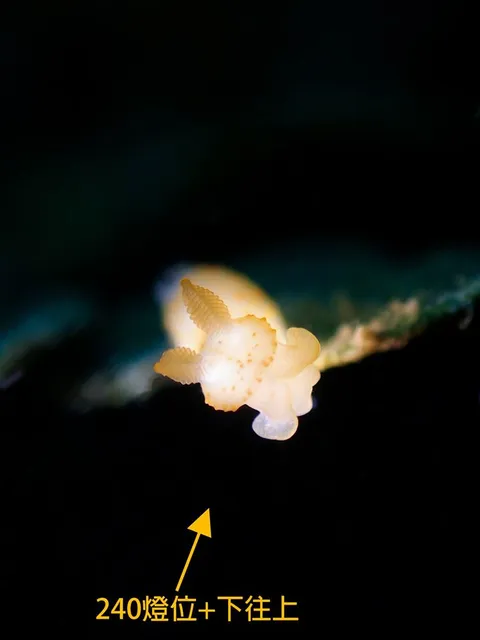
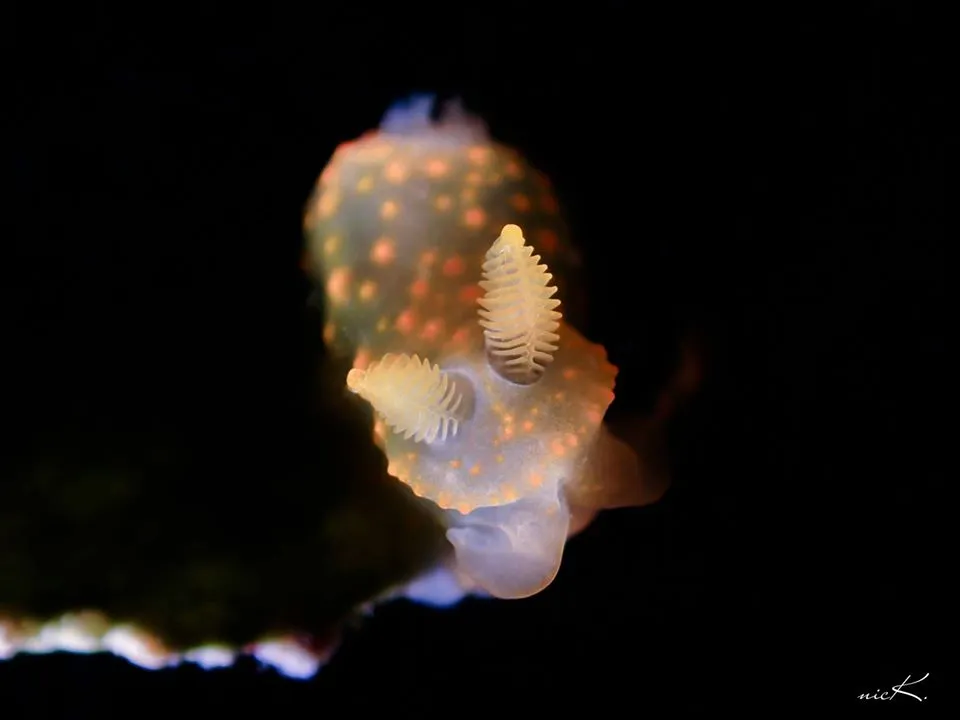
240° light position + bottom-up angle
This shot falls outside the scope of this article — it uses a different light avoidance position that I'll explain in a future post
A final note: there's no single right way to shoot, no single piece of gear you must use, and even color accuracy isn't an absolute requirement. What matters most is what you're trying to express through the image. The photographer who captures a frame they're truly satisfied with — that's the master you've always been looking for. If you enjoyed this article, please share it with everyone you know!
Hai Xia Dive Inn / Hengchun
Related links:
