


The Editor says: Underwater photography gear has evolved with the times, and prices have gradually become more accessible (though the Editor still can't afford it!). Beyond bulky DSLR setups, micro four-thirds and compact cameras have made tremendous leaps in image quality — not just in macro, but also delivering impressive wide-angle performance. Many thanks to Robin for this Sony RX100-M6 unboxing and field test, giving us a comprehensive look at what this camera can do. Let's all march forward together on the path to becoming underwater photography masters!
So, ever since I got my hands on the Sony RX100-M6, a whole bunch of friends have been asking me: how are the photos? How's the underwater macro performance? Is it easy to use? And so on and so forth. So I figured I'd just put together an unboxing and field test write-up. Everything below reflects my own thoroughly unprofessional testing — take it as a reference and a taste of what's possible. If I've got anything wrong, feel free to call me out, but please go easy on me~~~
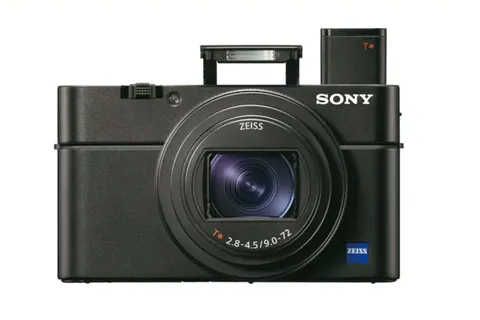
Sony RX100-M6 Features
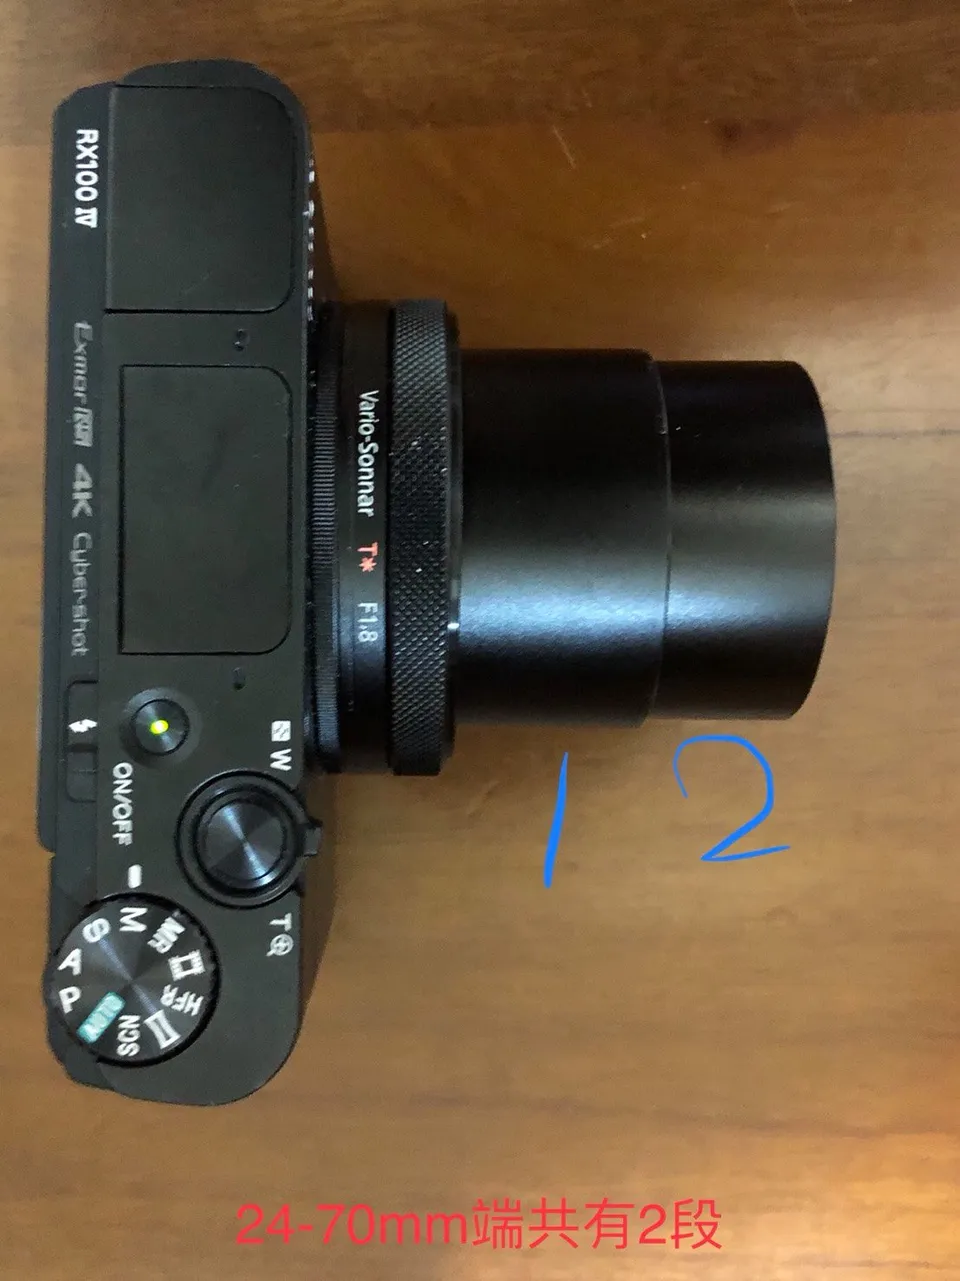
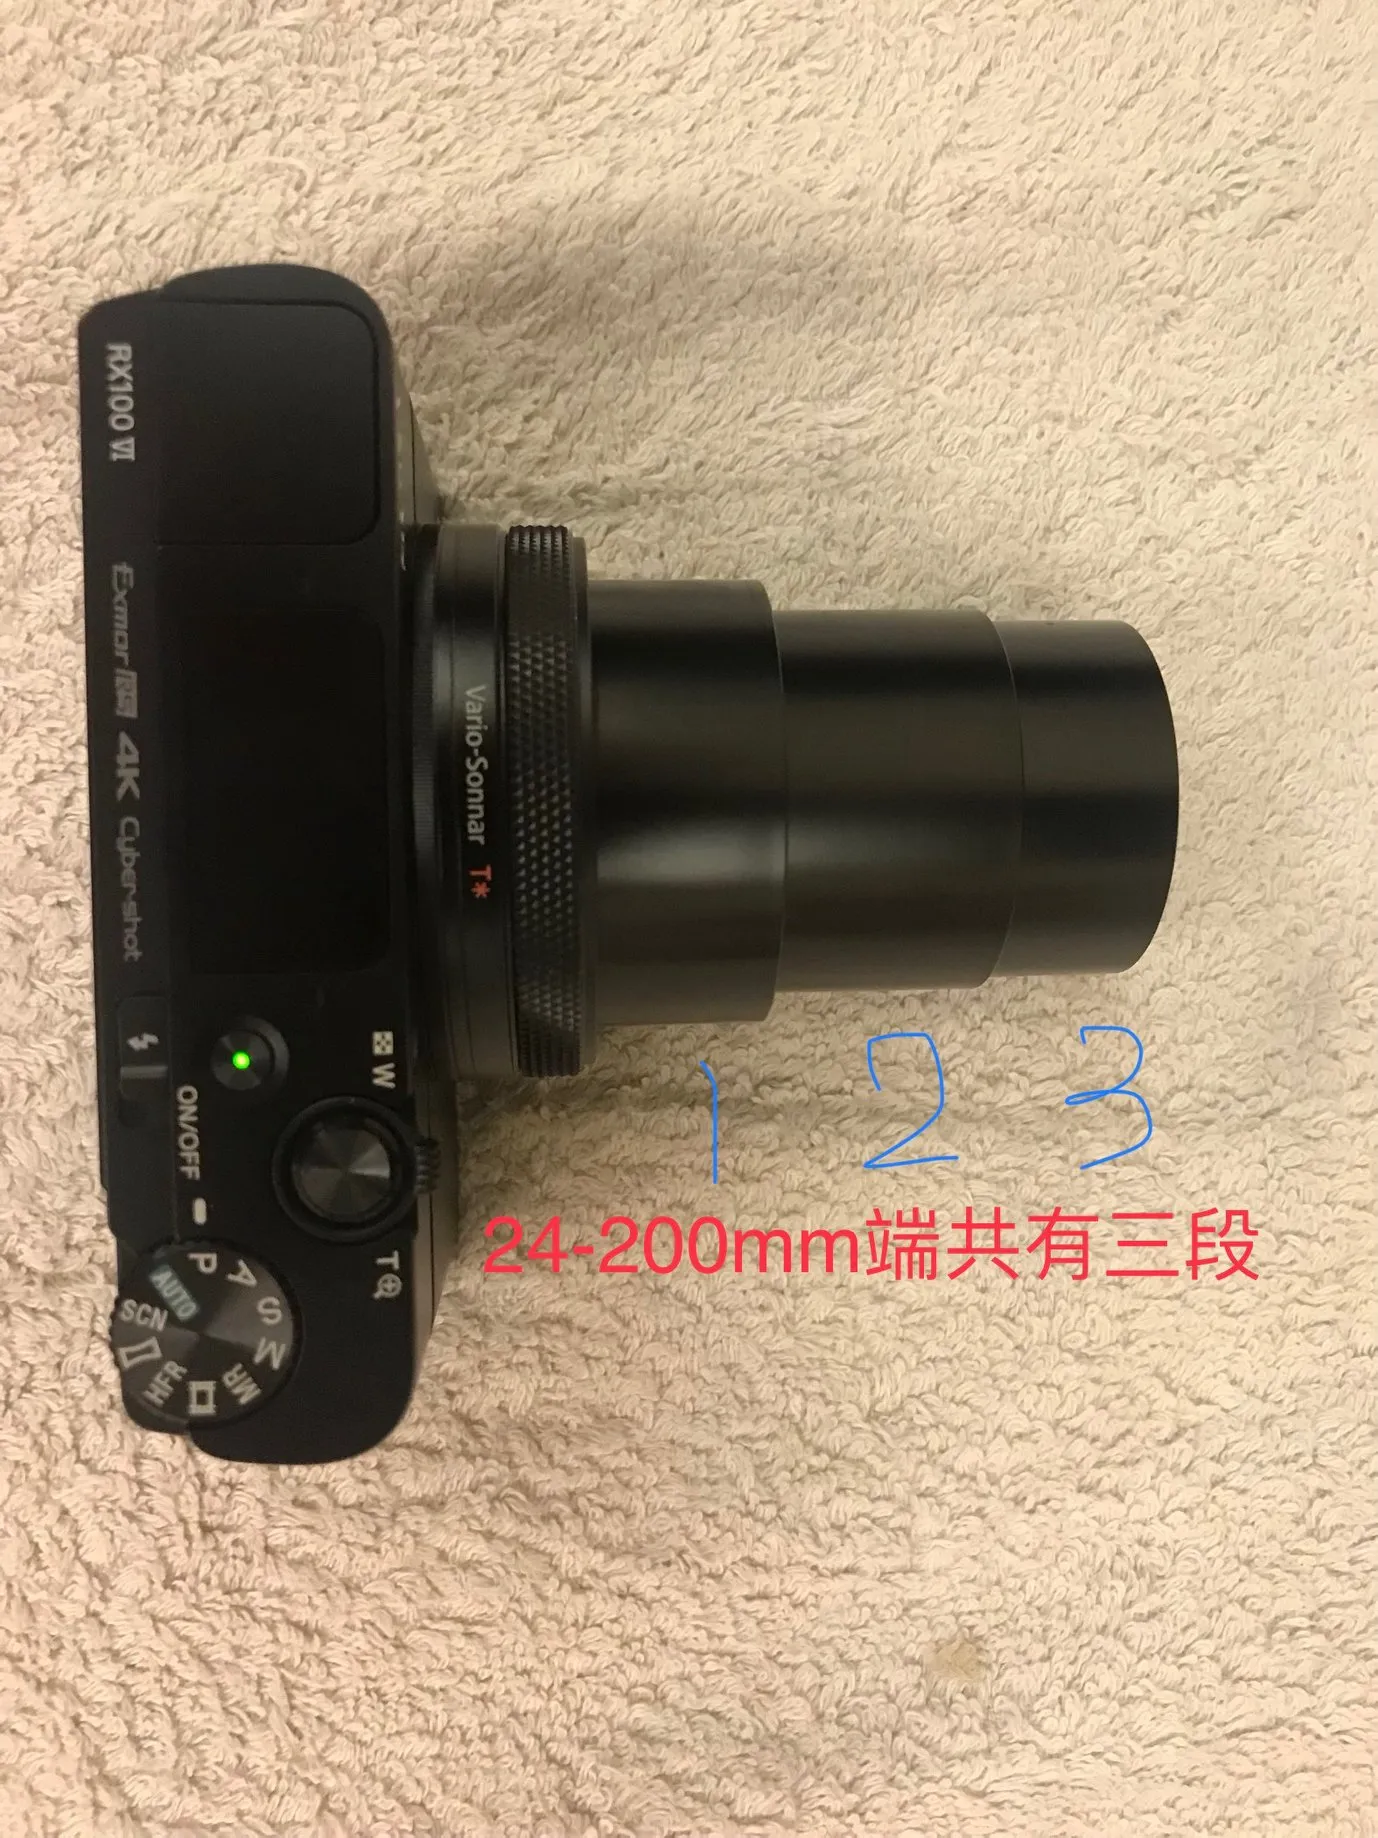
There are quite a few differences between the sixth generation and the fourth and fifth generations. Let's start with the physical hardware. The fourth and fifth gen models came with a 24–70mm lens — a very convenient range that's easy to use and get comfortable with. But the sixth gen leaps all the way up to 24–200mm, which is an enormous treat. Even a compact camera can now zoom into the telephoto end, and that dramatically boosts macro photography capability. In the past, when shooting small subjects or anything a little further away, you'd end up with a tiny speck on the screen and have to crop the image afterwards to enlarge the subject — but cropping means losing resolution.
Now, with the sixth gen's 200mm end, you can effortlessly bring subjects closer. No cropping needed after the shot — everything comes out large with excellent resolution. It's genuinely a fantastic upgrade!
The video above shows the zoom range of the 24–70mm lens — compare it with the video below!
The video above shows the zoom range of the 24–200mm lens. As great as the 200mm end is, it's also a real test of hand-steadiness, so it takes practice. If you really can't hold it steady, don't push the zoom too far............
Sony RX100-M5
Sony RX100-M6
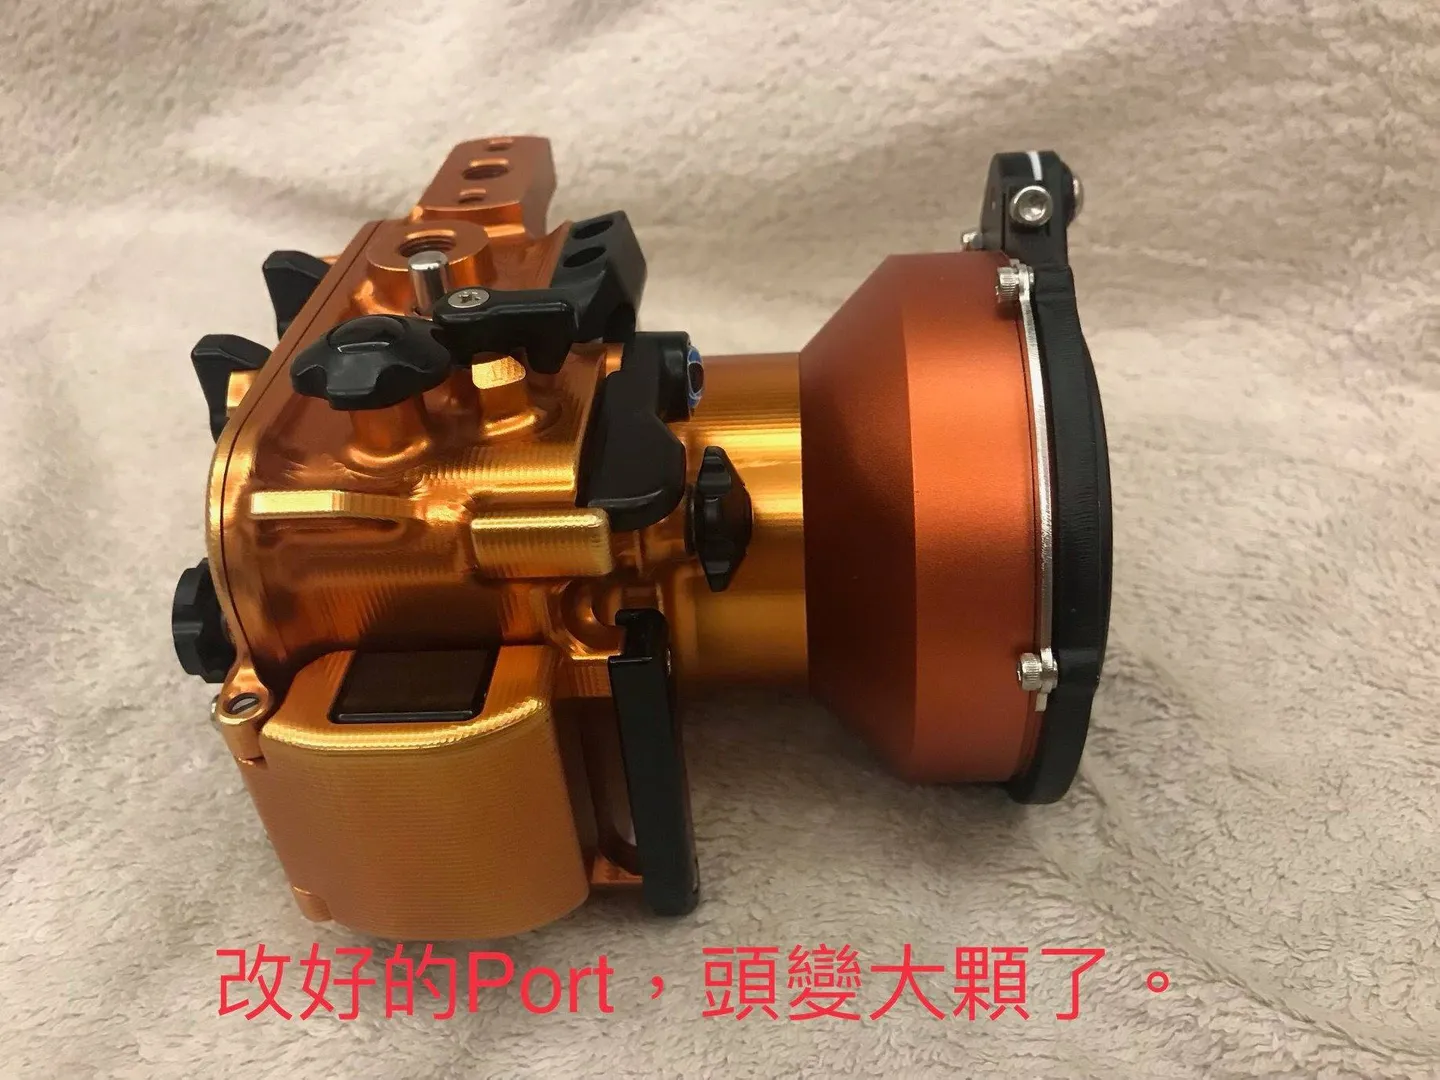
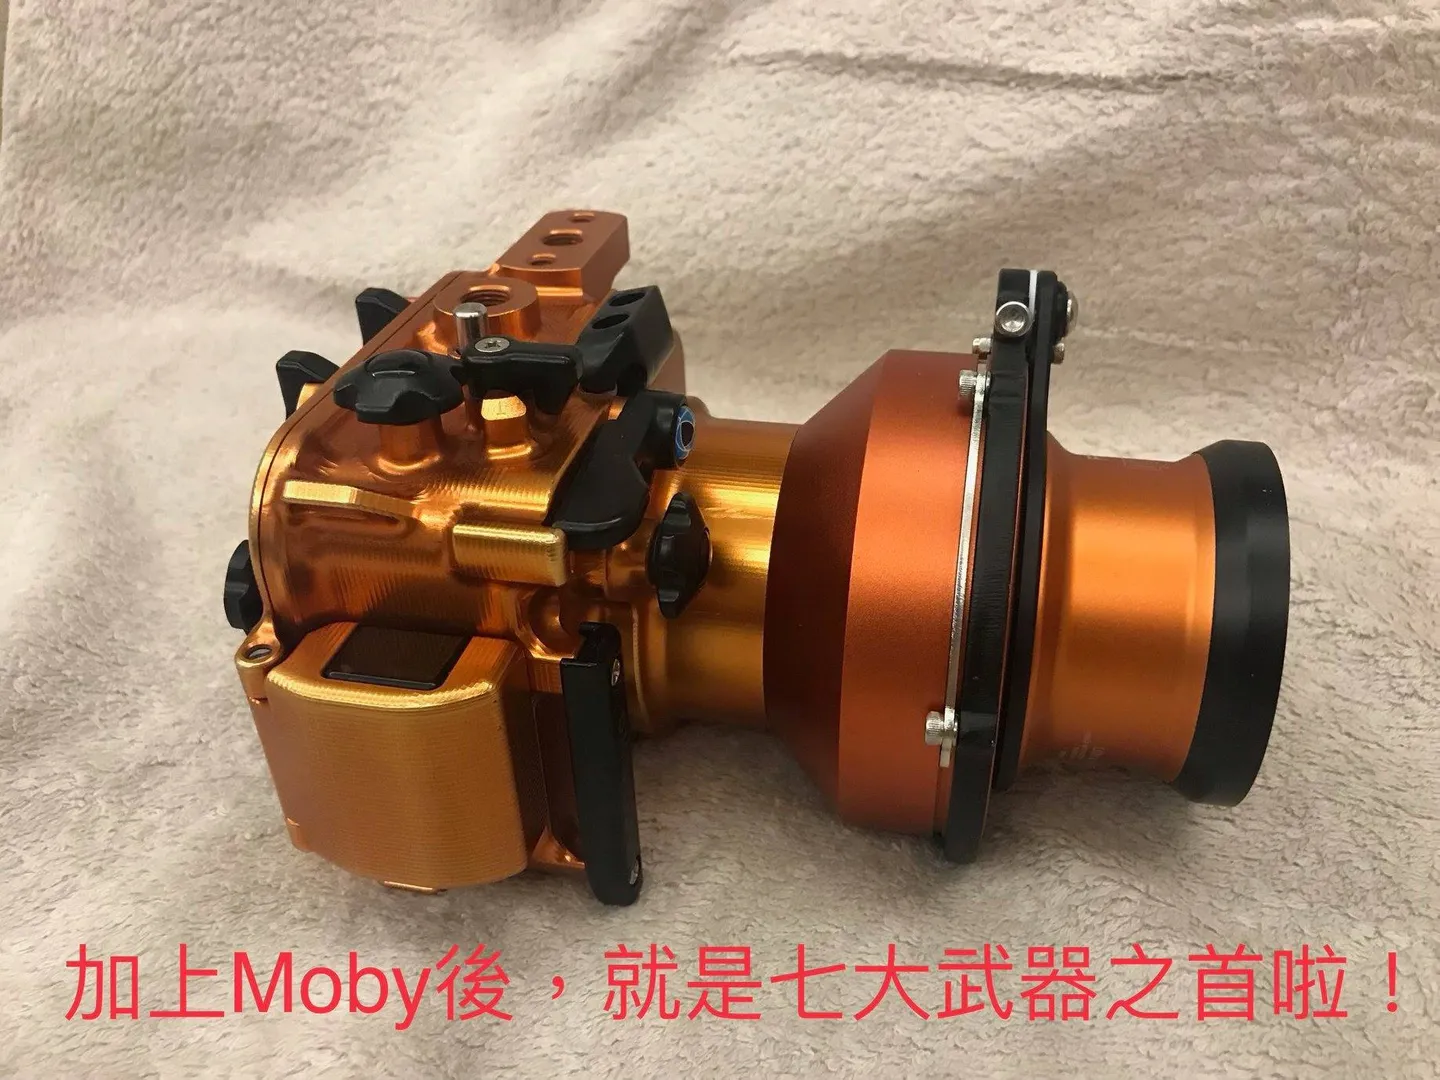
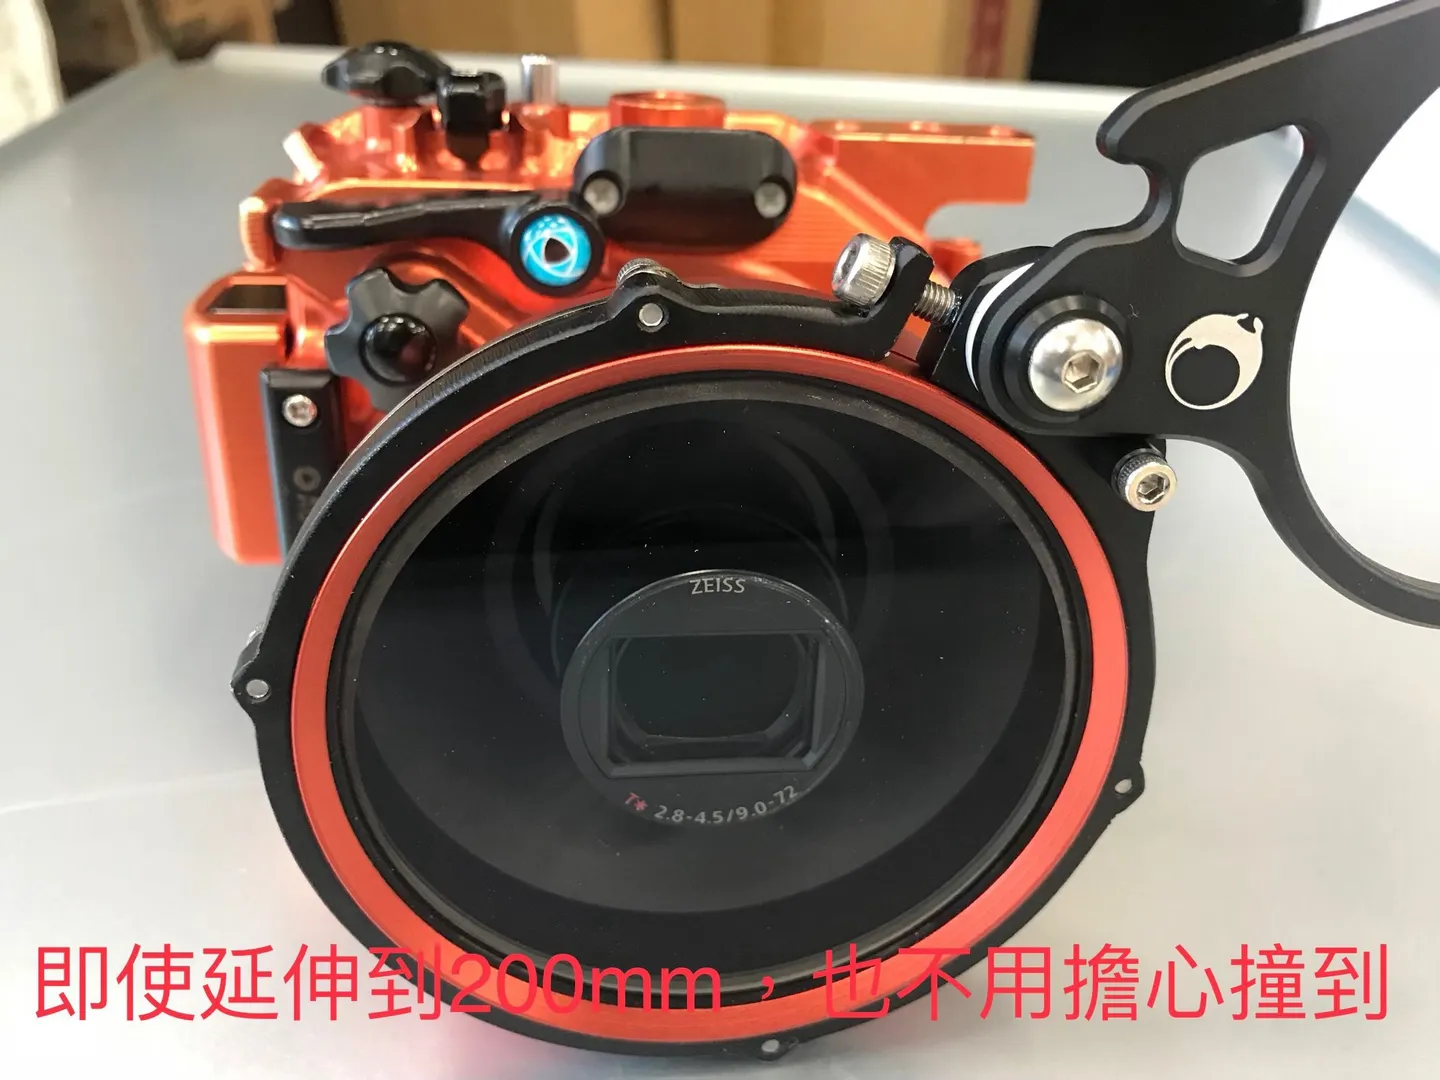
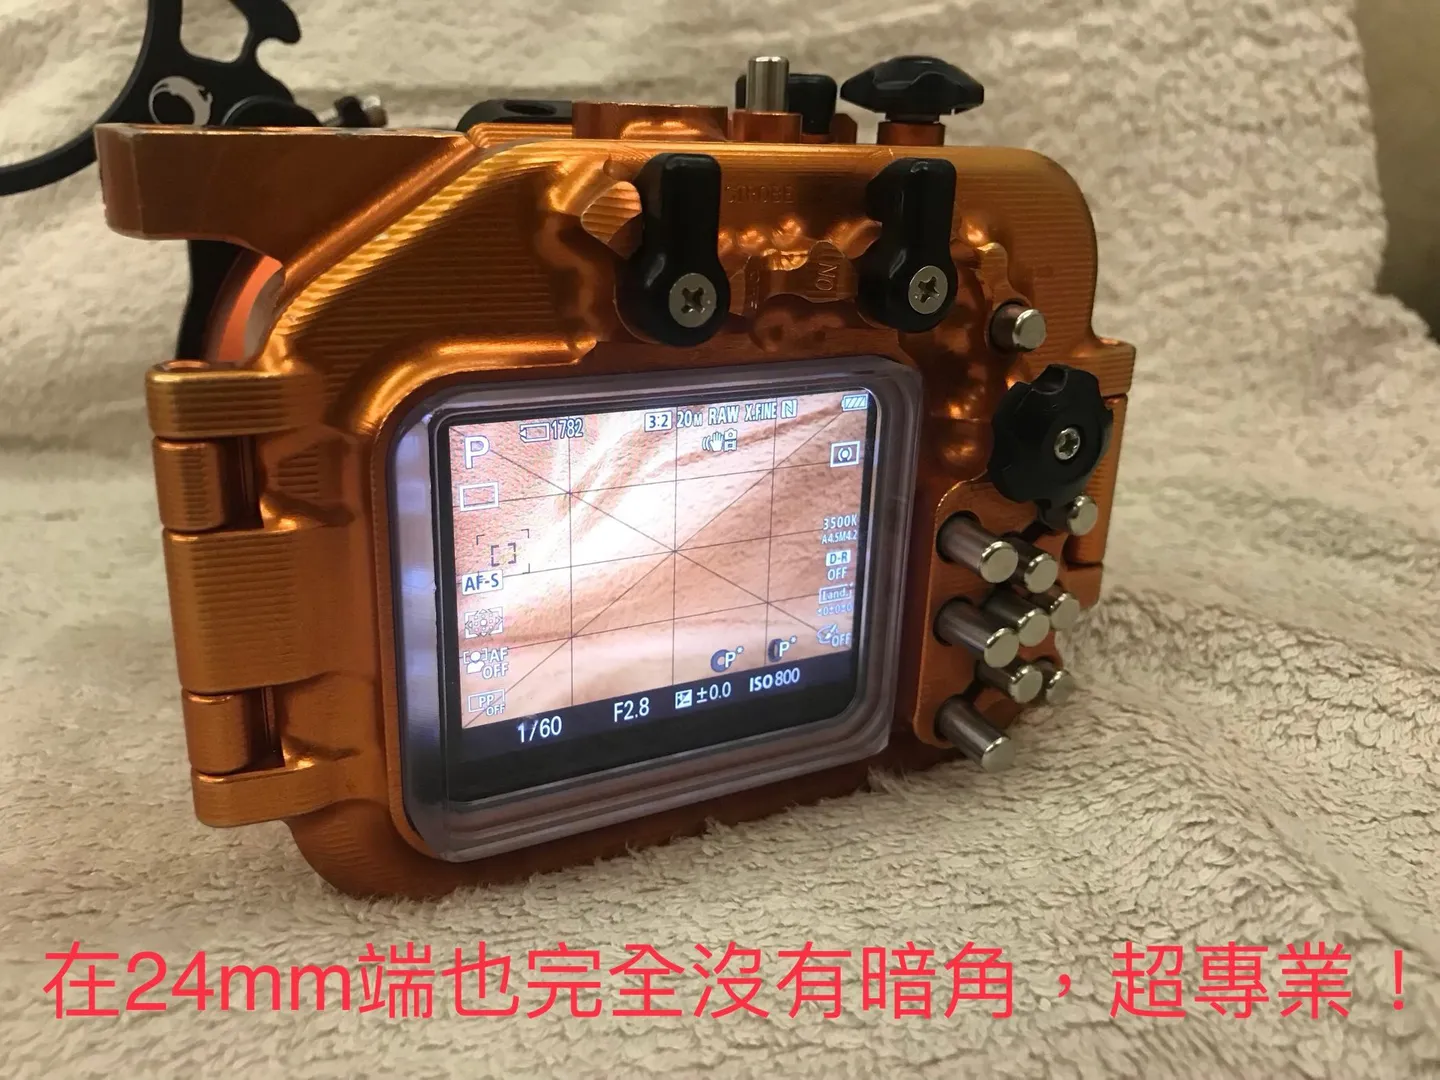
As for the exterior, aside from the lens extending from two segments to three and becoming notably longer (see Figures 03 and 04), if you're not paying close attention, it's hard to spot much difference. However, the professional underwater housing specialist 陳軍豪 noticed that all the buttons have shifted positions slightly, which means the fourth and fifth gen underwater housings cannot be used directly with the sixth gen — some modifications are required before the controls will work properly. I'll leave the specifics of that issue, as well as the longer lens accommodation question, to 陳軍豪 to answer professionally for anyone who needs it. If you have questions in this area, feel free to reach out to him directly. I've attached photos of the port he has already modified (see Figures 05, 06, 07, and 08).
Sony RX100-M6
Sony RX100-M6
Sony RX100-M6
Sony RX100-M6
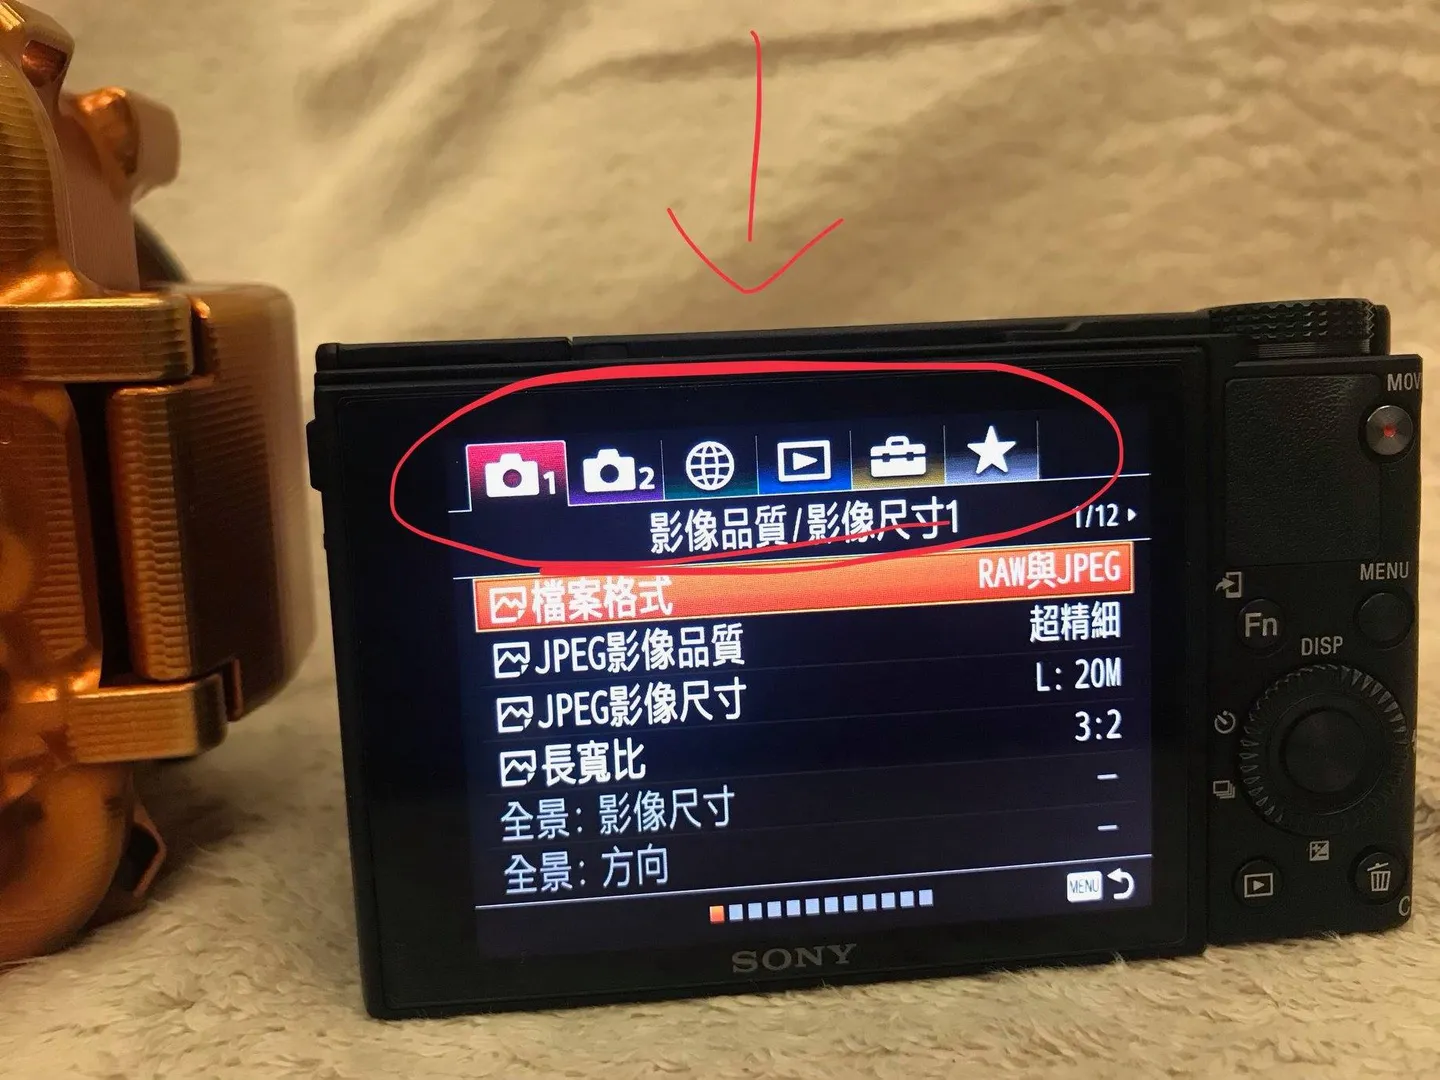
Next, let's talk about the software interface. The sixth gen brings quite significant changes and improvements here. The interface now uses color coding to distinguish different functions and areas (see Figure 09), and many features have been added or enhanced, including autofocus modes and more.
Updated software interface
However, I did notice that two features have been removed, which I personally find very disappointing. The first is the built-in ND filter. The third, fourth, and fifth generation models all had a built-in ND filter, meaning this compact little camera could shoot long-exposure photos — like waterfalls and flowing water (see Figures 10 and 11) — without overexposing, and without needing any external attachments. The sixth gen has dropped this feature entirely, which is a genuine shame.

ND filter function removed

ND filter function removed
The other removed feature is the Sony App functionality. Not many people knew about this, so most won't miss it — but once you've experienced how useful it is, you'll love it. The app allowed you to add built-in time-lapse photography, ND filter simulation, and much more to your camera. You can check out the full details on Sony's website by searching for Playmemories. Unfortunately, this too has been dropped from the sixth gen — for reasons I can't quite figure out.
Most of the above is the stuff many people don't want to hear, but I rambled on anyway — ha ha ha.
Now let's get to the underwater testing. For this session, I brought along three macro diopters: the Subsee +10, the SMC-1 (approximately +12), and the Moby (approximately +30). After going through more than ten scuba tanks worth of testing, here are my impressions~
During the shoot, I happened to come across some damselfish eggs, so I used those as my test subject. Figure 12 shows the actual size of the damselfish eggs (each egg is approximately 0.3–0.5mm), with a macro diopter placed beside them as a scale reference.
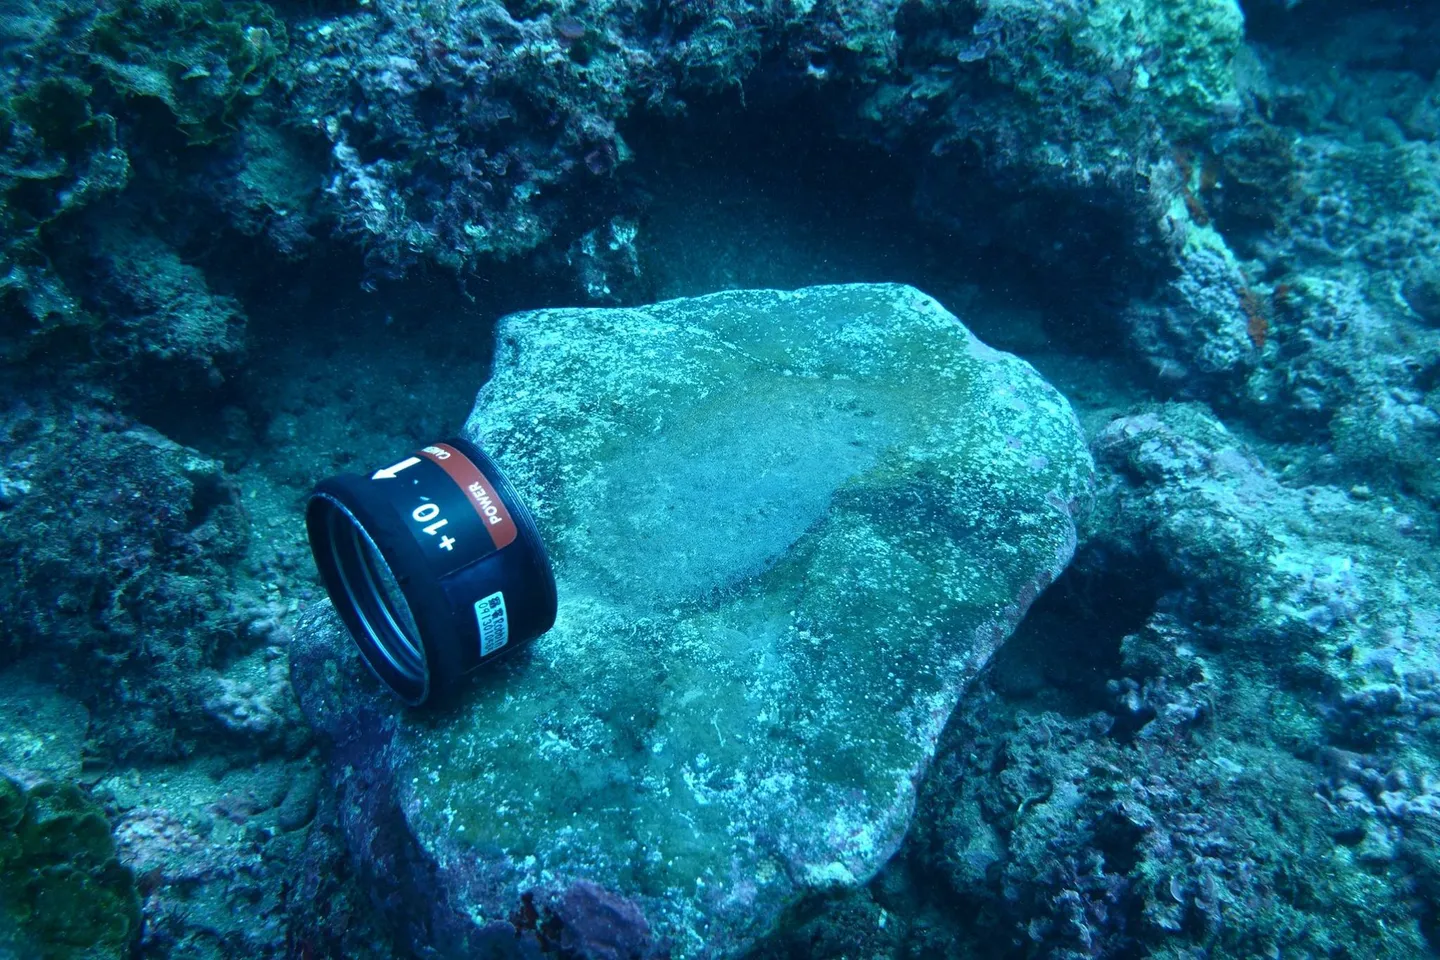
Figure 12: the actual size of the damselfish eggs
Next, I shot with the sixth gen at the 200mm end paired with the Subsee +10 (Figure 13). Within the in-focus area, approximately 3 to 4 rows of eggs were sharp. The magnification is decent, though the eyes inside the eggs aren't particularly clear.
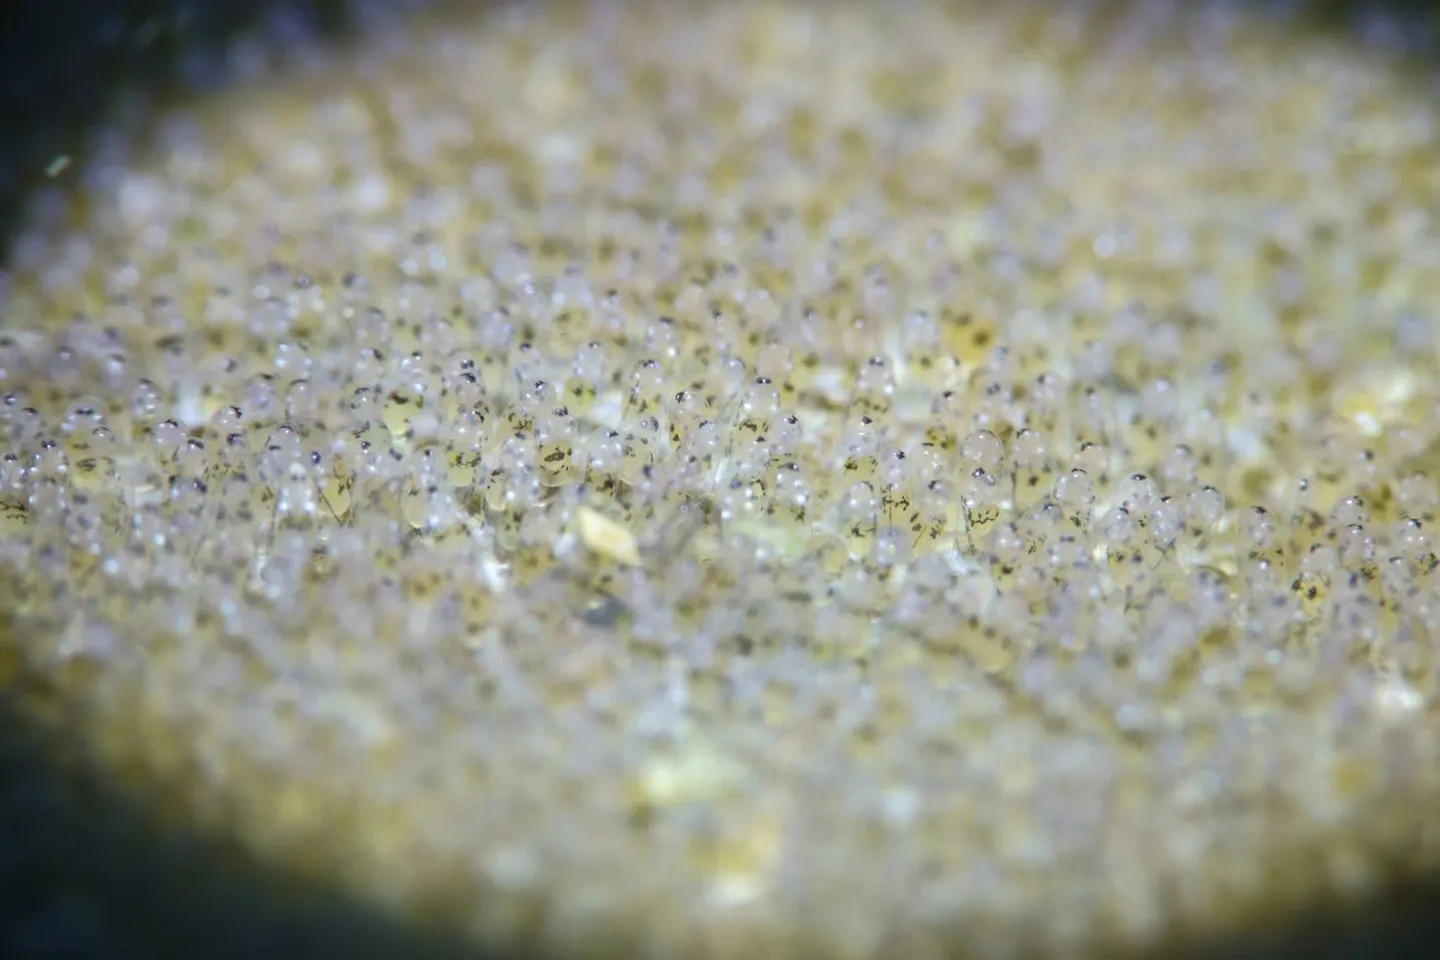
Figure 13 — the eyes inside the eggs aren't clear
Still at 200mm, I then switched to the SMC (Figure 14). The eggs are magnified slightly more than before; again, around 3 to 4 rows of eggs are in focus, and the magnification is still decent, though the eyes inside the eggs remain indistinct.
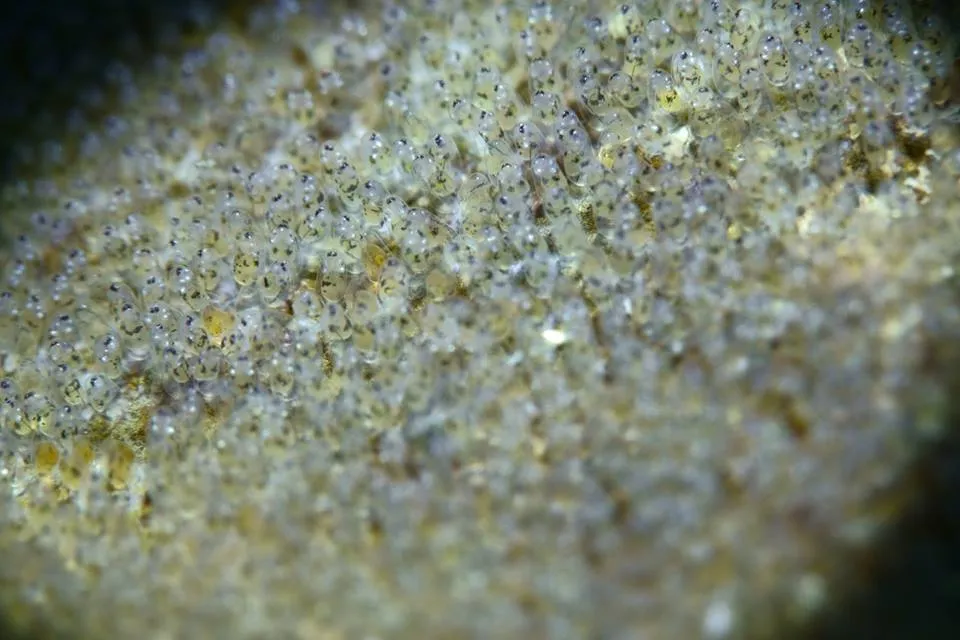
Figure 14 — the eyes inside the eggs are still not clear
Next up was the 200mm end paired with the Moby (Figure 15). You can clearly see that the eggs are much larger now, but the in-focus zone has narrowed to roughly just one row of eggs — the depth of field is extremely shallow.
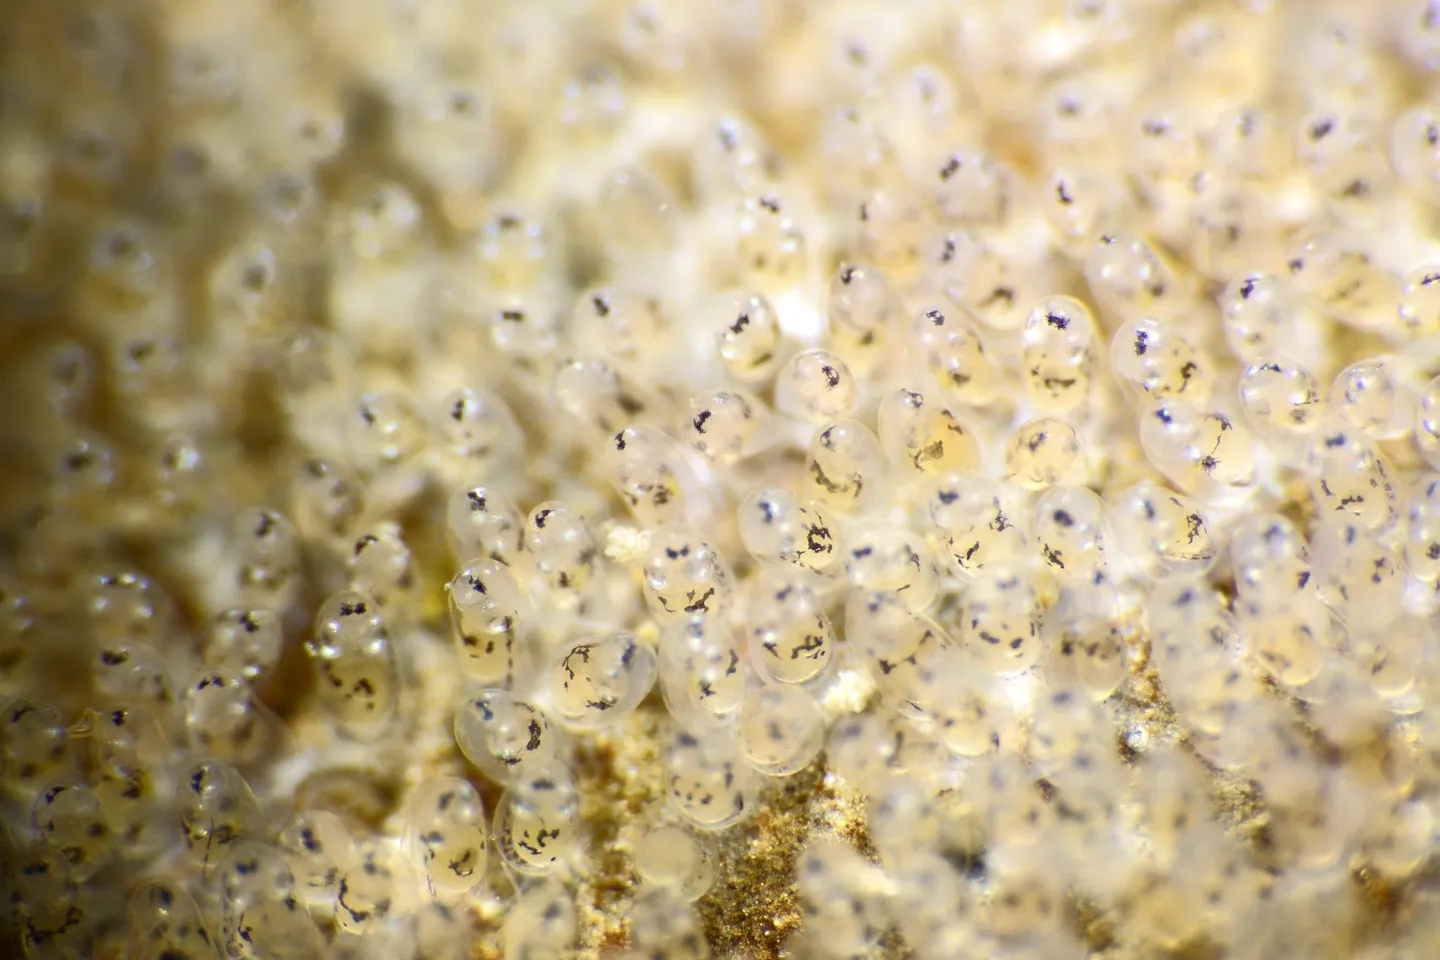
Figure 15 — eggs magnified, but depth of field is extremely shallow
Trying to focus at 200mm + Moby was genuinely agonizing — incredibly difficult. The tiniest accidental nudge would send your focal plane flying completely off target. So if you want this kind of extreme magnification, you'd better have rock-steady hands.
I also tried 150mm and 100mm, and focusing became noticeably easier. At that point it's worth thinking: that insane magnification at 200mm with its razor-thin depth of field — what can you actually use it for? Is it worth sacrificing some reach and sticking to 150mm, or even just 100mm?
In practice, once you've found your subject, think first about what kind of image you want to present to the viewer. Do you want an incredibly large subject filling the frame? A subject at a reasonable size with a beautiful backdrop? Something else entirely? Once you've decided on your vision, then choose your camera settings accordingly.
Testing your camera's various capabilities and quirks extensively is always worthwhile — you'll find that some so-called weaknesses, when used thoughtfully, can actually become strengths. I'll share one technique I've discovered for turning a limitation into an advantage.
As mentioned earlier, at 200mm + Moby the depth of field is extremely shallow, which means everything outside the focal plane turns into bokeh. I used this to my advantage: I shifted the focus point toward the bottom of the frame so the front row of eggs would be in focus, letting the eyes inside the eggs behind them blur into beautiful bokeh! (See Figure 16)
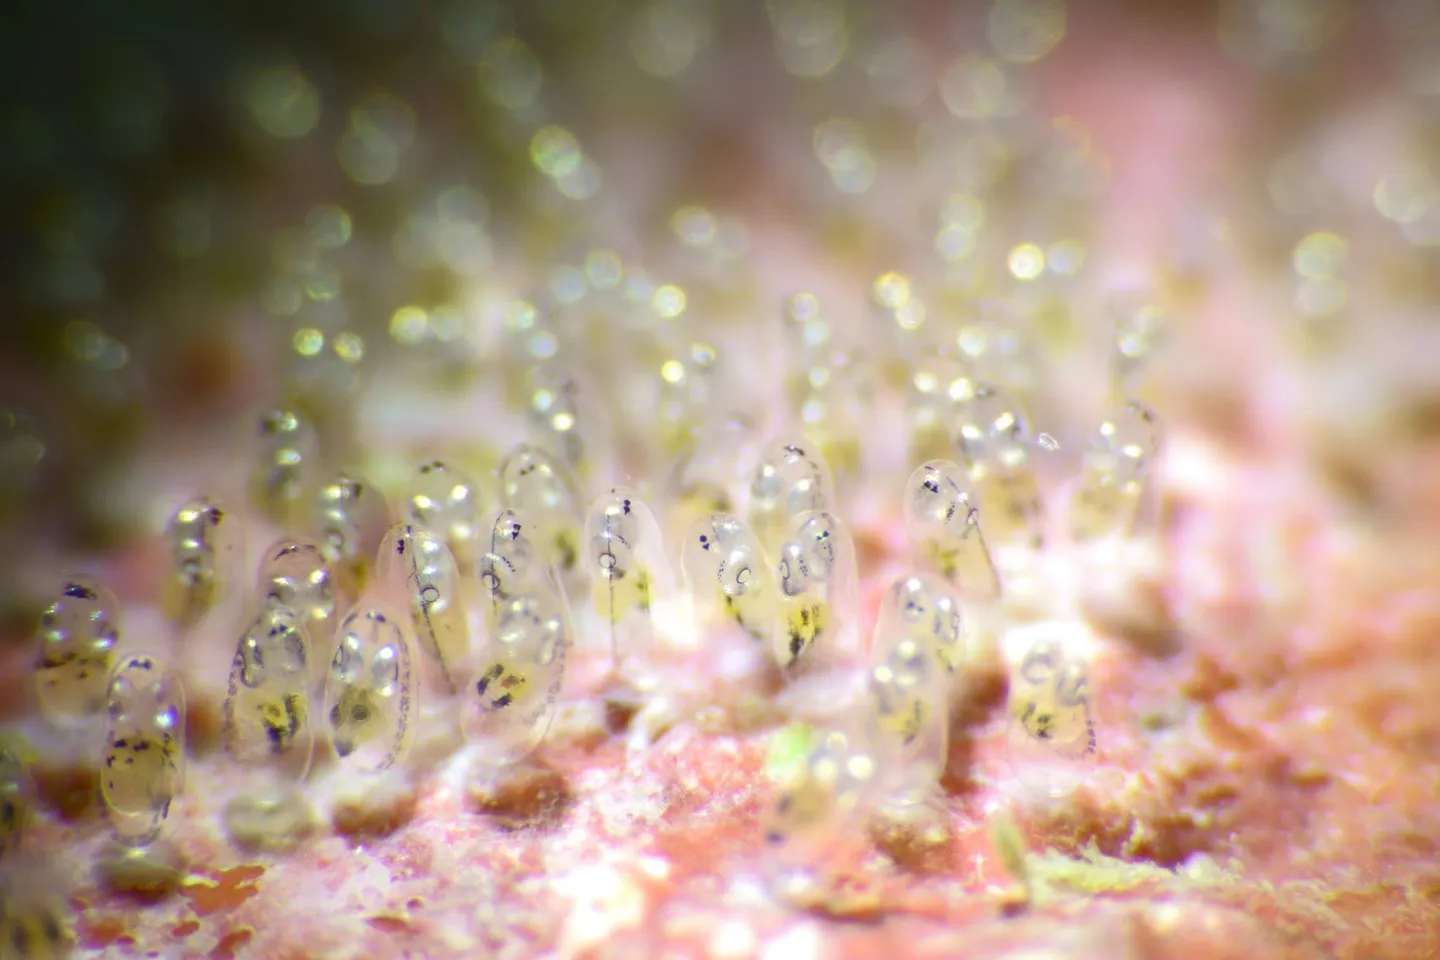
Figure 16 — perfect egg bokeh shot
I hope you've enjoyed this unprofessional little unboxing and field test, and that it proves useful to you!
Related links: