![[What Your Instructor Never Taught You!] A Deep Dive into Regulator Details — Part 2](/_images/46e47eb26ca5-480w.webp)


If you haven't read Part 1 yet, here's the link: [What Your Instructor Never Taught You!] A Deep Dive into Regulator Details — Part 1
《Regulator Detail Series #5 — The Atomic Oil-Filled Regulator》
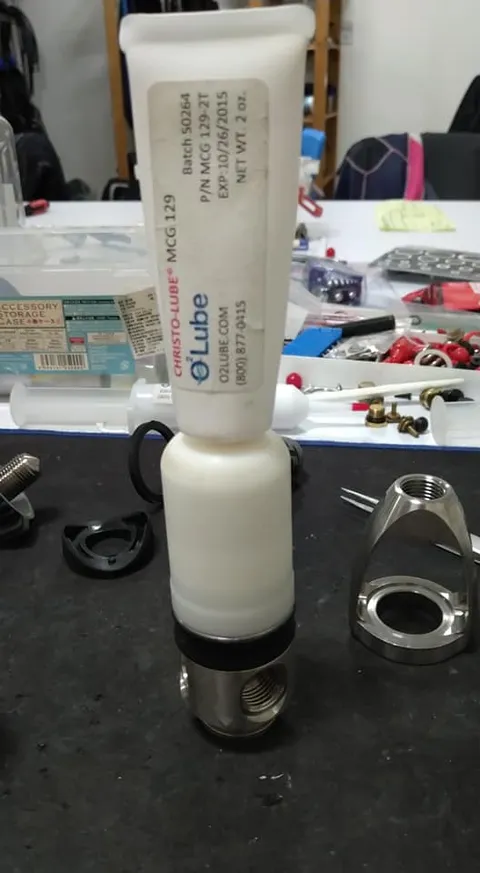
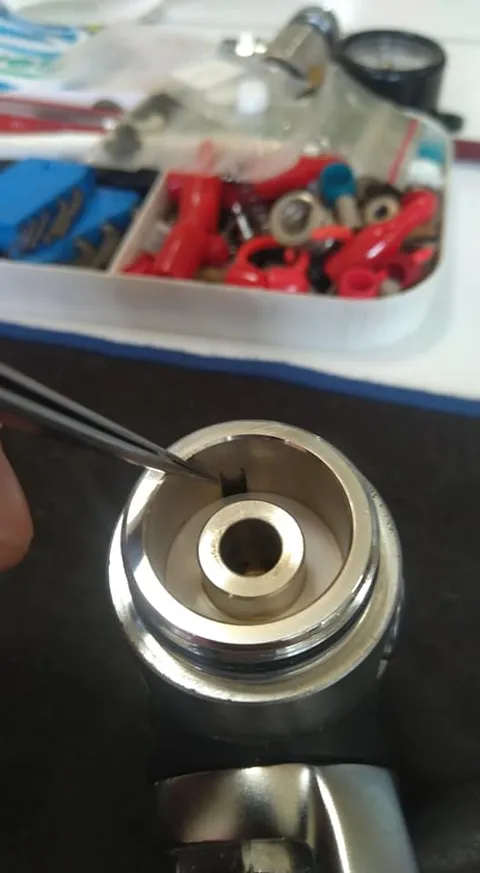
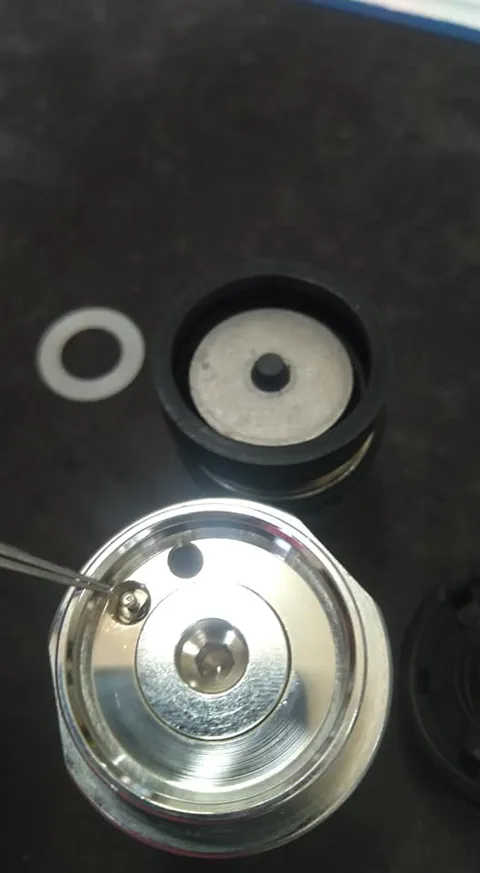
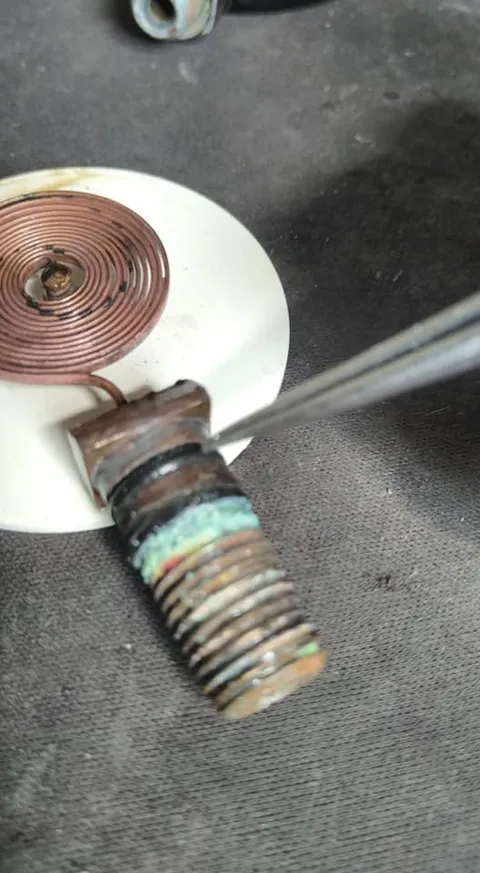
Besides its titanium construction, the Atomic T-series regulator is arguably best known for its industry-exclusive oil-filling technology. So what exactly is this mysterious substance, and what makes it so special? Atomic injects MCG-129 using a specialised tool (top row, left image) into the space between the intermediate-pressure (IP) spring and the piston (top row, centre image). A flexible rubber ring then seals the port that would normally allow seawater to enter. As a result, external water pressure compresses the rubber, the rubber pressurises the MCG-129, and the MCG-129 presses against the piston — effectively transmitting water pressure indirectly.
2 Benefits of Oil-Filling a Regulator:
-
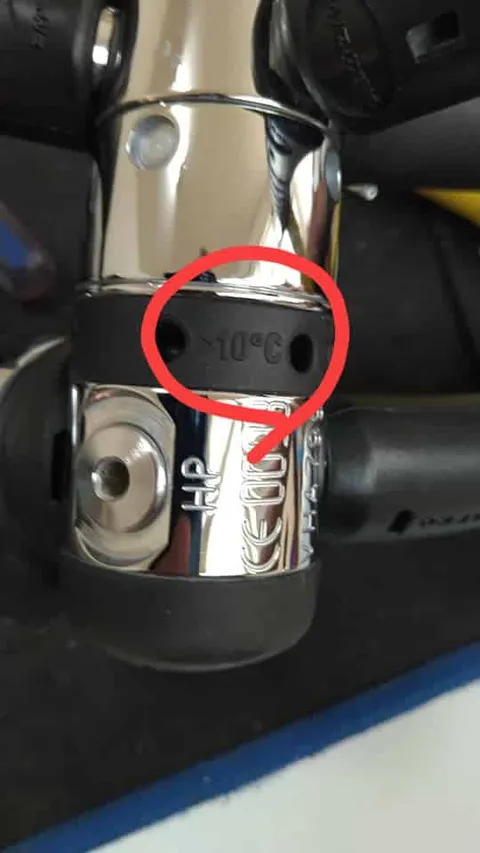
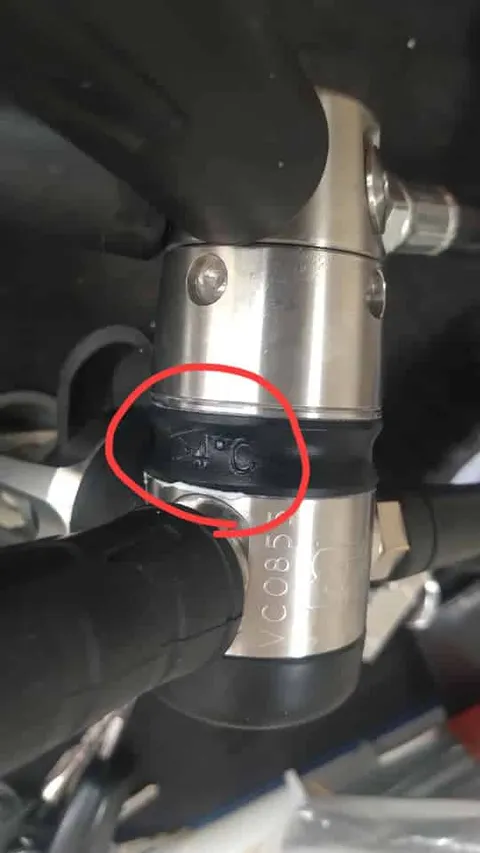
Freeze resistance: In a conventional first stage regulator, seawater enters the chamber surrounding the IP spring to provide ambient pressure compensation (don't worry if that went over your head — it really only makes sense after you've taken an equipment servicing course; but if you took my course and still don't get it, you're in for a spanking). When the regulator reduces high-pressure gas from the scuba tank down to intermediate pressure, the pressure drop causes the gas to expand and absorb heat — you've probably noticed how cold the dust cap feels after you blast it with air. When the surrounding water temperature is very low, this heat-absorption effect can cause the seawater inside to freeze. Picture it like a scene out of Frozen — ice encasing the IP spring, locking it up and rendering the regulator inoperable. By replacing the seawater with MCG-129, water can no longer enter the regulator's interior, naturally eliminating the freeze-failure problem. Notice the difference in the body markings between the B2 and the T3: the B2 is rated for operation above 10°C (top row, right image), while the T3 is rated above 4°C (bottom row, left image) — a 6°C improvement in minimum operating temperature.
-
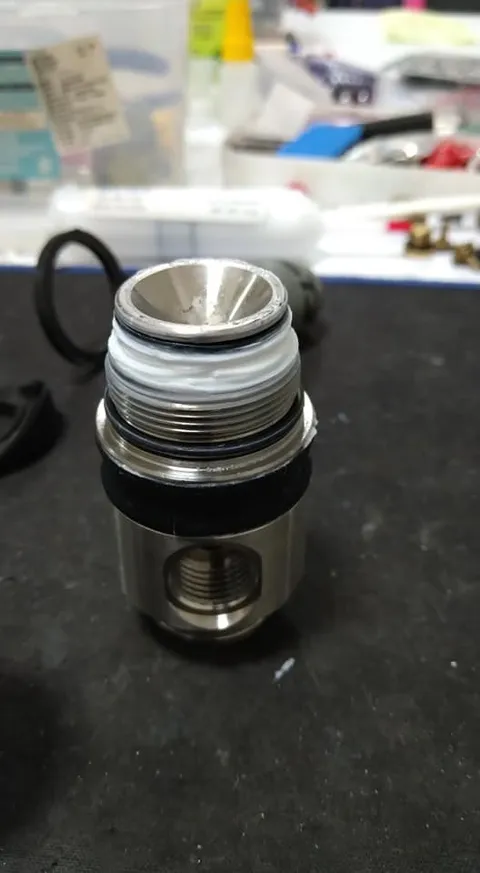
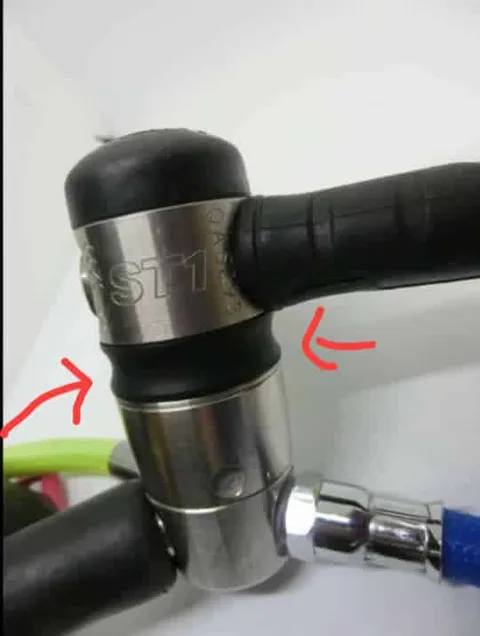
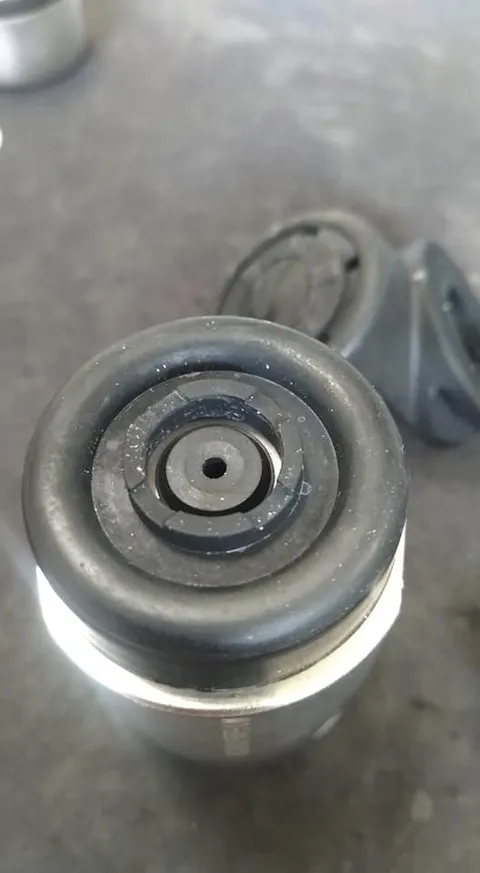
Corrosion and contamination resistance: When dirty water enters the interior of a piston-balanced first stage, contaminants can interfere with the piston's reciprocating motion and cause malfunctions. By replacing the seawater with MCG-129, dirty water is kept out of the regulator's interior, naturally preventing such failures — and with no seawater entering, there is no corrosion either. However, if oil is lost over extended use or was insufficiently injected to begin with, the internal vacuum will disappear. In minor cases, seawater may seep in, potentially disrupting proper ambient pressure compensation. To check whether the oil level is sufficient: attach a scuba tank and open the valve, then feel the black ring in the middle of the T3 to see whether it is firm. After releasing the pressure, check whether the black ring retracts inward. A properly filled T3 should have a "waist" ... (bottom row, right image) — when the regulator is not in operation, the piston drops down, increasing the internal volume, and the fully charged oil pulls the black ring inward. If the black ring does not retract, the internal vacuum has been lost.
Regulator Detail Series #5 — The Atomic Oil-Filled Regulator
Regulator Detail Series #5 — The Atomic Oil-Filled Regulator
Regulator Detail Series #5 — The Atomic Oil-Filled Regulator
Regulator Detail Series #5 — The Atomic Oil-Filled Regulator
Regulator Detail Series #5 — The Atomic Oil-Filled Regulator
《Regulator Detail Series #6 — The Odd One Out》
A typical first stage regulator is either a diaphragm type or a piston type. Today, however, we're going to look at a piston-type first stage that also incorporates a diaphragm — a design that challenges many conventional assumptions about how regulators work.
The Diaphragm-Assisted Piston First Stage — Sherwood
In a conventional piston-type first stage, the intermediate pressure (IP) drops as tank pressure decreases, and the design is unsuitable for cold-water environments (below 10°C) because the piston can freeze and stop functioning. Neither of these problems exists with the Sherwood. For the working principle of a piston-type first stage regulator, please refer to https://bluetrend.media/regulators-introduce-first-stage/
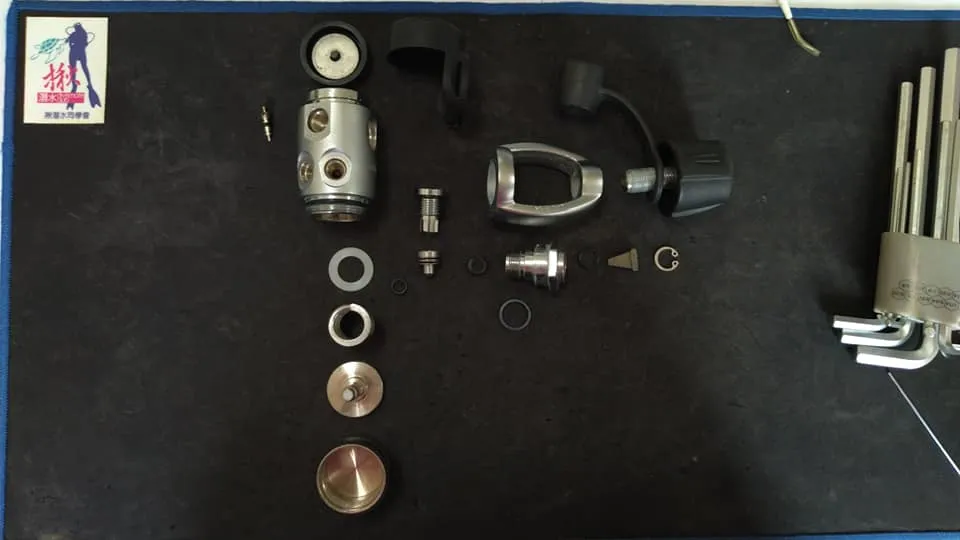
First, Sherwood redesigned the high-pressure inlet port to automatically adjust its height using a spring leaf and the tank's incoming gas pressure (top row, centre image). When tank pressure is high, the inlet is pushed downward, shortening the distance to the high-pressure seat on the piston. This reduces piston travel, compresses the IP spring less, and lowers the IP output. Conversely, when tank pressure drops, the spring leaf pushes the inlet upward, raising IP output. This self-compensating mechanism effectively cancels out the pressure variation, allowing the regulator to deliver a stable intermediate pressure regardless of tank pressure.
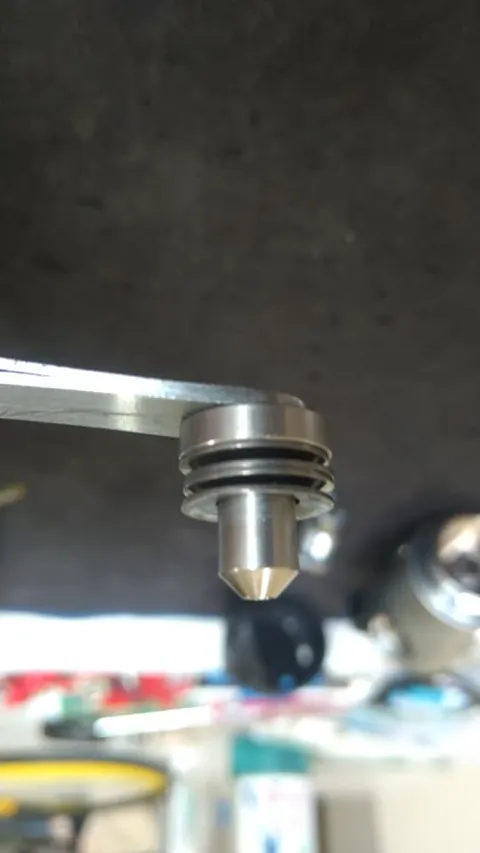
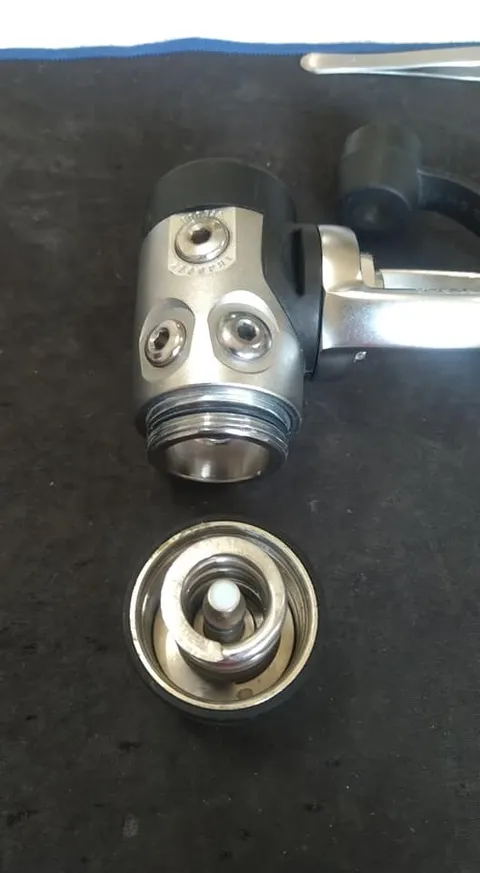
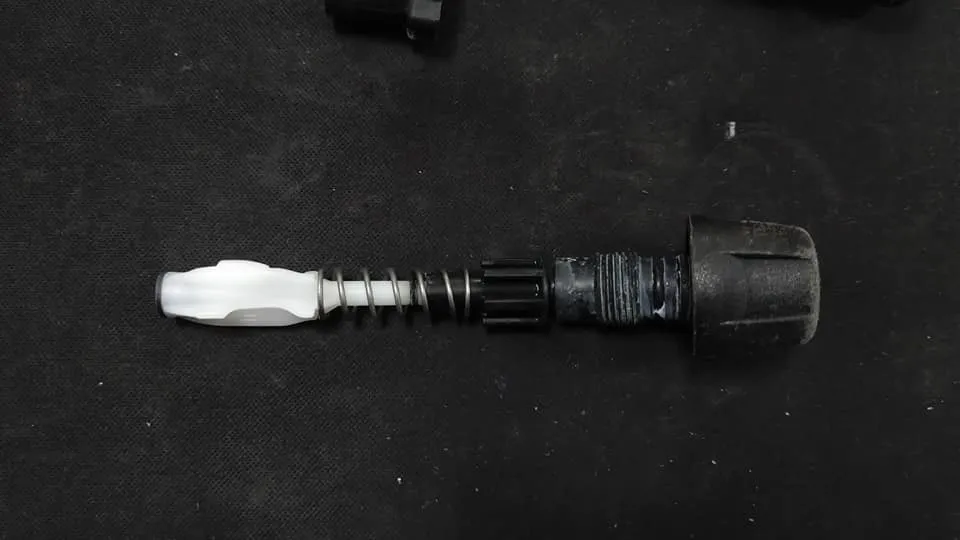
Looking closely at the exterior of this first stage, you'll find no water ports anywhere — it is a fully environmentally sealed design (video). So how does it achieve ambient pressure compensation? The key is that instead of water, it uses air to pressurize the IP spring chamber (top row, right image; bottom row, left image). The spring chamber is completely sealed, but a small air port feeds air into it — and this port is connected to the top of the first stage.
At the top sits a diaphragm (bottom row, centre and right images). When descending, as water pressure exceeds the internal air pressure, the diaphragm is pushed inward, forcing air out through the nozzle (video) until the internal air pressure equals the external water pressure. In this way, the IP output rises as water pressure increases (video 9). Conversely, when ascending, the internal air pressure exceeds water pressure, and air naturally vents (video — audible leaking sound), reducing air pressure back to match the ambient water pressure. The entire system uses air as an indirect medium for transmitting water pressure.
This design keeps the IP spring chamber completely sealed and free from water contact — eliminating corrosion entirely, and more importantly, making the regulator suitable for use in polluted water and ice diving.
Regulator Detail Series #6 — The Odd One Out
Regulator Detail Series #6 — The Odd One Out
Regulator Detail Series #6 — The Odd One Out
Regulator Detail Series #6 — The Odd One Out
Regulator Detail Series #6 — The Odd One Out
Regulator Detail Series #6 — The Odd One Out
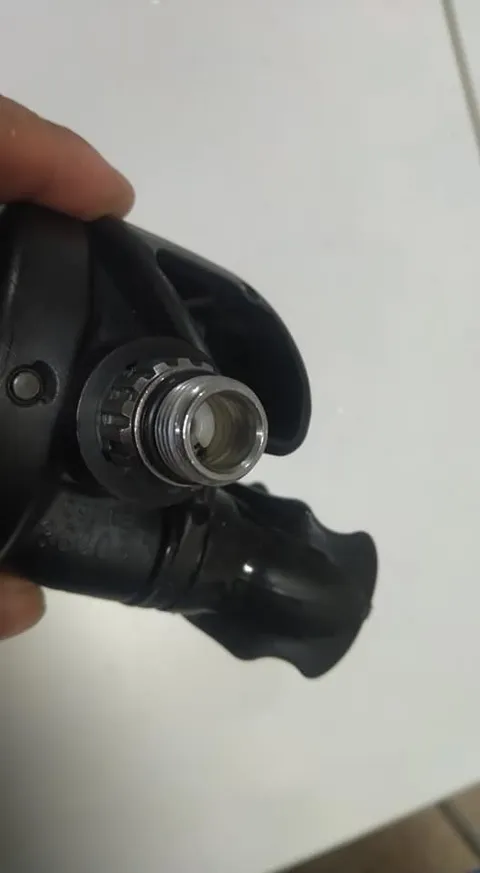
《Regulator Detail Series #7 — Scubapro's Different Series, Different O-rings》
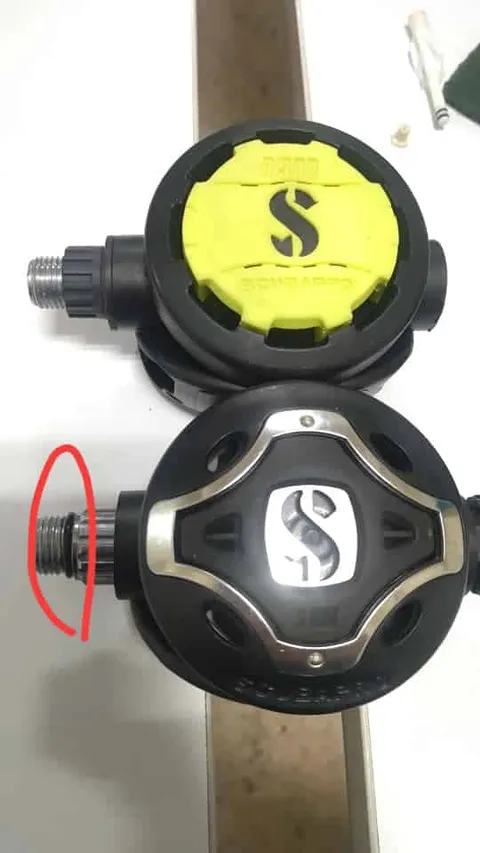
Why Does the Scubapro S-Series Second Stage Have an Extra O-ring on the Spindle?
Have you ever noticed that Scubapro's S-series second stage regulator has an extra O-ring on the spindle, while the R-series does not?
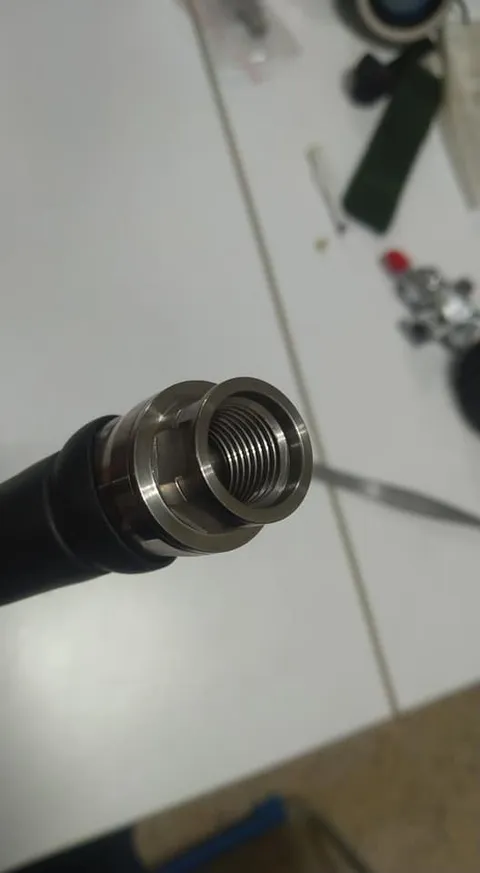
(Figure 1) — let's call it the second stage external spindle O-ring (AS-013). In fact, even after the retaining screw is removed, there is yet another O-ring behind it (Figure 2). The actual airtight seal of the second stage is created by the O-ring inside the second stage spindle (Figure 3) and the O-ring on the inner bore of the second stage tube (Figure 4) (AS-010) — this combination is what allows the swivel to rotate. However, some swivel fittings don't have an inner bore design (Figure 5); in those cases, the external spindle O-ring (Figure 1) must serve as the seal.
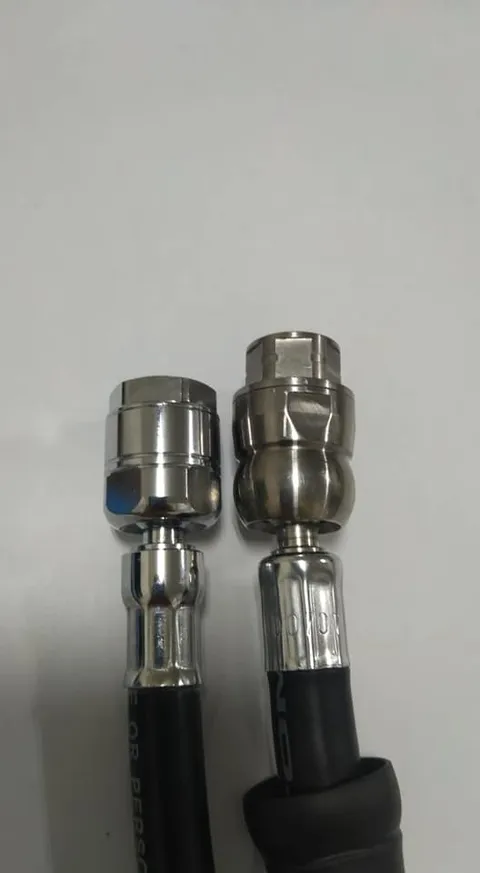
Swivel fittings also come in short and long versions (Figure 6). When installing a long swivel fitting, you must remove the retaining screw and the first O-ring, then thread the long fitting directly onto the spindle. In this configuration, the second (inner) external spindle O-ring provides the airtight seal.
So in the S-series, these two O-rings are included as standby components — their purpose is to accommodate a variety of swivel fitting types. The R-series, by contrast, lacks this provision, meaning that if you want to use a swivel fitting with an R-series second stage, you must specifically choose the type shown in Figure 3.
Regulator Detail Series #7 — Scubapro's Different Series, Different O-rings

Regulator Detail Series #7 — Scubapro's Different Series, Different O-rings
Regulator Detail Series #7 — Scubapro's Different Series, Different O-rings
Regulator Detail Series #7 — Scubapro's Different Series, Different O-rings

Regulator Detail Series #7 — Scubapro's Different Series, Different O-rings
Regulator Detail Series #7 — Scubapro's Different Series, Different O-rings
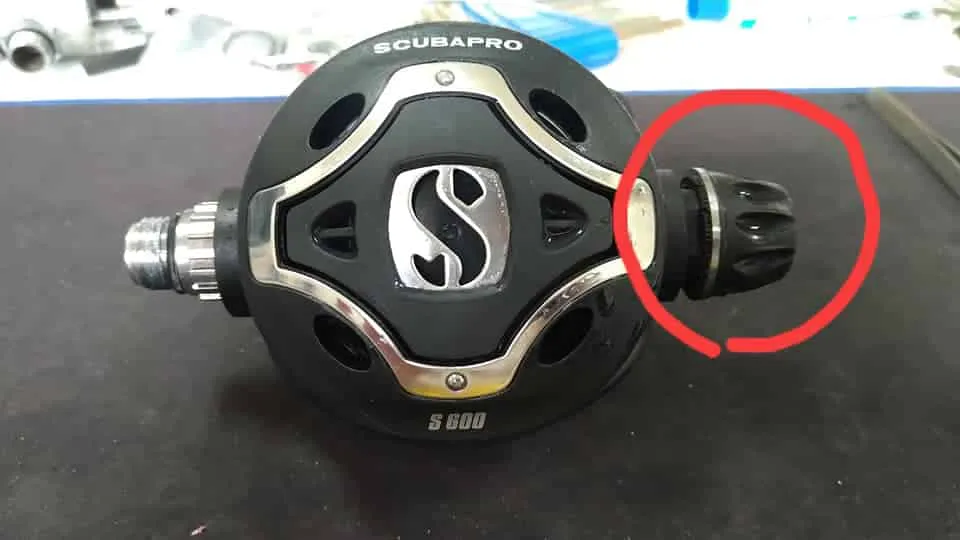
《Regulator Detail Series #8 — Go Back and Loosen That Knob!》
When many people pick up a second stage regulator, the first thing they do is reach for that knob and crank it all the way in. Others mistakenly believe it controls the volume of air delivered. Both of these are wrong.
In reality, what this knob does (see figure 2 below) is simply compress the spring. When the spring is compressed, you need to inhale more forcefully to pull the lever and trigger airflow from the second stage. With the same amount of effort, the lever travels a shorter distance, the valve doesn't open as wide, and naturally less air is delivered.
But here's what you may not know: the standard technical specification calls for the knob to be fully backed out (loosened all the way), and the second stage to be tuned for optimal resistance while remaining free of free-flow. In plain terms: tightening the knob only makes breathing harder.
Setting up a second stage that doesn't free-flow is easy enough, but getting one that is both free-flow-proof and effortless to breathe from is genuinely difficult. Cranking the knob in randomly just undoes all the careful calibration your technician put in. So when should you actually use this knob?
If after extended use you notice the second stage has developed a slight free-flow, it may be due to spring fatigue — at that point, turning the knob in slightly is appropriate. You may also turn it in slightly during a dive when water pressure is causing the second stage to free-flow. Alright, now that you've read this — go back and loosen that knob. Otherwise, no matter how good your regulator is, you're just wasting it.
Regulator Detail Series #8 — Go Back and Loosen That Knob!
Regulator Detail Series #8 — Go Back and Loosen That Knob!
Don't forget your annual regulator service — find a trusted shop and dive with greater peace of mind.
《Bonus Feature — How to Choose a Pressure Gauge (SPG)?》
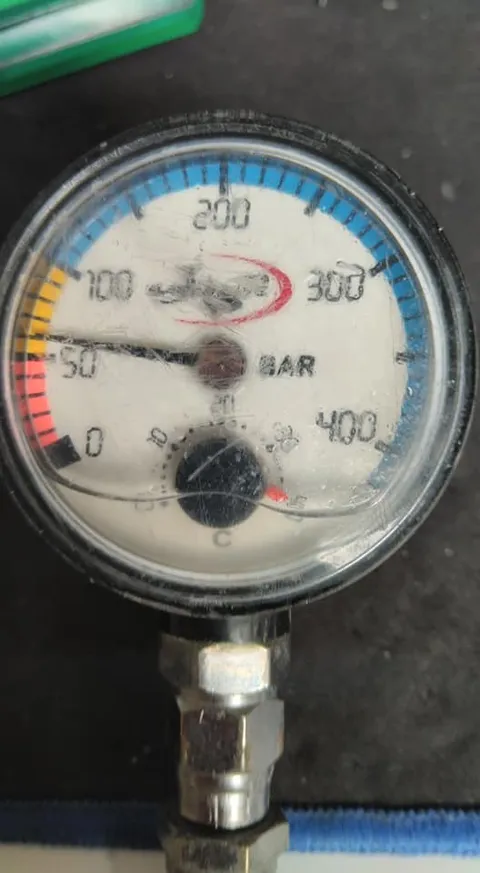
A cautionary tale: yet another pressure gauge (SPG) from a certain brand "S" has bitten the dust. Out of the four units I personally own, three have now flooded — a failure rate of 75%. The old, the middle-aged, and the relatively new, all laid out in a row — quite the spectacle. From 2013 to 20??. Even more heartbreaking: all four were pool-use equipment, typically operating at a working depth of no more than 5m.
Per standard practice, an unnatural death demands an autopsy to determine the cause. The suspected culprit: the O-ring between the metal body and the plastic housing had aged and failed. The tragic part? Those two O-rings cannot be serviced or replaced — from day one, they were always destined to fail. There's no going back.
Sincere advice: when purchasing a pressure gauge (SPG) console, prioritise all-metal housing. At minimum, look for a one-piece construction. Plastic housings are structurally weaker, prone to cracking under pressure, and have a much shorter service life.
Bonus Feature — How to Choose a Pressure Gauge (SPG)?
Bonus Feature — How to Choose a Pressure Gauge (SPG)?
Further reading:
-
[What Your Instructor Never Taught You!] A Deep Dive into Regulator Details — Part 1
-
[What's This Gear?] Scubapro Diving Regulator Demystified! SCUBAPRO Diving Regulator Unboxing
-
[What's This Gear?] Atomic Diving Regulator Demystified! ATOMIC Diving Regulator Unboxing
-
[What's This Gear?] Apeks Diving Regulator Demystified! APEKS Diving Regulator Unboxing
