The Editor says: More and more divers are shooting with cameras these days, but every time we admire the photos from master underwater photographers, our jaws hit the floor — nothing but awe. Fortunately, a growing number of divers are happy to share their experience. Beyond camera settings, they're even willing to share the legendary secrets of post-processing. So don't hold back — share this article widely so everyone can master Photoshop mask techniques in no time!
Underwater Photography Contributor: Candy Lin (Facebook)
Learning through online resources and never being too proud to ask the masters for guidance, Candy Lin has, over the past few years, built a quiet reputation in the diving community — all with a compact Olympus TG4. Beyond the commonly used Lightroom, the software most people already have on their computers is Photoshop. With its powerful post-processing capabilities, Candy has — through the guidance of experienced photographers — worked out her own masking workflow. She's sharing it freely, in the hope that everyone will continue to share their beautiful photos!
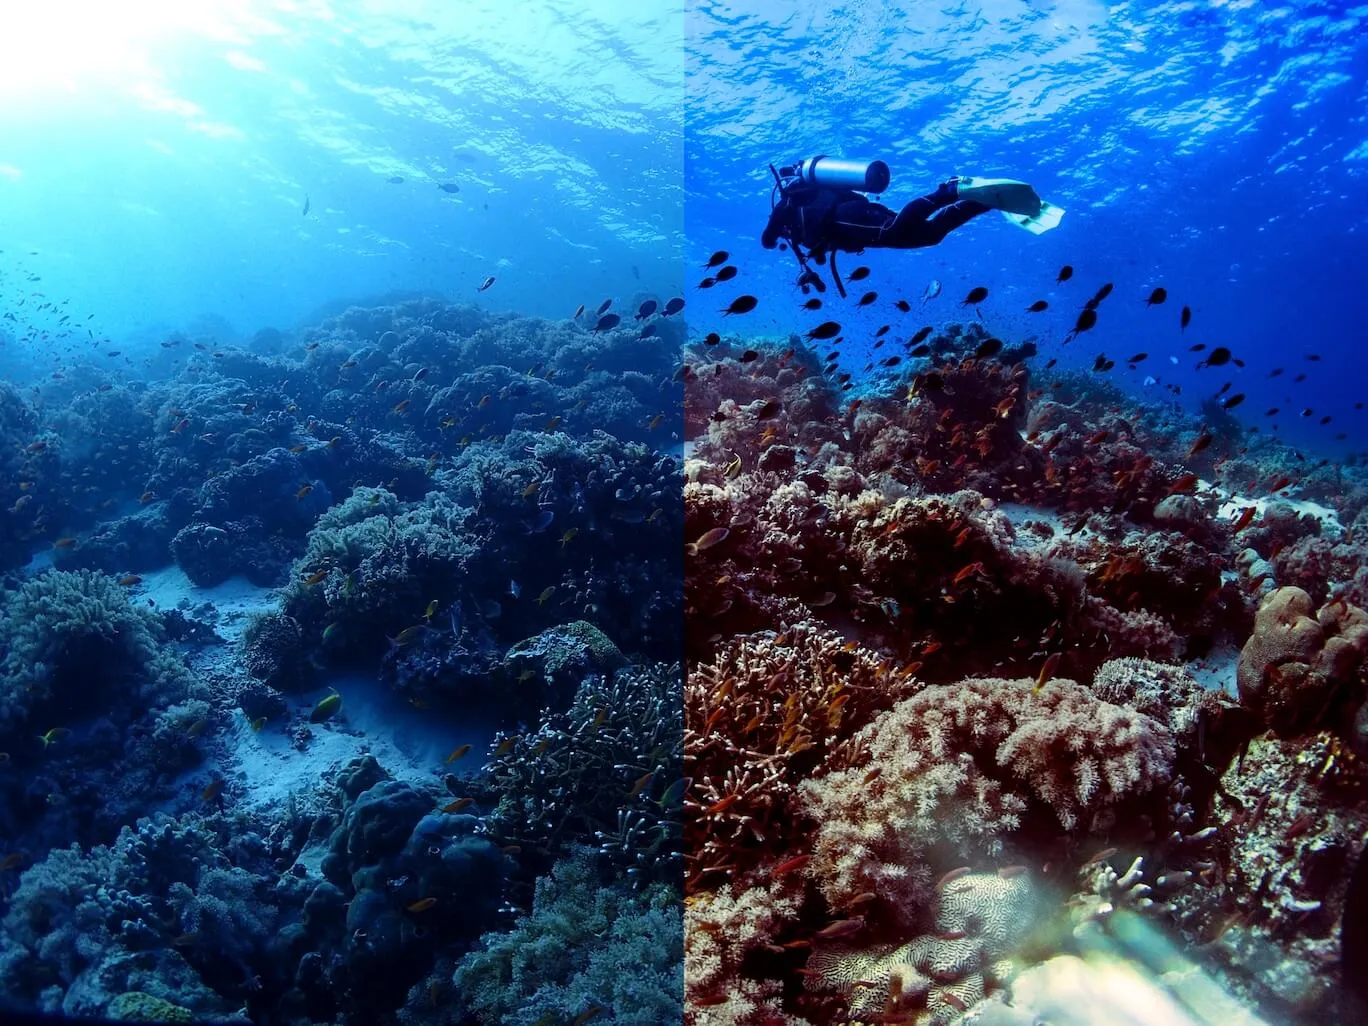
Before diving into the tutorial, let's take a look at the difference before and after using masks!
Before applying the mask
After applying the mask
Steps for Adjusting Underwater Photos in Photoshop (Using Masks)
1. Initial Adjustments and Import
The reason I use Photoshop (PS for short) is that every photo has different depth values — I prefer to edit them one by one, because each shot is unique and I like to dial in colors that appeal to me personally.
My shooting setup is an Olympus TG4 with a Weefine wide-angle lens attached; no strobe or video light was used for this photo.
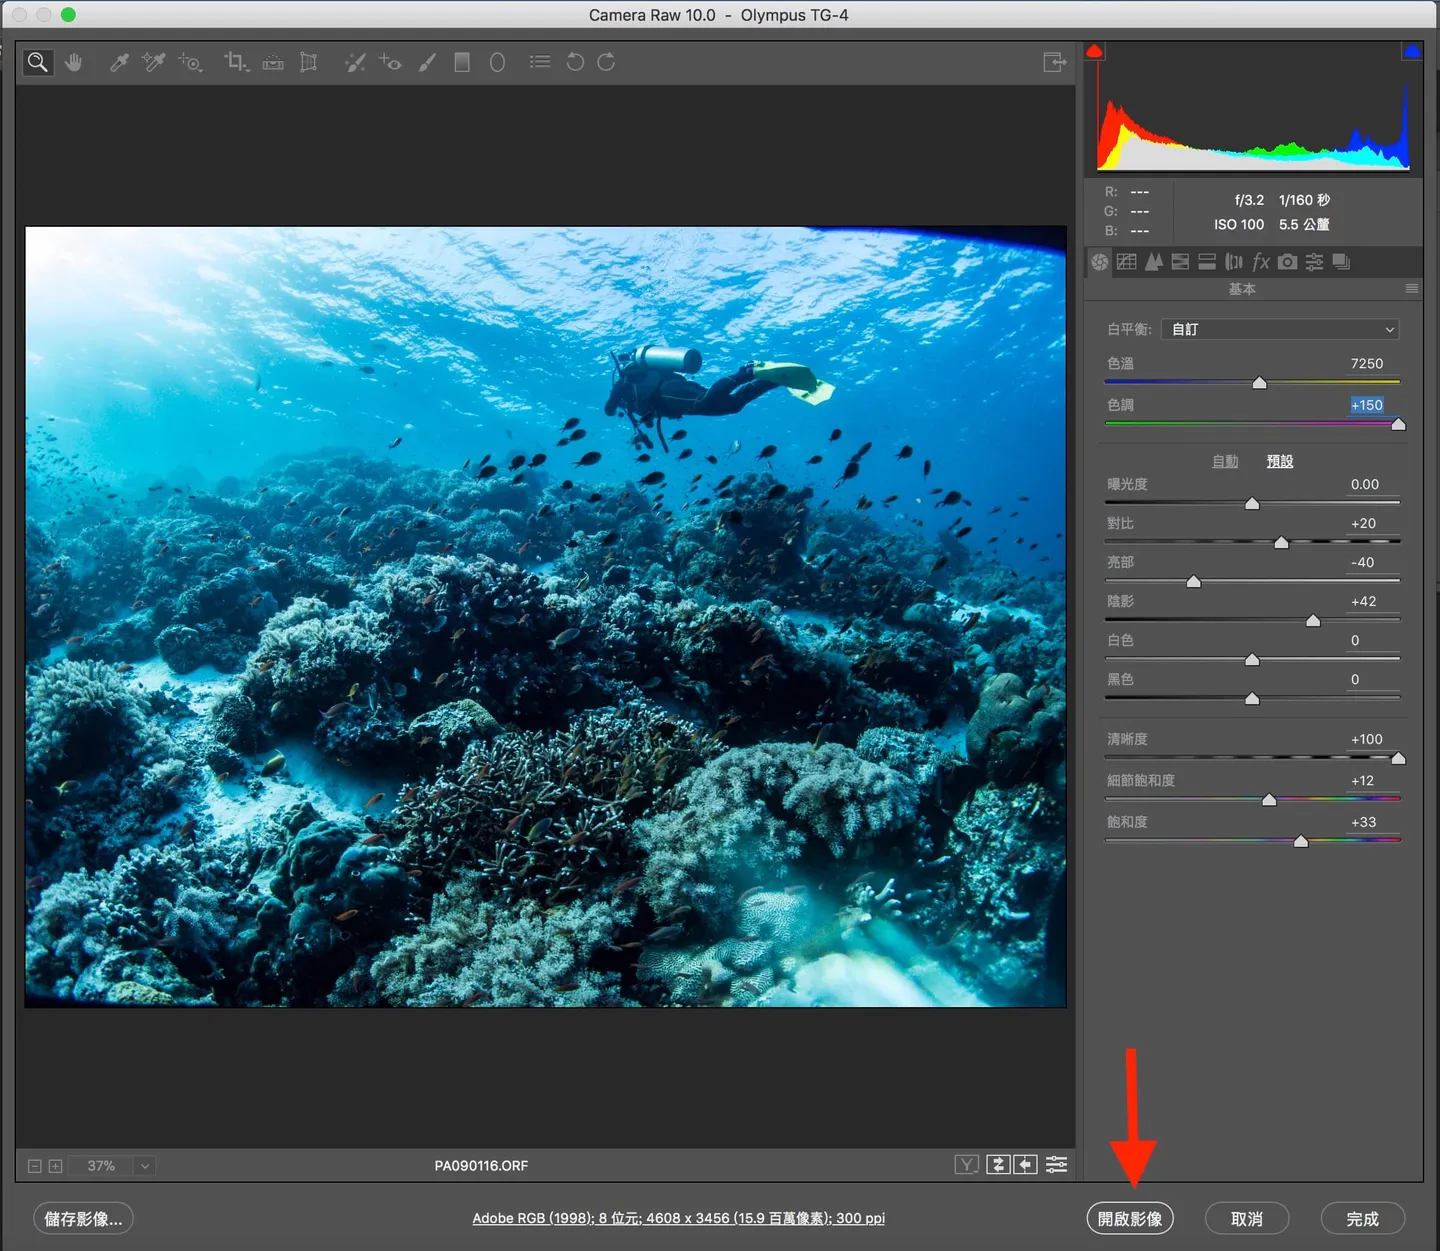
Start by opening the image (I shoot in RAW format). The Camera Raw plug-in dialog will appear first (if your version of PS can't open RAW files, you'll need to install this plug-in).
You can make some basic preliminary adjustments here. How exactly? Honestly, I'm no expert either — just drag the sliders until the image looks right to your eye. To develop that sense of what looks good, spend time appreciating great photos, both on land and underwater. That said, there are no absolute rules about beauty in photography — feel free to experiment with your own style, or even imitate others' work at the start. Once you're happy with the adjustments, click "Open Image" to enter the PS workspace.
2. Crop to the Right Size
Once inside PS, take this photo as an example: the wide-angle lens housing cast a black vignette in the upper-right corner. You can use the Crop tool to trim the image, or use the Healing Brush to clean up the dark edges. Since this tutorial focuses on masks, I won't go into detail on that here.
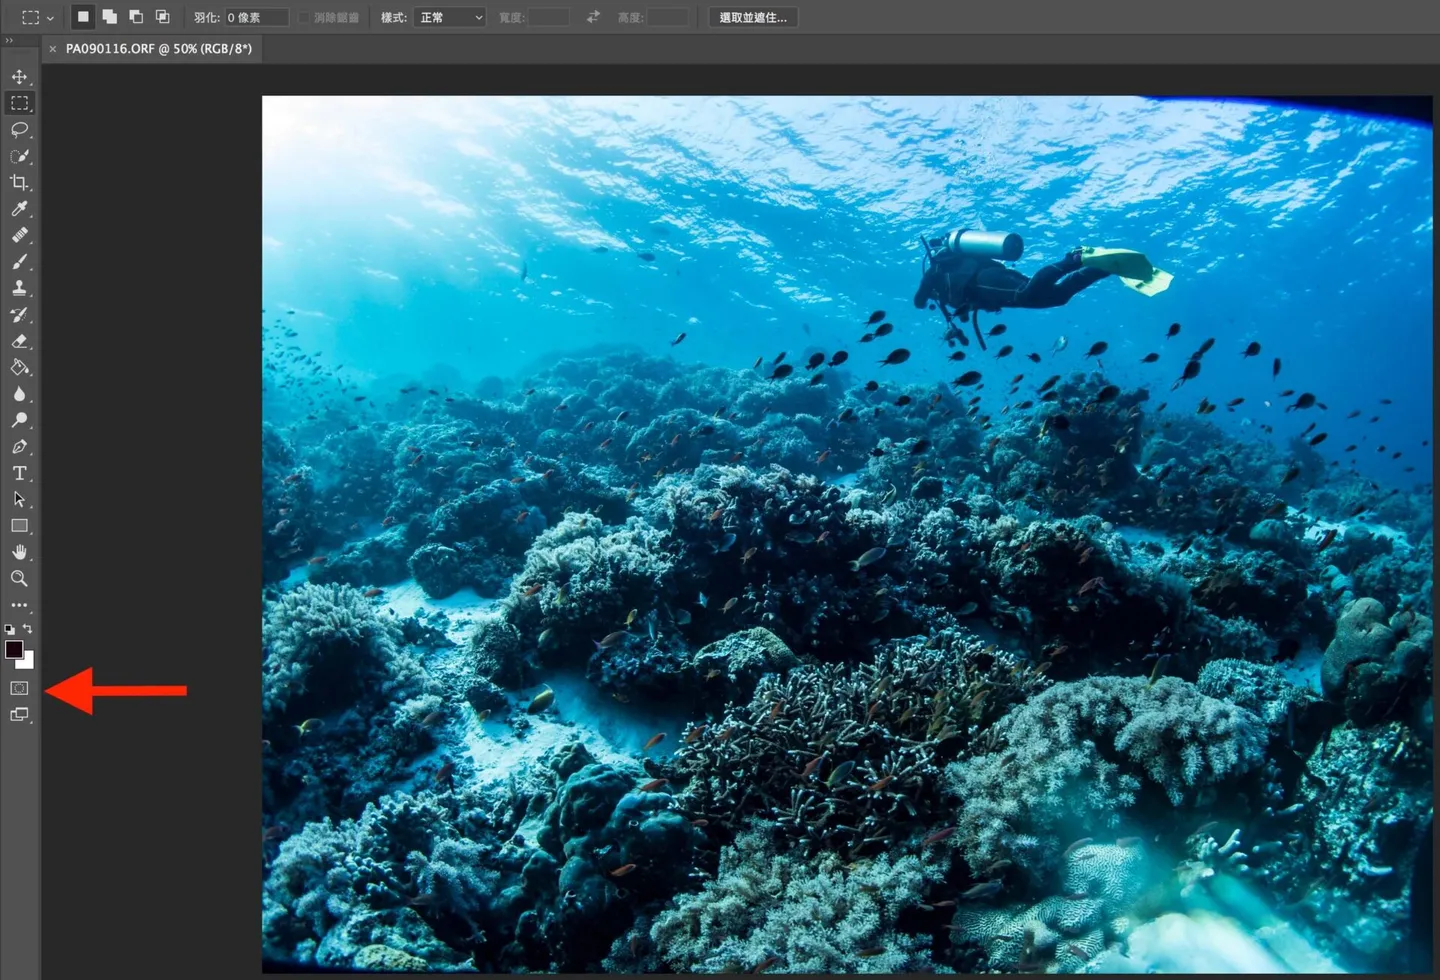
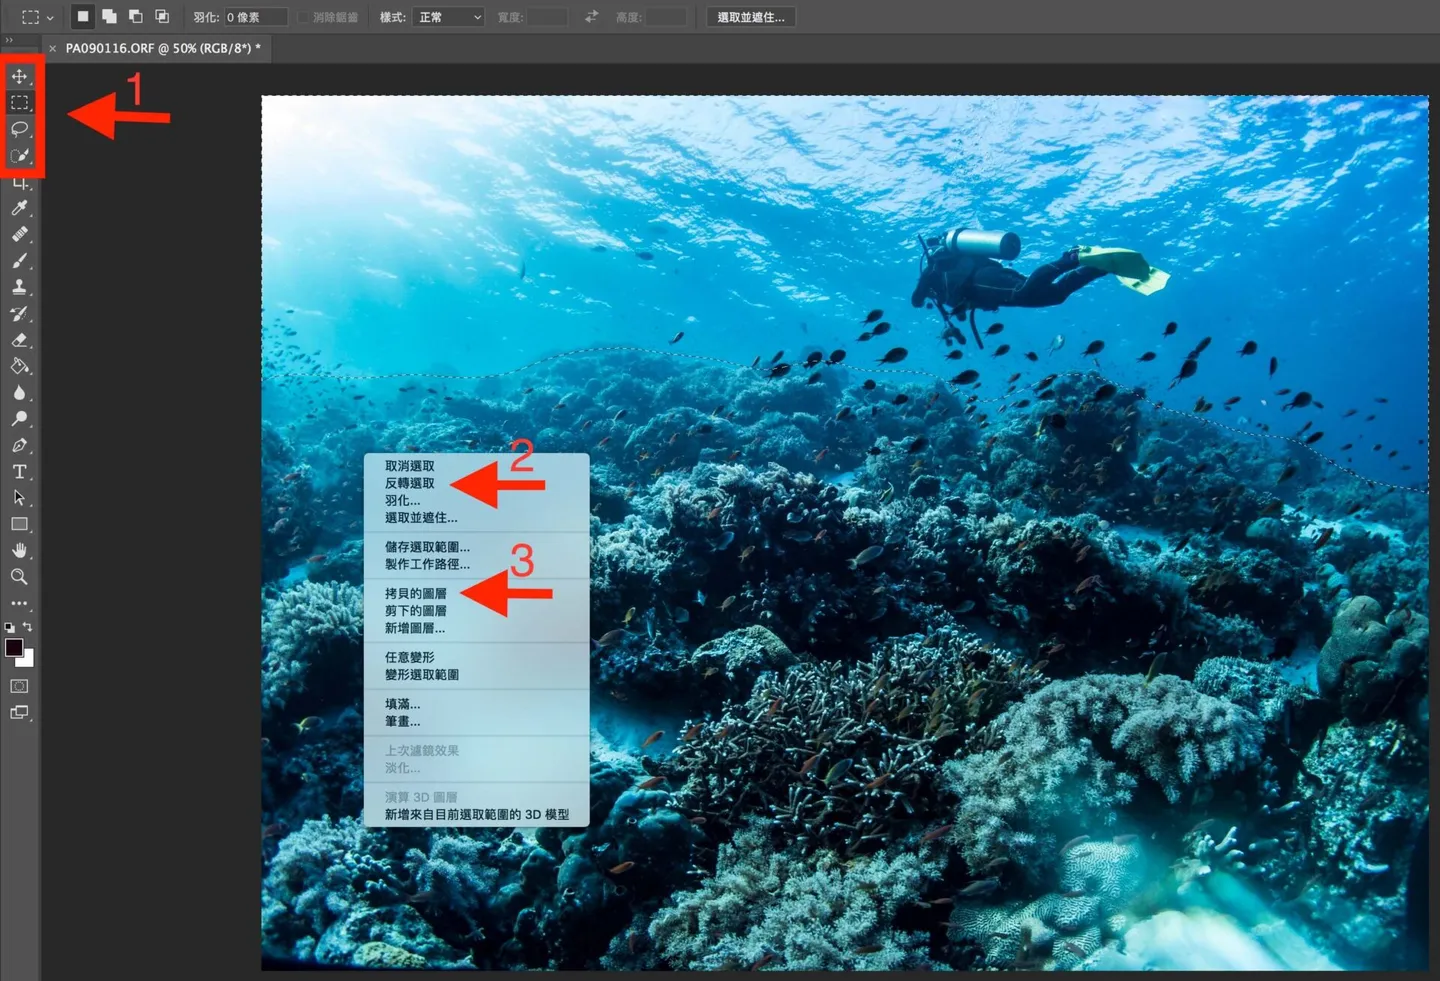
3. Select the Quick Mask
There are many ways to use masks; I'm sharing the method I use — which is, admittedly, the only one I know. First, click on Quick Mask, located at the bottom of the toolbar.
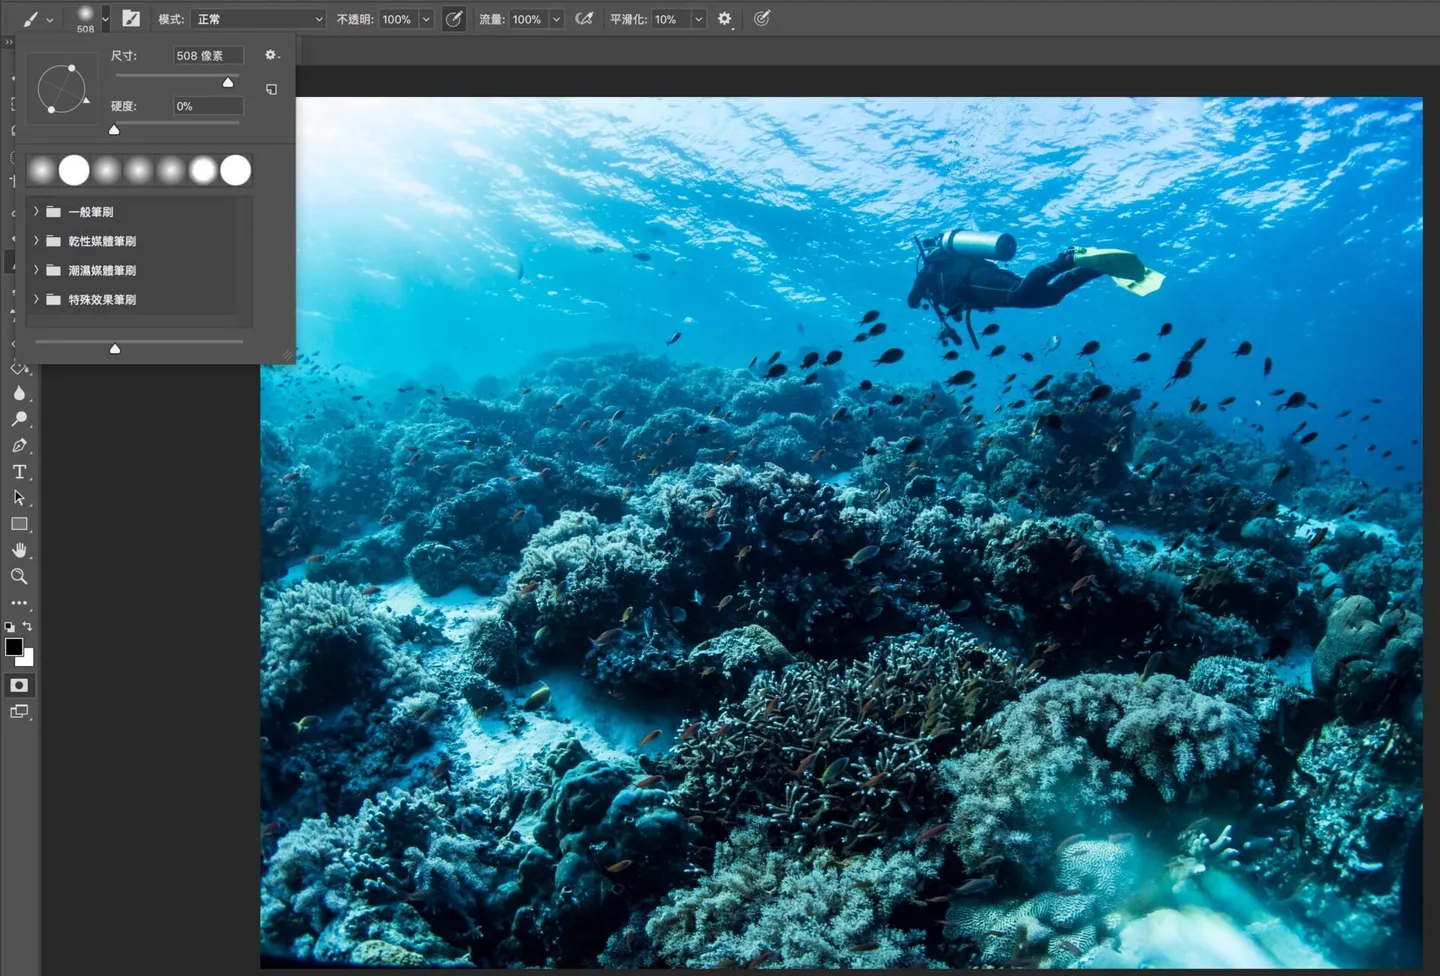
4. Brush Adjustment
With Quick Mask active, select the Brush tool. Brush size is up to you, but the key setting is Hardness — I always set it to 0%. Because edges in underwater photos tend to be soft (unlike landscape shots where the line between mountain and sky is sharp and clear), painting with a soft brush lets you define the area you want to adjust while keeping the transitions natural, so the result doesn't look like a composite.
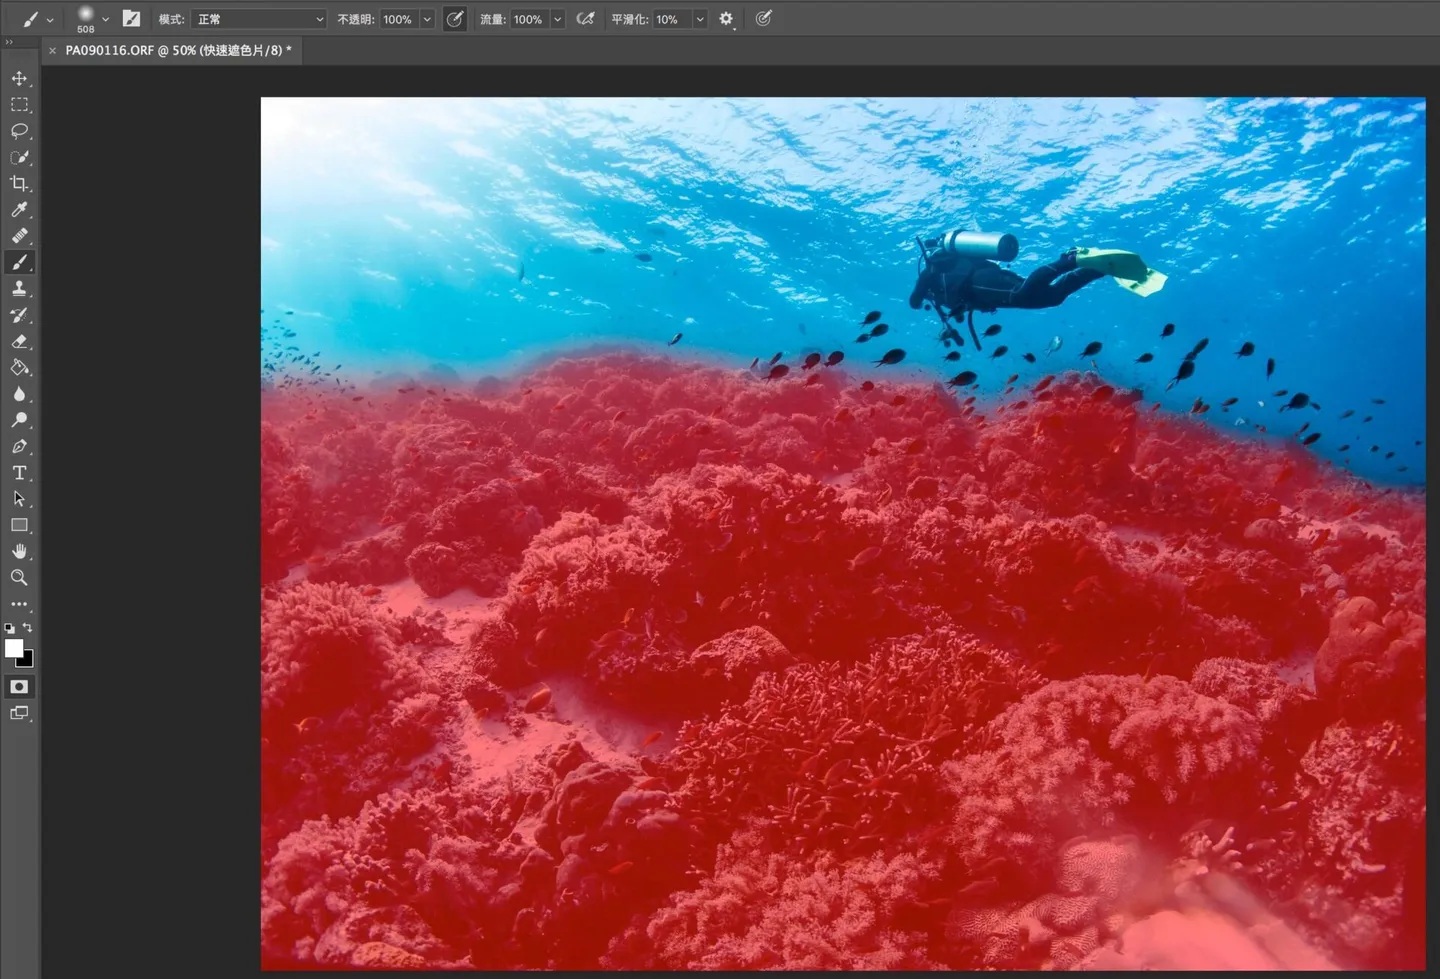
Paint over the area you want to adjust — it will appear in red (the default Quick Mask color). If you go too far, swap the foreground and background colors in the lower-left corner; when the top swatch turns white, the brush acts as an eraser to remove excess painted areas.
The red area is actually masking the parts you do not want to change. However, since painting over the coral is more precise than painting across the open water, I paint directly on the coral. Then click Quick Mask again — you'll see a dashed selection outline appear around the image.
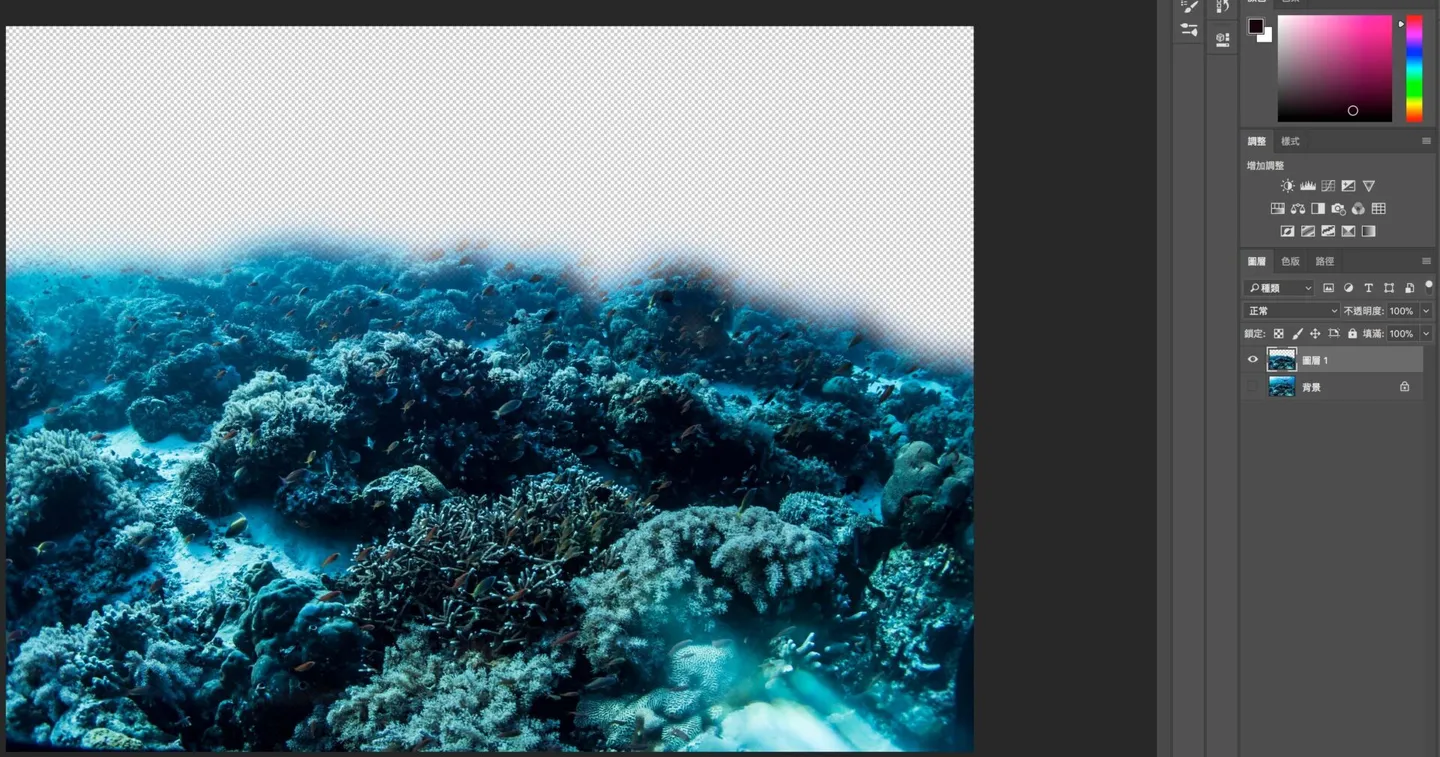
5. Duplicate Layer
At this point, it's important to select any one of the four selection tools. Then right-click and choose Select Inverse (this shifts the selection to the area you want to change — i.e., away from the ocean). Next, click Layer via Copy.
Layer 1 will now appear, displaying only the region of the photo you want to adjust. You can then use the adjustment tools to work on it.
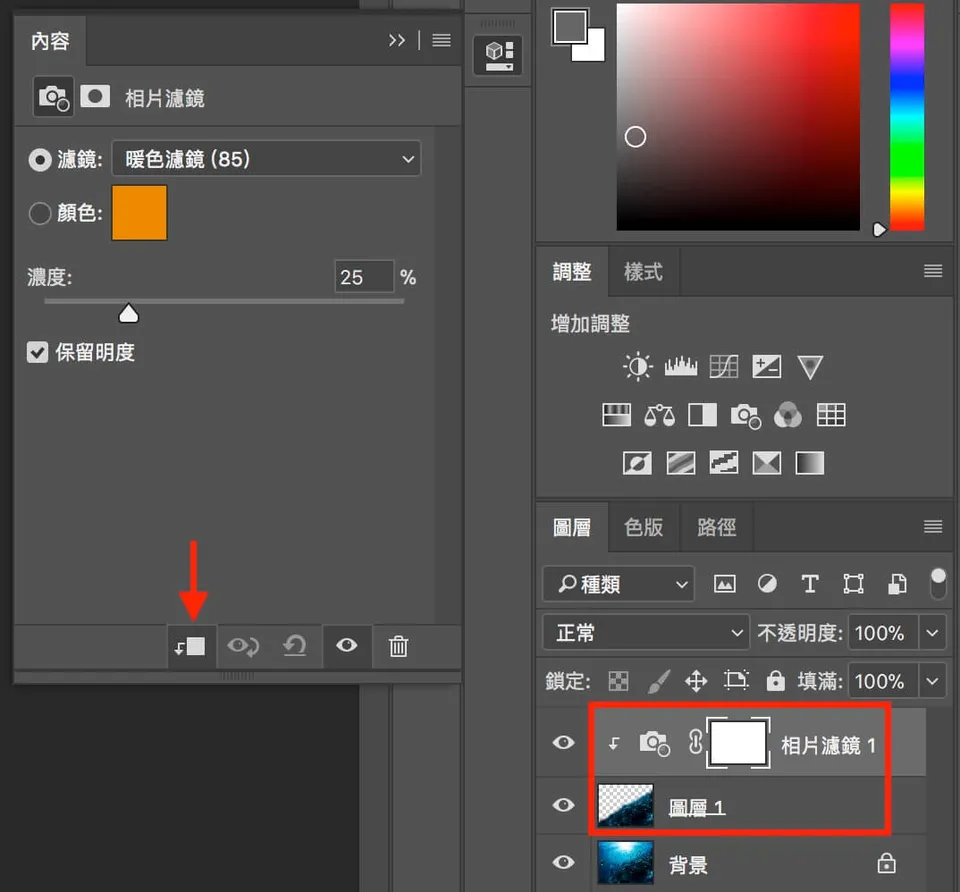
When making adjustments, remember to click the clip to layer button in the lower-left corner of the Adjustments panel — this ensures the changes apply only to Layer 1. If you don't, the adjustment will affect the entire image, defeating the purpose of isolating the coral reef area.
6. Adjust Color Tone
What you adjust is entirely a matter of personal preference — there are no fixed rules or sequences. I usually adjust as I go, checking whether each change suits the photo.
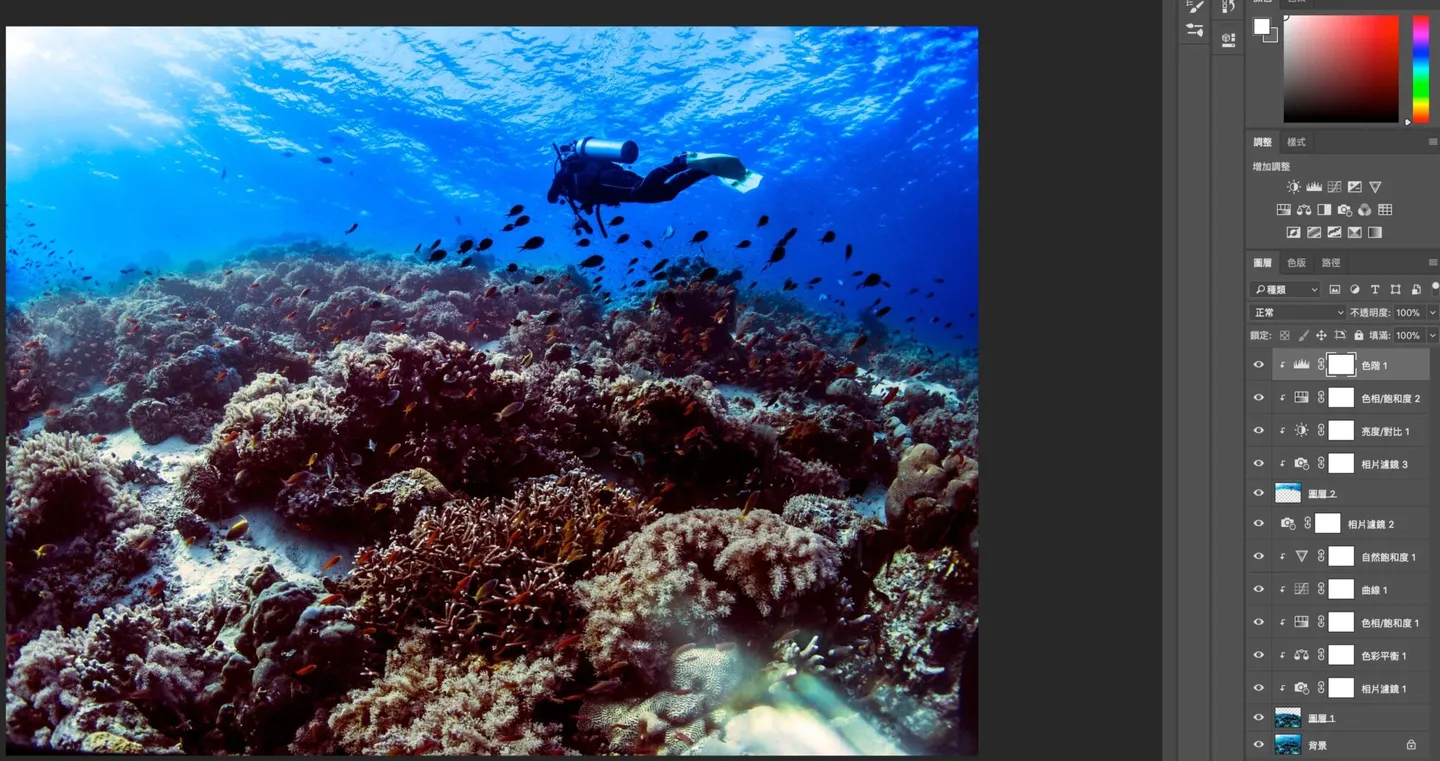
In my own workflow, I use the mask twice. My goal is to restore the natural colors of the coral without letting the light from above the water get pushed toward red or orange. So I first adjust the coral at the bottom — I like saturated colors, so the restored tones tend to be vivid. Then, for Layer 2, I deepen the ocean water toward a darker blue (to make the visibility look better than it was — laugh). This way, the light streaming in from the upper left isn't affected by a global adjustment that would have turned it orange or red.
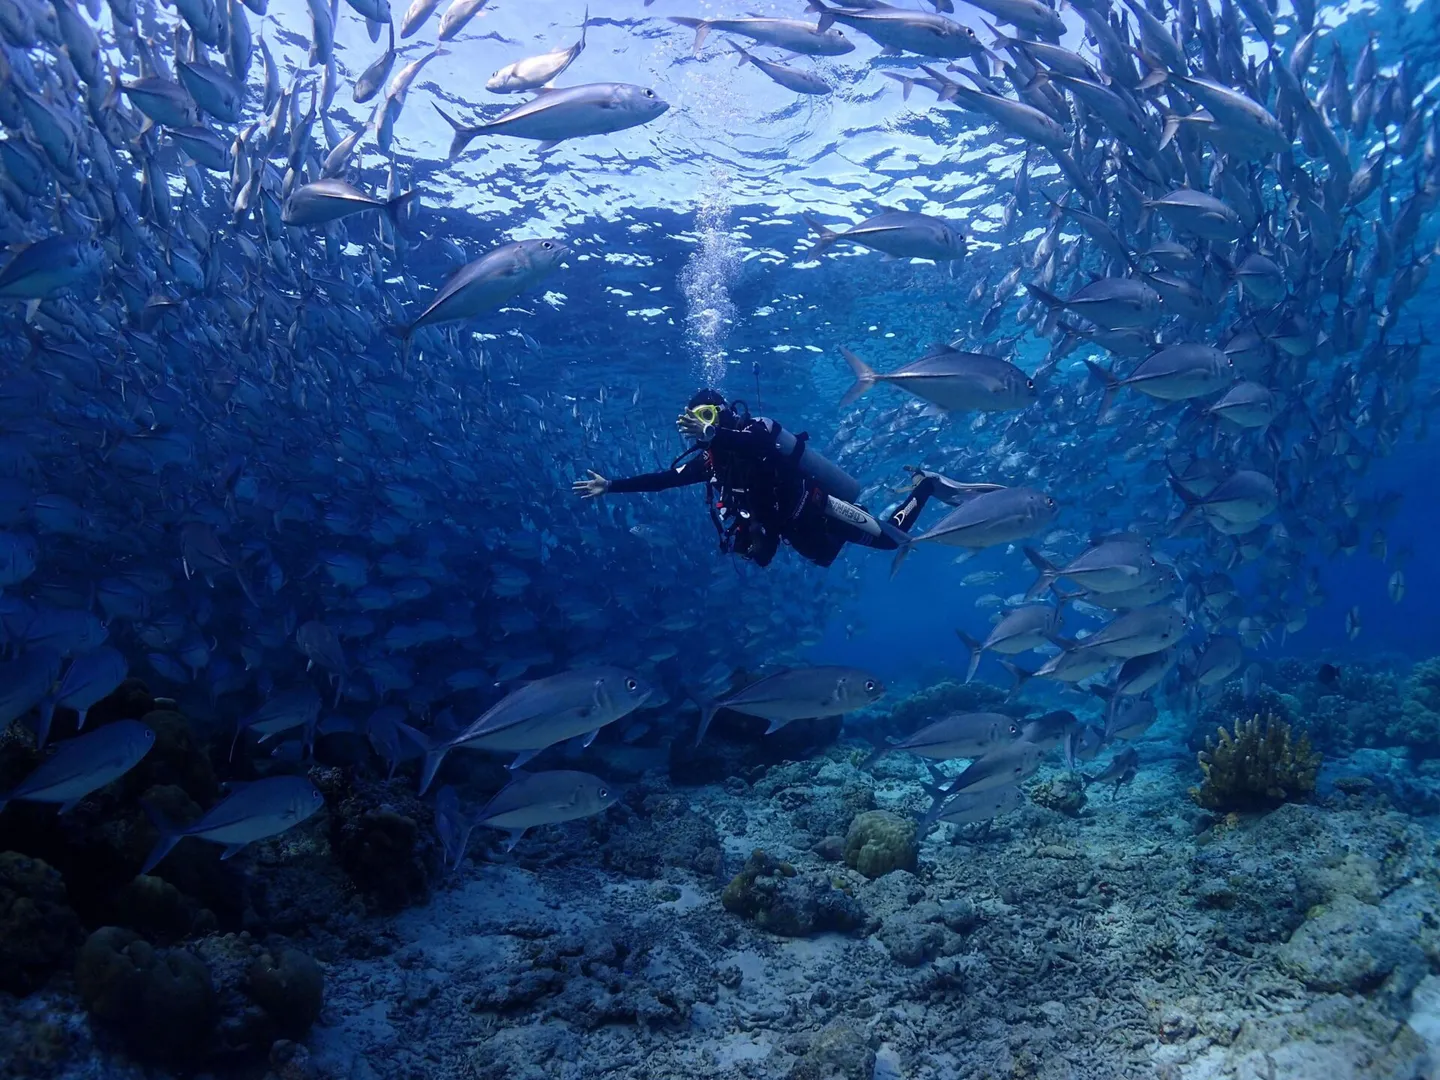
This image below is one I edited previously without using masks — notice how the light above the water in the frame has a yellowish cast.
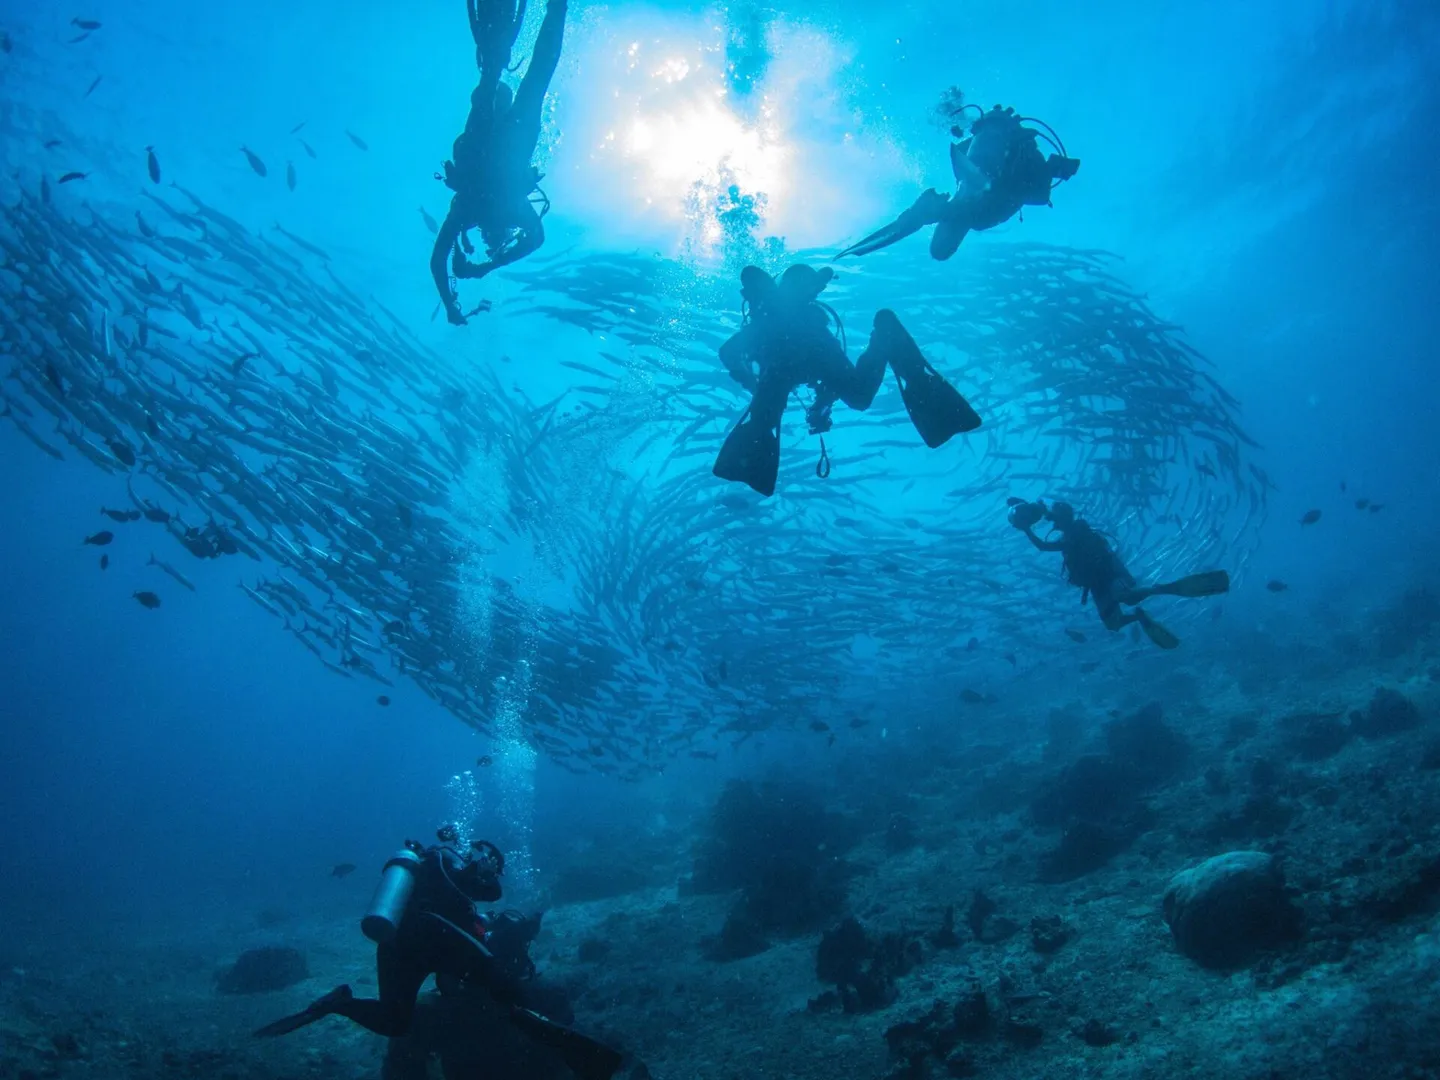
Image sourced from the internet — if this infringes any copyright, please let us know. Thank you!
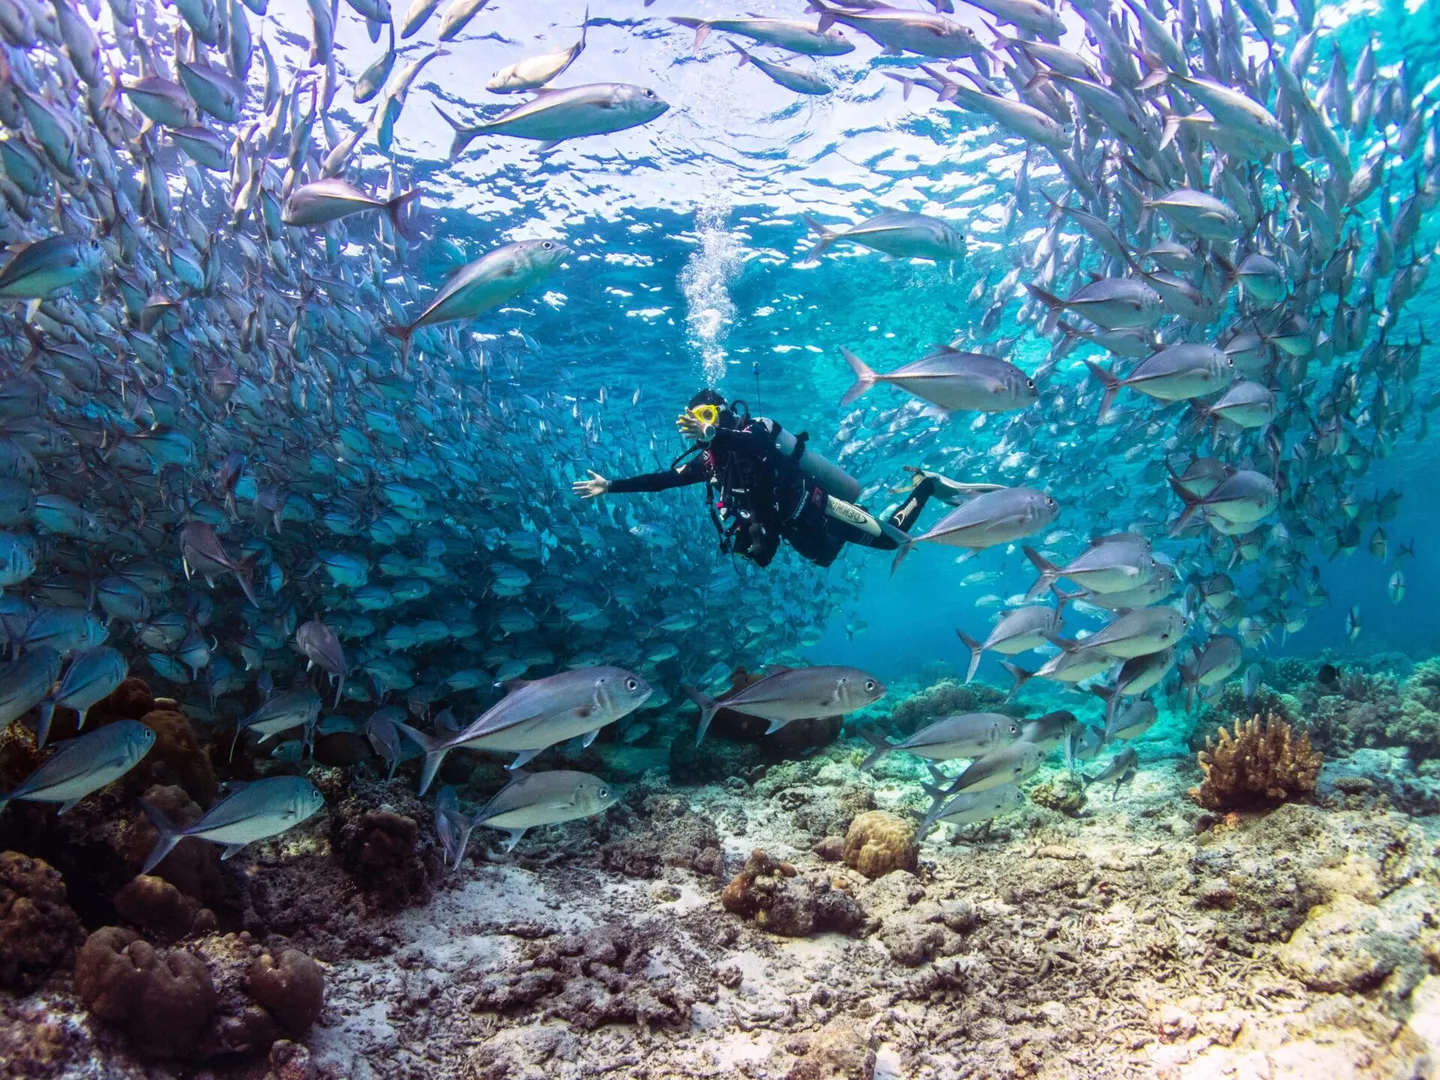
The final result looks like the image below. That wraps up my very unofficial tutorial! There's definitely room for improvement — for example, I still struggle with handling the light caustics at the bottom. But for those of us working on a budget without a strobe or video light, this method is the best way I've found to restore an underwater photo. I hope it's helpful!